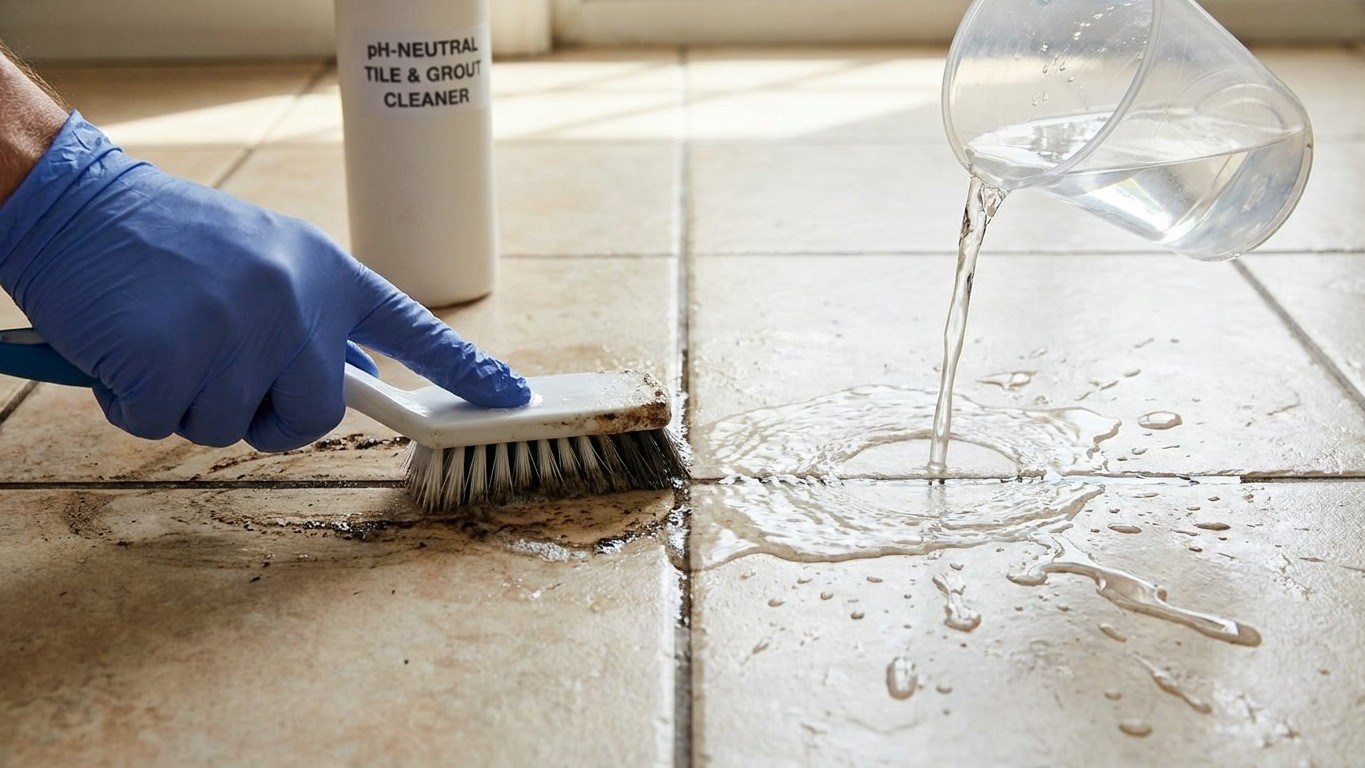

Clean grout before you seal it, never after. Lift embedded dirt with a pH-neutral cleaner and a stiff nylon brush, rinse until the water runs clear, let the lines dry completely (a full day, minimum), then work a penetrating sealer into every joint with a small brush or foam applicator. Reseal on a schedule tied to foot traffic and water exposure, not a date on the calendar. Skip the cleaning step and the sealer just locks in whatever was already there.
What Is Actually happening
Grout is cement, sand or fine filler, and water, and once it cures, it’s riddled with microscopic pores. Unlike a glazed tile, which is basically a fired ceramic skin that liquids slide off, cured grout behaves more like a sponge with a fine, tight structure. That’s the thing to understand here: grout doesn’t get stained the way a countertop gets stained, with something sitting on top of it. It absorbs the stain into its body, which is why a paper towel and all-purpose spray rarely fix anything more than surface dust.
A sealer doesn’t turn grout into glass. What it does is sit inside those pores and slow down how fast liquid gets absorbed, buying you time to wipe up a spill before it soaks in. That’s a meaningful difference from waterproofing. A penetrating sealer reduces absorption; it doesn’t eliminate it, and it definitely doesn’t survive forever in one place. Sealer wears fastest exactly where your feet, your mop, and your cleaning chemicals hit it hardest, so a kitchen threshold or the grout right in front of a kitchen sink will need attention again long before the grout under a rarely-used dining table does.
This uneven wear is normal, not a sign of a bad sealing job. It also explains why “I sealed my whole floor two years ago” doesn’t mean the whole floor is still protected. Traffic patterns write themselves into the sealer coat before they ever show up as visible grout discoloration.
Sanded and unsanded grout behave a little differently here. Sanded grout, used in wider joints, has a coarser structure with more surface area exposed at the joint face, so it tends to take up sealer (and stains) a bit more readily than the smoother, tighter unsanded formulas used in narrow joints. Neither type is stain-proof on its own. Both need the same basic sequence: get it clean, get it fully dry, then seal.
Drying matters more than most people expect. Grout that looks dry on the surface can still be holding moisture a few pores deep, especially after a wet cleaning session or in a shower enclosure that doesn’t ventilate well. Sealer applied over grout that’s still damp underneath doesn’t bond the way it should, and it can trap that moisture right where mildew likes to grow.
The covering, or what is under it
Grout is the thing you can see and scrub. But some of what shows up in grout lines isn’t a cleaning problem at all, it’s something happening behind or below the tile talking through the joint. Sealing over that kind of discoloration doesn’t just fail to fix it, it seals the problem in place until the grout eventually wears through or gets replaced.
| What you observe | What it usually means | Which layer it belongs to |
|---|---|---|
| Gray or dull haze across grout lines after cleaning | Soap scum or cleaner residue sitting on the surface | The grout surface itself, a cleaning issue |
| Dark line along a tub or shower edge that keeps coming back within days of cleaning | Moisture wicking up or through from behind the wall assembly | What’s behind the tile, not the grout |
| Chalky white deposit that reappears after scrubbing | Efflorescence, mineral salts carried to the surface by moisture moving through the material | The substrate below, moisture is doing the talking |
| Yellow or brown tint trapped just under a shiny sealed surface | Grout was sealed while already dirty or damp | The grout, but the mistake happened at the covering stage |
| Musty smell concentrated near one section of grout, no matter how it’s cleaned | Moisture sitting behind the tile long-term | Below or behind the covering, not a surface fix |
The pattern in that table matters more than any single row. Anything that lifts with cleaning and stays lifted is a covering problem, and sealing after cleaning locks in the improvement. Anything that returns on its own timeline, regardless of how hard or how often you scrub, is telling you something is happening behind the tile or in the substrate, and no sealer applied on the surface will change that.
This is also why order of operations isn’t a minor detail. Clean, confirm the discoloration is actually gone (not just masked while wet), let the joint dry fully, then seal. Sealing first, or sealing over a stain that only looked lighter because it was still wet, traps the problem under a coat that’s now much harder to strip and re-treat than plain grout would have been.
What to check, in order
- Look at the pattern of the discoloration. Uniform haze across large areas points to cleaning residue or general soil buildup. A single line or a corner that stays dark rules out a whole-floor cleaning problem and points to something localized, usually plumbing-adjacent.
- Clean a small test section with a pH-neutral cleaner and plain water, then let it dry fully before judging the result. If the stain is gone once dry, it was surface-level and sealing now will hold that result. If a shadow remains even dry, that rules out simple surface soil.
- Check whether the discoloration reappears within a few days of a confirmed clean, dry result. A fast return, especially in a wet-use area like a shower or a kitchen backsplash, rules out a one-time spill and points toward ongoing moisture movement from behind or below.
- Inspect the caulk lines and any transitions where tile meets a tub, a wall, or a floor. Cracked or missing caulk lets water get behind the tile in exactly the way that produces the recurring dark lines described above, and it’s a fix well within reach of most homeowners.
- If the pattern still points to moisture after the checks above, that’s the point to call in someone who can test for it properly. A flooring contractor or a moisture specialist has tools for reading what’s happening inside a wall or under a slab, and that test tells them Where the Water is coming from, not just that it’s there. This is also the point where the job stops being a grout-cleaning job on its own.
Nothing on this list requires pulling tile or opening a wall. It’s a sequence built to rule things out cheaply before anything more invasive happens, and each step either confirms you can handle the rest with a brush and a sealer, or tells you clearly that the next step belongs to someone else.
When this stops being a flooring job
Three things move a grout problem out of the realm of cleaning and sealing entirely. The first is anything Structural, meaning joists, beams, or support posts are involved. Grout doesn’t crack or crumble on its own from a healthy structure underneath. Persistent cracking along the same joints, especially paired with a floor that feels slightly springy or uneven, points to movement below that no amount of resealing will address.
The second is active water. A recurring damp patch, a musty smell that won’t clear, or grout that’s dark again within a day of drying isn’t a cleaning failure, it’s water finding its way in from somewhere, and that source needs to be found and stopped before any surface work is worth doing. That’s plumbing territory, and it’s a plumber’s job to trace it, not a flooring job to paper over.
The third is anything that’s been wet long enough to smell. A musty or sour odor around tile or grout usually means moisture has been sitting somewhere out of sight for a while, long enough for mold or mildew to establish itself in materials you can’t see from the surface. At that point the visible grout is the least of the problem, and treating it with cleaner and sealer just cosmetically covers something that needs to be opened up and dried out properly.
Each of these calls for a different professional, and it’s worth knowing which one before you pick up the phone. A flooring contractor handles the tile and grout itself, including re-grouting or replacing sections that are too far gone to save. A plumber handles the water source, whether that’s a slow supply line leak, a failed shower pan, or a drain that’s not sealing properly. A structural engineer gets called only when there’s real reason to think joists, beams, or the subfloor framing are compromised, which is rare but not something to guess at. If the water’s arrival traces back to something above or behind the wall rather than below the floor, the roofing and plumbing guides elsewhere in this collection cover how to trace leaks back to their source, since that’s a different mechanism than the porosity story that governs grout itself.