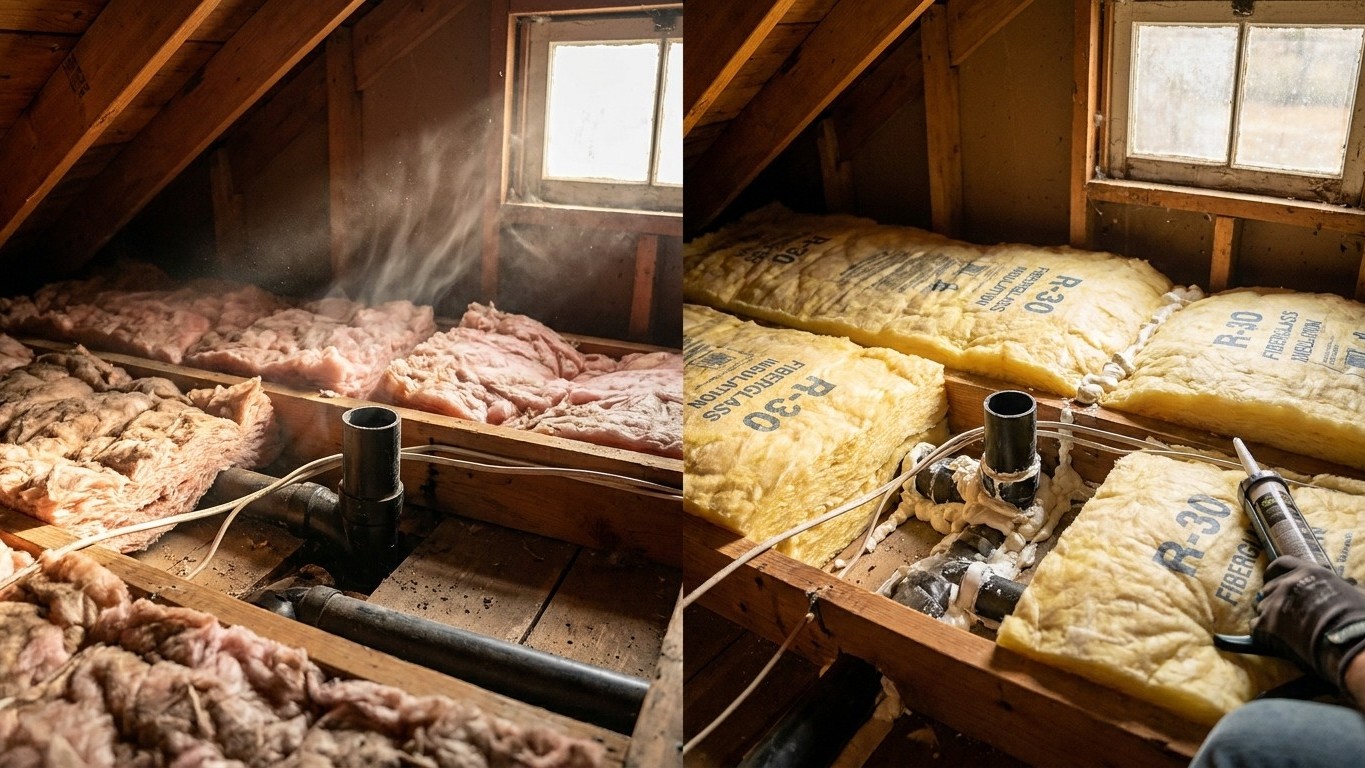

Seal every gap that connects the living space below to the attic above before you add or replace Insulation up there. Insulation slows heat moving through a material; it does nothing to stop air moving around it. ENERGY STAR’s own attic project instructions list air sealing as the step that comes before Insulation, not after, because Insulation laid over an unsealed penetration only buries the leak instead of closing it. Do the sealing first, then figure out how much insulation the space actually needs.
Insulation does not stop air

Fiberglass batts, blown cellulose, spray foam board, whatever sits between your joists, all of it works the same basic way: it resists the transfer of heat through the material itself. That resistance is what an R-value measures. What it does not measure, and what it cannot fix, is a hole. A gap around a plumbing stack, a light fitting with a two-inch ring of open framing, a chase behind a chimney that opens straight into the wall cavity below: none of these are insulation problems. They’re air problems, and air moving through a hole carries far more heat with it than the same square inch of solid material ever could by conduction alone.
This is the part homeowners miss most often. A crew (or a homeowner working a weekend) rolls out fresh batts or blows in loose fill across the attic floor, the space looks finished, and the job gets checked off. But if the top plates of the interior walls were never sealed, the insulation is now sitting on top of open pathways it can’t close. Warm, moist household air keeps rising through those gaps in winter, and in summer the same holes let attic heat work its way down. The insulation looks complete. It isn’t.
ENERGY STAR structures its own attic project guidance around this exact sequence. Its instructions for improving an attic put air sealing as the step that happens first, with insulation following as a separate, later step in the same project. That ordering isn’t a stylistic choice. It reflects how the two jobs interact: sealing is inspection work, done with the joists and framing fully visible, and once insulation goes down, most of that framing disappears from view. Seal after Insulating and you’re sealing blind, or not sealing at all.
None of this means sealing alone delivers some standalone savings number you can bank on. The published energy estimates for this kind of work cover air sealing and insulation together, as one project, not sealing by itself. What sealing buys you on its own is simpler and more foundational: it makes sure the insulation you add afterward is actually doing the job it’s rated for, instead of sitting on top of holes that let conditioned air escape regardless of how many inches of material cover the floor.
Where the holes actually are
Most attic air leakage happens at a small, predictable set of penetrations, the places where something passes through the ceiling plane from the living space into the attic. Two of these need a flag before you touch them. Anything near a flue or chimney chase has to be sealed with a non-combustible material, and the clearance around it is set by the appliance manufacturer’s own instructions, not by a general rule of thumb. And some recessed light fittings are not rated for insulation contact at all; covering or sealing around the wrong type can create a fire hazard rather than solve an air leak. Check the fitting before you seal near it.
Beyond those two, the rest of the usual suspects are more straightforward, though each has its own quirks worth knowing before you start.
| Penetration | How to recognize it | What it takes to close |
|---|---|---|
| Top plates of interior walls | A gap running along the top of a wall where it meets the attic floor, often an inch or more wide, sometimes hidden under old insulation | Caulk for narrow gaps, expanding foam for wider ones, worked in from above with the joists visible |
| Plumbing stacks | A vent pipe running vertically through the attic floor, usually with a ragged framed opening around it | Fire-rated caulk or foam sealant rated for the gap size, packed around the full circumference |
| Wiring holes | Small drilled or cut holes where electrical cable runs from below into the attic, often several per run | Caulk or expanding foam, small enough that a single tube covers many of them |
| Recessed light fittings | Round or rectangular housings poking up through the ceiling insulation, wiring attached | Check the fitting’s rating first; some can be boxed and sealed, others must be left uncovered entirely |
| Chimney and flue chases | A framed shaft, often larger than the flue itself, running from the attic down alongside the chimney or metal flue pipe | Non-combustible material only, clearance set by the appliance manufacturer’s instructions, not general foam or caulk |
| Bathroom fan housings | A boxed unit with a duct running toward a soffit or roof vent, often with gaps around the housing itself | Caulk or foam around the housing perimeter, checking the duct connection while you’re up there |
| Attic hatch or pull-down stair | The access opening itself, frequently unsealed and uninsulated even in an otherwise finished attic | Weatherstripping around the frame and an insulated cover or box built over the opening |
If a combustion appliance, a furnace or water heater flue, shares space with the area you’re sealing, that’s worth a second look before you finish. Tightening a space that a combustion appliance depends on for air can change how it draws, and that’s a case for having it evaluated rather than guessing.
Doing the work
The sequence matters as much as the materials. Work from the biggest openings down to the smallest, and only think about insulation once every penetration is closed.
- Pick a mild day. Attics run far hotter or colder than the rest of the house, and a comfortable outdoor temperature makes the work tolerable and safer.
- Light the space properly before you start. A headlamp plus a portable work light beats a single flashlight; you need to see gaps at the base of framing, not just the obvious ones at eye level.
- Start with the largest openings, chimney and flue chases, dropped soffits, open wall cavities, since these carry the most air volume and are exactly the ones that get buried and forgotten once insulation goes down.
- Move to mid-sized penetrations: plumbing stacks, bathroom fan housings, and any framed openings around ductwork.
- Close the smaller penetrations last: wiring holes, top plate gaps, and any remaining minor gaps you spot as you work your way across the joists.
- Finish with the attic hatch or pull-down stair, since it’s easy to seal and easy to forget precisely because it’s not a “hole” in the usual sense.
- Only after every one of these is closed, move on to insulation.
The order is the whole point. The biggest holes carry the most air, and they’re also the ones that disappear from view first once loose-fill or batt insulation goes over them. Seal small stuff first and you’ll still have a duct chase or a chimney gap moving conditioned air straight past whatever insulation you add later.
A few safety basics apply the entire time you’re up there. Walk on the joists themselves, not on the ceiling drywall between them, since drywall won’t hold your weight. Wear eye protection and a mask when working around old, disturbed insulation. And if you suspect the existing insulation contains asbestos or vermiculite, stop. That’s a different job with different rules, and it’s not one to handle as part of a weekend sealing project.
Then, and only then
Once every penetration is closed, chased, and weatherstripped, the attic is finally ready for insulation, and figuring out how much you need (and what R-value makes sense for your setup) is its own separate step, covered in the attic insulation guide on this site.
The number worth keeping in mind covers both jobs together, not sealing on its own. As ENERGY STAR puts it: “EPA estimates that homeowners can save an average of 15% on heating and cooling costs (or an average of 11% on total energy costs) by air sealing their homes and adding insulation in attics, floors over crawl spaces, and accessible basement rim joists.” That’s an average drawn from energy modeling of a typical existing U.S. home, not a guarantee for any specific house, and it applies specifically to the areas named: attics, floors over crawl spaces, and accessible basement rim joists, not walls, windows, or doors.
The reason that figure is attached to both steps together, and not to sealing alone, is exactly the argument this page has been making. Sealing without insulation leaves the attic floor thermally weak. Insulation without sealing leaves it full of hidden air leaks. The savings estimate reflects a house where both jobs got done, in the order that lets each one actually work.
Common questions
Can I seal the attic myself, or does this need a contractor?
Most of the penetrations described here, wiring holes, top plates, stack gaps, are within reach of a homeowner comfortable working on joists with a headlamp and basic sealants. Chimney and flue chases are the exception, since they require non-combustible materials and clearances set by the appliance manufacturer, which makes that portion worth getting checked if you’re unsure.
Do I need to seal the attic before adding more insulation to an already-insulated attic?
Yes. If the existing insulation was installed without sealing the penetrations underneath it first, those gaps are still there, just hidden. Pulling back insulation at the major chases and penetrations to check and seal them before topping up is the same logic as sealing a bare attic, just with an extra step of moving material out of the way first.
What if I find insulation that might contain asbestos or vermiculite while I’m sealing?
Stop working in that area. Don’t disturb the material further, don’t try to seal around it, and treat it as a separate project requiring its own assessment. This is not a step to combine with a standard air-sealing weekend.
Will sealing the attic affect a furnace or water heater flue that runs through it?
It can. Combustion appliances rely on a certain amount of air movement to draw properly, and tightening the space around a flue changes those conditions. If a combustion appliance shares the space you’re sealing, have it evaluated rather than assuming the sealing work has no effect on how it operates.