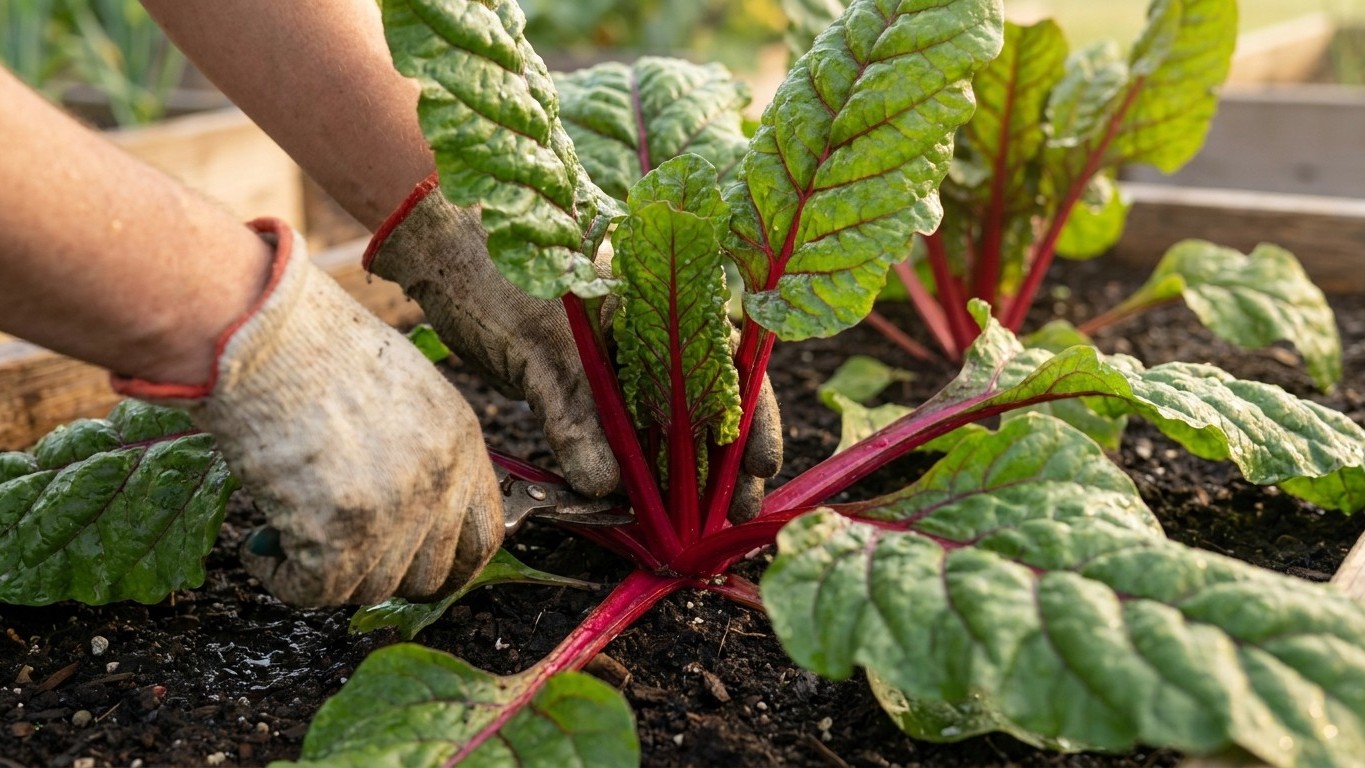

Yes: Swiss chard can be sheared down to within 2 inches of the soil, and the plant will keep producing. Utah State University Extension is explicit about the one condition that makes this work: the growing point has to stay intact. Damage that single point and the whole plant is done, no matter how much stem you left behind.
The short answer
Utah State University Extension’s fact sheet on Swiss chard in the garden lays out the rule plainly: leaves can be harvested at full size or any time after they form, and “provided the growing point is not damaged, all leaves can be cut off to within 2 inches of the soil.” That’s a total cut, not a leaf-by-leaf pick. No other leafy crop in this family gets that treatment. Lettuce gets picked outer leaf by outer leaf. Kale gets stripped from the bottom up while the crown keeps growing. Chard alone tolerates being shorn almost to the ground and coming back for another round.
The extension sheet also gives a practical harvest rhythm most gardeners use before reaching for the shears: older, outer leaves get stripped off the plant first, which lets the younger inner leaves keep growing undisturbed. That staggers the harvest and stretches a single planting over many weeks. The two-inch shear is the other option, usually reserved for when a row has gotten leggy, gone to seed pressure, or just needs a hard reset.
What comes off the plant is worth knowing too. A 10-foot row produces 8 to 12 pounds of chard, according to the extension data, which is a substantial return from a strip of garden that size. Both the leaves and the stems are edible; the leaves are the main event, but the stems cook down and hold texture in a way spinach stems never do. Chard can be eaten raw or cooked, and once cut it stores for 1 to 2 weeks under refrigeration, longer than most tender greens manage.
None of that changes the central fact. The two-inch cut works because of where the plant keeps its growth engine, not because chard is simply tougher than other greens. That distinction matters for how you actually make the cut, which is where the next section picks up.
What actually decides it

The growing point sits at soil level
Swiss chard, like beets (its close relative), holds its growing point low, right around where the leaf stems meet the crown near the soil surface. That’s different from a plant that grows from a central stalk tip several inches up. Because the point sits low, a cut at 2 inches can remove essentially every leaf above ground while leaving the point untouched, provided the blade doesn’t dig in below that mark. Go lower, or cut at an angle that nicks the crown itself, and the point goes with it. There’s no regrowth after that. The plant doesn’t die dramatically; it just stops producing new leaves, and the gardener is often left wondering why a chard row went silent for good.
Older leaves vs young leaves
The extension guidance about stripping outer leaves first isn’t just about tidiness. Older leaves shade the crown and slow the emergence of new growth, while removing them redirects the plant’s energy toward the leaves still forming at the center. This is the gentler harvest method, and it’s the one that lets a single planting produce continuously over a long stretch. The two-inch shear is the more aggressive alternative: instead of managing leaf age, it resets everything at once and asks the growing point to rebuild the entire canopy from scratch.
Why the plant tolerates a full cut
The mechanism that makes the hard cut survivable is the same one that makes chard behave like a perennial in mild climates: energy reserves stored in the crown and upper root. As long as that storage tissue and its attached growing point are undamaged, the plant has what it needs to push out a fresh flush of leaves. Cut into that tissue, even slightly, and the reserves have nowhere to direct new growth. The condition in the extension guidance (“provided the growing point is not damaged”) isn’t a caveat added for caution. It’s the entire reason the two-inch number works at all.
How to do it
- Start chard from seed 3 to 4 weeks before your last frost date. Utah State University Extension’s guidance places seed sowing this early relative to frost, well ahead of when Transplants go in.
- Set transplants out at your last frost date. This is the later of the two entry points; seed goes in earlier, transplants go in right around the frost date itself, not before it.
- Let the plant establish a full set of leaves before any hard harvest. Early growth should go untouched so the plant builds enough leaf area to photosynthesize and recharge its root reserves.
- Begin routine harvest by stripping the oldest, outer leaves first. This keeps the plant producing continuously and delays the need for a full cut.
- When a full reset is needed, shear the plant down to within 2 inches of the soil. Use a clean, straight cut across the base rather than an angled or scooping motion that risks digging into the crown.
- Check the cut for any nicks near the crown before walking away. If the growing point looks damaged or crushed, that plant likely won’t recover; healthy uncut crowns push new leaves within a couple of weeks.
- Refrigerate harvested chard promptly. Cut leaves and stems hold for 1 to 2 weeks under refrigeration, per the extension sheet, so there’s no rush to use the whole harvest at once.
What goes wrong

- Cutting at an angle instead of straight across. An angled blade is more likely to catch the crown on one side even when the visible cut looks like it’s above the 2-inch mark. Keep the cut level and shallow, and inspect the stub afterward.
- Mistaking the crown for a leaf stem and cutting too low. The growing point is compact and easy to miss under a cluster of leaf bases. When in doubt, cut a little higher than 2 inches rather than risk it; the extension figure is a maximum depth, not a target to hit exactly.
- Shearing a plant that hasn’t built up reserves yet. A young plant with only a handful of leaves has little stored energy in its crown. Wait until the plant has a full, established leaf canopy before doing a hard cut, and rely on outer-leaf stripping in the meantime.
- Leaving cut leaves at room Temperature too long. Chard wilts and loses quality fast once separated from the plant. Refrigerate right after harvest to get the full 1 to 2 weeks of storage life the extension data describes.
- Planting too densely and expecting a full 10-foot-row yield. The 8 to 12 pound figure assumes a properly spaced row; overcrowded plants compete for light and water, and the growing points on stressed plants are slower to recover after any cut.
- Choosing a variety by an expected number that isn’t there. Utah State University Extension names Rhubarb, Bright Lights, Lucullus, and Fordhook Giant without attaching days-to-maturity, size, or yield figures to any of them. Don’t assume one variety shears back faster than another based on a number you saw elsewhere; the extension sheet doesn’t make that distinction.
Common questions
Can chard really regrow after being cut to almost nothing?
Yes, as long as the growing point near the soil line is untouched. Utah State University Extension states plainly that all leaves can be cut to within 2 inches of the soil provided that point isn’t damaged, and the plant resumes producing from there.
Is it better to strip leaves or shear the whole plant?
The extension sheet describes both as valid, but they serve different purposes. Stripping older leaves first keeps a plant producing steadily over time. Shearing to 2 inches is a full reset, useful when a row needs to start over rather than be managed leaf by leaf.
How long can I keep harvested chard before it goes bad?
Refrigerated chard holds for 1 to 2 weeks, according to Utah State University Extension. That’s enough of a window to harvest a large batch, including a full two-inch shearing, without racing to use it all immediately.
Do I sow seed and set out transplants at the same time?
No. Seed goes in 3 to 4 weeks before your last frost date. Transplants go out later, right around the last frost date itself. The two methods start at different points relative to frost, not the same one.