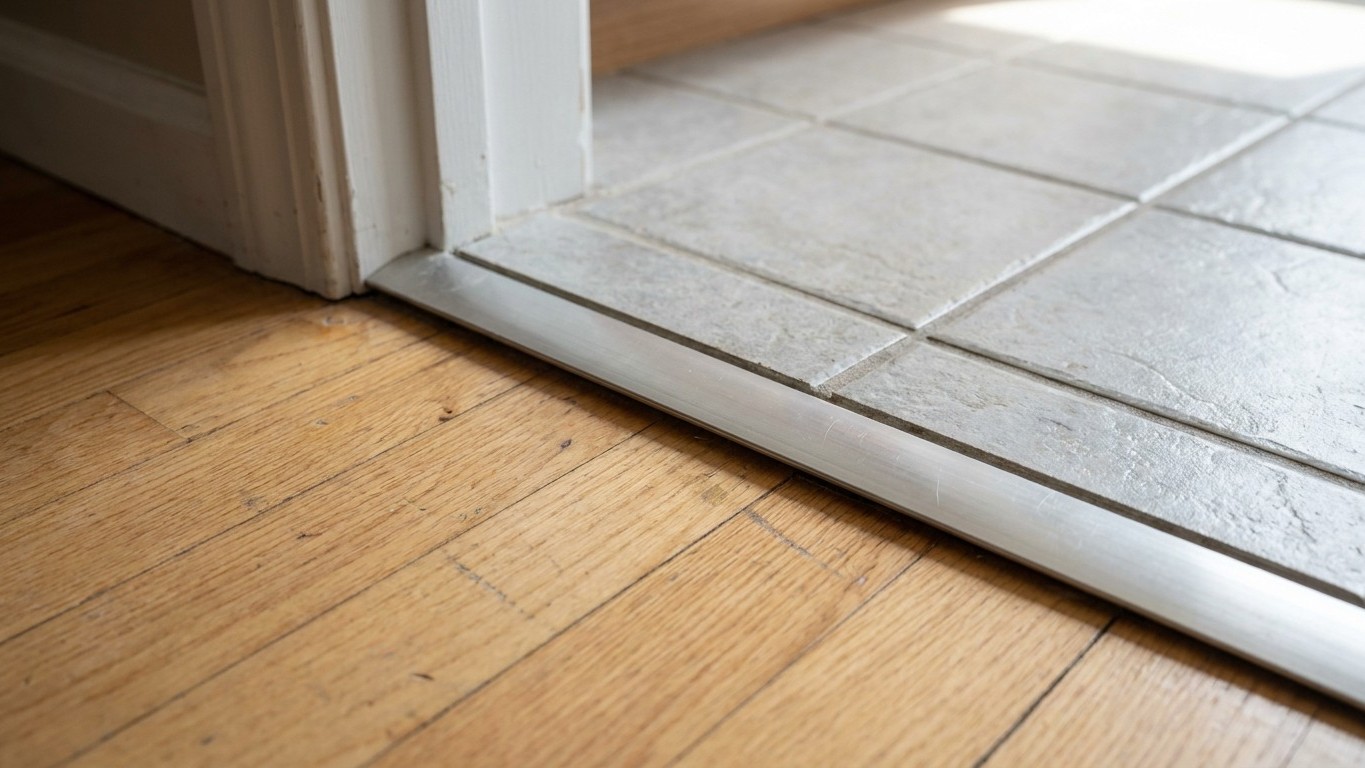

A transition strip at a doorway is never just cosmetic. It sits at the exact spot where two floors move at different rates, sit at different heights, and often need to be treated as two separate problems rather than one continuous surface. Get the pairing wrong and the strip cracks, lifts, or telegraphs a problem that started somewhere else entirely.
What is actually happening

Every floor covering moves. Solid wood expands across its width with humidity and contracts again in dry months. Engineered wood does the same thing on a smaller scale. Laminate needs a perimeter gap for the same reason. Vinyl plank shifts a little with temperature. Tile, once it is set in thinset and grout, does not move at all under normal conditions, which is exactly why it cracks instead of flexing when something underneath it does move. Carpet and pad compress underfoot but don’t expand or contract the way rigid materials do.
Put two of these side by side and you have two different movement rates meeting at one line. The transition strip’s job is to give both of them room to do what they do without pushing against each other. That’s the whole reason it exists as a separate piece of material instead of just running one floor into the next.
Height is the second half of the equation. A tile floor set over backer board sits higher than carpet over pad in the next room, often by a noticeable step. Hardwood over standard underlayment sits at a different level than vinyl plank glued directly to a slab. None of that is a defect. It’s the normal result of different systems being built up differently, and the transition strip is what bridges the step so nobody catches a toe on it.
Where this gets misread is when someone assumes a gap or a step at the doorway means the subfloor is uneven. Sometimes it does. But often the doorway is simply where two legitimately different floor assemblies were always going to meet at slightly different heights, and the strip was designed with that in mind from the start.
One more piece worth knowing before troubleshooting anything: flooring installers use a moisture meter on the subfloor before certain materials go down, particularly wood and laminate over concrete. That test exists to confirm the subfloor is dry enough to accept the new material and to protect the installer’s warranty on the job, not to diagnose a transition that’s already cracking years later. If moisture is suspected at an existing transition, that’s a separate check, done by someone qualified to read it, not a number a homeowner needs to chase down themselves.
The covering, or what is under it
The most common mistake at a transition is treating it as one continuous repair, fixed down to both floors as though it were a single material. It isn’t. One side of that strip is often meant to float, and nailing or gluing it rigidly to both floors pins a floor that needs to move, which shows up later as buckling several feet away from the doorway, not at the strip itself.
The table below separates what you’re likely seeing at a given pairing from which layer actually owns the issue: the visible covering, or the subfloor and framing underneath it.
| Pairing | What you observe | Which layer it belongs to |
|---|---|---|
| Hardwood to tile | Step at the doorway, sometimes a hairline gap that opens and closes with the seasons | Covering (different buildup heights) unless the gap keeps widening year over year, which points to the subfloor |
| Laminate or floating vinyl to carpet | Strip feels loose or clicks underfoot | Covering, usually meaning the strip’s track was never properly seated, not a subfloor issue |
| Tile to tile, different rooms | Cracked grout line running straight along the doorway | Subfloor or framing, since tile itself doesn’t crack from normal humidity movement |
| Wood to wood, two different installations | One side sits visibly higher, not just by a hair | Subfloor, likely a difference in underlayment thickness or floor buildup from an older renovation |
| Any covering over a sloped transition | A ball rolls, or a level shows a consistent tilt across several feet, not just at the strip | Framing, this is no longer about the transition piece at all |
Notice the pattern. A gap that breathes with the seasons is the covering behaving normally. A gap that only grows, a crack that keeps returning after repair, or a slope that extends well past the doorway itself are all signals coming from underneath, not from the surface material. Sanding, re-gluing, or replacing the transition strip in those cases fixes the symptom and leaves the cause in place, which means the same crack or gap comes back within a season or two.
What to check, in order
- Look at the gap or step by eye first. A consistent, narrow gap that seems to open slightly in winter and close in summer is normal wood or laminate movement. It rules out a Structural problem and points to the covering doing what it’s designed to do.
- Check whether the strip is fixed to one floor or both. Run a fingernail or a thin tool under each edge. If it’s rigidly fastened on both sides and one of those floors is a floating installation, that’s your answer for why it’s cracking or lifting, no need to look further underneath.
- Walk the line slowly, listening. A hollow or springy sound right at the transition, but not elsewhere in either room, usually means the subfloor fastening loosened at that one seam, which is common and localized. That’s still a flooring-level fix.
- Lay a straightedge or a four-foot level across the doorway. This distinguishes a clean step, which is intentional buildup difference, from a slope, which is not. A slope that continues into the room on either side, rather than stopping at the doorway, rules out the transition as the actual source.
- Look for staining, cupping, or a musty smell near the transition specifically. Cupped boards or a discolored edge right where two floors meet often means water has found that seam at some point, whether from a spill, a mopping habit, or something coming from below.
- If the smell or staining is present, this is the point where the transition strip and a board or two on either side need to come up. That’s the limit of what can be checked without disturbing the room. Everything up to this point can be done by looking, listening, and checking level. Once staining or odor is confirmed, a moisture meter reading by someone who installs flooring for a living is the appropriate next step, not a guess based on how the wood looks.
When this stops being a flooring job
Three things mark the edge of what a transition repair or a floor covering can fix on its own. The first is anything structural: a slope that runs well past the doorway into the room, joists that flex noticeably underfoot, or a beam or support post that looks out of level. That’s framing, not flooring, and it calls for a structural engineer or a contractor who works on framing, not someone who installs floor coverings.
The second is active water. A stain that’s spreading, a smell that’s getting stronger week to week, or dampness that returns after drying are signs water is still finding its way in. That’s a plumbing question, or in some cases a roofing or exterior drainage question, and it needs to be traced and stopped before any flooring work makes sense. Putting down a new transition strip over an active leak just hides it again.
The third is anything that’s been wet long enough to smell musty or show visible mold. At that point the subfloor itself may need to be assessed and possibly replaced, which is a different scope of work than sanding, Refinishing, or swapping a transition strip.
A flooring fitter can level a subfloor within a small tolerance, replace a damaged transition, and match new material to old. A plumber traces and repairs the actual source of water, whether that’s a supply line, a drain, or a fixture nearby. A structural engineer or framing contractor evaluates whether joists or beams need sistering, reinforcement, or replacement. These are three different trades and three different phone calls, and mixing them up usually means paying twice.
If water is arriving from above or from an exterior wall rather than from underneath, the source is worth chasing through the site’s plumbing and roofing guides before any flooring decision gets made, since covering over an active leak from either direction just moves the problem out of sight for a while.