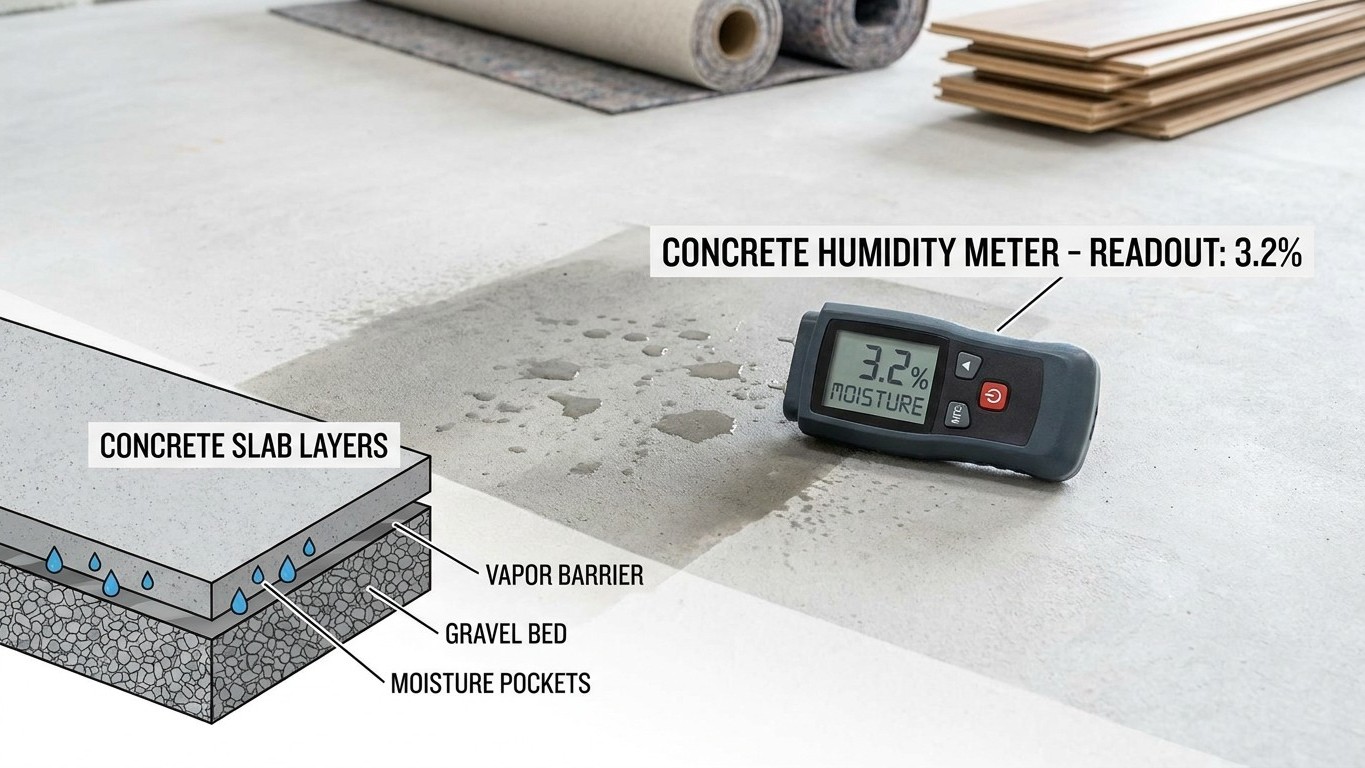

Testing a slab means confirming, before flooring goes down, that the concrete has released enough of its internal moisture and that its surface chemistry won’t attack the adhesive or the material above it. The test itself is simple. Reading the result correctly is where most installation failures actually start.
What is actually happening

Poured concrete is not a solid, inert block the moment it hardens. It’s a matrix of sand, aggregate and cement paste that trapped a large amount of water when it was mixed, and that water has to go somewhere. The chemical reaction that hardens concrete, called hydration, uses up some of it. The rest sits inside the slab as free moisture, and it leaves the only way it can: by migrating upward and evaporating off the top surface. That process is slow, and it doesn’t stop just because the concrete looks, feels, and sounds finished.
The thing to understand here is that a slab does not dry from the surface inward. It dries from the inside out, continuously, for as long as the moisture gradient between the slab’s core and the surrounding air keeps pushing water toward the top. A slab poured on grade, over a crawlspace, or below grade in a basement has an added complication: it may be sitting on or near damp soil, which means it isn’t just releasing the water it was mixed with, it’s also drawing up groundwater on an ongoing basis. That slab may never fully dry in the way a slab poured on a raised, well-drained pad eventually will.
This is why a surface that looks and feels bone-dry to the touch tells you almost nothing. Evaporation happens at the surface, so the top skin of concrete will always read drier than the mass underneath it. Someone installing flooring who checks dryness by pressing a palm to the slab, or by noting that no water beads up when a bit is splashed on, is measuring the one part of the slab least representative of what’s happening below.
There’s a second issue riding along with the moisture question, and it matters just as much: alkalinity. Fresh concrete is highly alkaline, and as moisture moves upward it carries dissolved salts with it. Those salts concentrate at the surface as the water evaporates, and in high enough concentration they break down certain adhesives and coatings from underneath, causing bond failure that has nothing to do with how the flooring was installed. A slab can be reasonably dry and still be chemically hostile to whatever gets glued to it. That’s the two-part problem testing is meant to catch: how much moisture is still moving, and how aggressive the surface chemistry is when it gets there.
The covering, or what is under it
Slab testing exists precisely because the two failure points, moisture and alkalinity, belong to the slab itself, not to the flooring material sitting on top of it. A flooring installer’s job is to prepare and install the covering correctly; it is not to dry out a slab that was never given enough time, and it is not to fix a vapor problem coming from the ground below. Separating those two things before the job starts is what testing is for.
In practice, a flooring contractor, a moisture-testing technician, or sometimes the general contractor on a new build runs these checks before any adhesive, underlayment, or flooring material touches the concrete. The result of the test doesn’t get reported to the homeowner as a number to interpret. It gets used by the installer to decide one of three things: proceed as planned, delay the installation and let the slab continue curing, or add a moisture mitigation step (a sealer or vapor-retarding primer rated for that purpose) before installation continues.
| What you observe | Which layer it belongs to |
|---|---|
| Surface feels dry, no discoloration, no odor | Tells you about the top skin only, not the slab’s core |
| Musty smell rising when a section of existing flooring is lifted | Slab or subfloor moisture, unrelated to the flooring material itself |
| Flaking, powdery residue on the concrete surface | Slab alkalinity/salt migration, a chemistry issue, not a flooring defect |
| New flooring cupping, bubbling, or lifting shortly after installation | Almost always traced back to slab moisture the covering couldn’t tolerate |
| Adhesive failing to bond in patches | Can be either poor installation technique or slab alkalinity. Testing before the fact is how you rule one out |
That last row is the one that trips people up during troubleshooting later on. A homeowner who notices a section of glued-down flooring lifting a year after installation will often assume it’s a defective product or a bad installation job. Sometimes that’s true. But if no moisture or pH test was done on the slab beforehand, there’s no way to rule out the slab itself as the actual source, and re-installing the same flooring without addressing the slab will produce the same failure again.
What to check, in order
- Visual inspection of the slab’s history. Check the pour date if it’s available, note whether the slab is on grade, over a crawlspace, or below grade, and look for existing staining, efflorescence (that white powdery residue), or previous flooring failures. This rules out nothing on its own, but it tells you how skeptical to be about Everything that follows. A below-grade slab with a history of staining deserves more scrutiny than a raised slab poured two years ago with no issues.
- A simple plastic sheet test. Tape a square of clear plastic sheeting to the slab, sealed on all four edges, and leave it for at least a day. Condensation forming underneath the plastic, or a darkened, damp patch of concrete once it’s removed, indicates active moisture movement. A dry sheet with no change doesn’t clear the slab entirely, since this test is qualitative, but it does rule out an obvious, active moisture problem.
- A pH check on the surface. Using distilled water and pH testing strips or pH paper, dampen a spot on the slab and read the color change against the strip’s chart. This tells you specifically about surface alkalinity, the factor that attacks adhesives, and it’s separate from the moisture question entirely. A slab can pass a moisture check and fail this one, or the reverse.
- A calcium chloride test. This is the standard method for quantifying how much moisture is actually leaving the slab over a fixed period: a small dish of calcium chloride is sealed under a dome on the concrete for roughly three days and weighed before and after. It’s more involved than the previous checks but still doesn’t require lifting anything beyond a section of existing flooring if one is present.
- An in-situ relative humidity probe. This is the most invasive check on this list and the one that gets closest to what’s happening in the slab’s core rather than just its surface. It requires drilling a small hole partway into the slab and inserting a sensor, left in place for a period of time to equilibrate. This is where testing stops being something a motivated homeowner does with a hardware-store kit and becomes work for a flooring professional with the right equipment.
Nothing on this list requires removing a whole floor or opening up a room. The point at which testing does escalate past a homeowner’s ability to do it themselves is the probe check, and even that is still a flooring-trade task, not a demolition project.
When this stops being a flooring job
Slab testing has a clear boundary, and three things sit past it. The first is anything structural: cracking that runs through the slab rather than sitting at the surface, noticeable unevenness, or a slab that’s visibly heaved or settled. That’s not a moisture question anymore, and no amount of testing or mitigation changes a slab that’s physically moving. That call goes to a structural engineer, not a flooring installer.
The second is active water. A damp reading from a test is one thing. Standing water, a recurring wet spot that reappears after cleanup, or moisture tied to a specific event like rain or a plumbing fixture running is another. That’s a plumbing or drainage problem, and it needs to be traced and stopped before any flooring decision matters. A plumber, not a flooring contractor, finds where that water is actually coming from.
The third is smell. A musty or sour odor coming from under an existing floor, especially one that’s been there long enough to notice, generally means moisture has been present long enough to start breaking down organic material, whether that’s the subfloor, an underlayment, or the flooring itself. At that point testing for future installation isn’t the priority. Finding and remediating what’s already growing is. That’s a job for a remediation specialist, and depending on what’s found, potentially a structural assessment of the subfloor and joists underneath.
The distinction matters because these three trades don’t overlap. A flooring fitter tests and prepares the surface a floor sits on. A plumber finds and stops water intruding from pipes, grading, or a foundation crack. A structural engineer evaluates whether the framework under the floor, the joists, beams, and posts, can still do its job. If the source of moisture in a slab traces back to a roof leak dripping down through a wall cavity, or a supply line failure inside a slab itself, that’s outside the flooring conversation entirely and belongs with the plumbing and roofing guides in this same series, Where the Water‘s origin, not the floor’s readiness, is the actual subject.