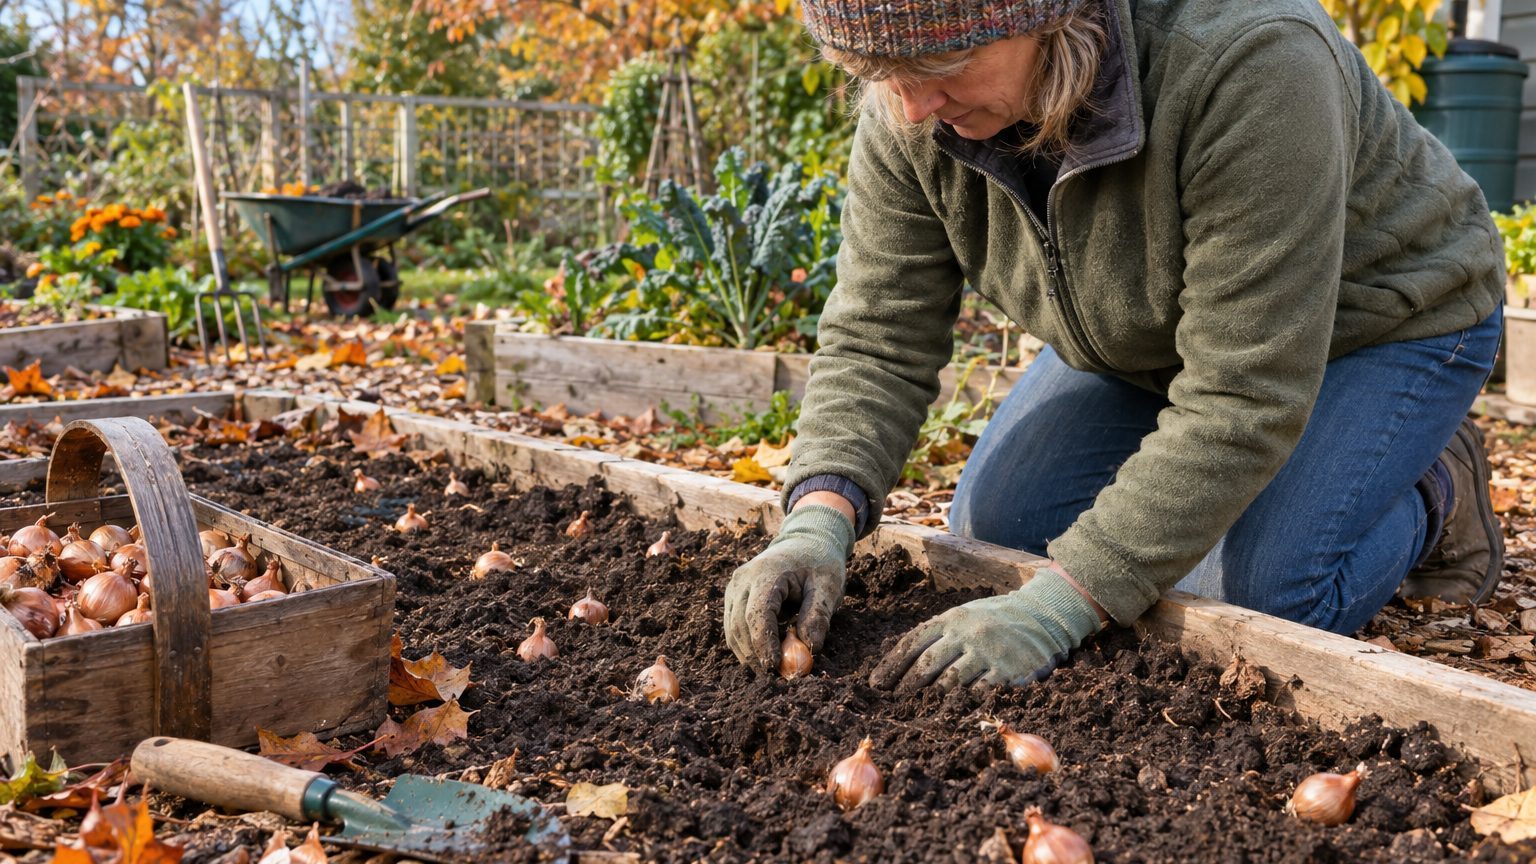

For most home gardeners, sets are the better choice: small bulbs planted in fall or early spring that multiply into a cluster of 5 to 10 full-size shallots by midsummer. Seed makes sense when you want cheaper plants, a wider choice of varieties, or a cleaner start free of soil-borne disease. It asks for more patience and a head start indoors. Neither route is wrong. They just suit different gardens, budgets, and calendars.
The two methods also produce slightly different crops. A set is a clone, so it behaves like its parent bulb. A seed is a fresh genetic roll, and the shallots it grows tend to be more uniform in some modern hybrids and more variable in older open-pollinated types. That difference shapes almost everything below. If you’re still deciding whether shallots belong in your beds at all, start with the overview in Growing Shallots: One Bulb In, a Handful Out, then come back here to pick a method.
What you’re actually buying: sets versus seed
A shallot set is a small, cured bulb, usually between ¾ and 1¼ inches across. You push it into the ground, and it splits into offsets as it grows. One bulb in, a handful out. That multiplication is the whole charm of the crop, and it’s why a $10 bag of sets can fill a bed that would otherwise need dozens of onion transplants.
Shallot seed is the true botanical seed of Allium cepa var. aggregatum, the same species as the common onion. Seed-grown shallots became popular with market growers because the plants arrive free of many of the problems bulbs can carry, and because the seed packs flat and costs little. A packet that would cost you far more as a bag of sets can produce a lot more plants per dollar.
Seed-grown plants don’t behave quite like set-grown ones. Many seed varieties, especially the F1 hybrids bred for this purpose, form one to three bulbs per plant instead of a big cluster. The bulbs are often bigger and more uniform. You trade the multiplication effect for tidy, kitchen-friendly shallots. Some seed varieties do still cluster, so read the variety description before ordering.
Where sets win, and where seed wins
Time is the clearest dividing line. Sets planted in early spring are generally ready to lift in about 90 to 110 days, with the exact timing depending on variety and weather. Seed-grown plants need a longer runway: you start them indoors roughly 8 to 10 weeks before your last spring frost, then transplant, and harvest comes well into summer. In a short-season spot such as northern Minnesota, Maine, or parts of the Mountain West, that extra lead time is workable only if you start early and keep the seedlings on a bright windowsill or under lights.
Effort follows time. Sets are nearly foolproof. You don’t manage seedlings, you don’t worry about damping off, and you don’t fuss with hardening off. Seed demands a little more attention, though onion-family seedlings are among the easier ones to raise. They look like blades of grass for weeks, and the temptation to give up on them is real.
Cost and variety favor seed. Seed catalogs list far more shallot types than most garden centers stock as sets, including varieties selected for long storage, specific day-length zones, or particular bulb colors. Seed is also lighter to ship and cheaper to overnight in a pinch.
Plant health is the less obvious factor, and it matters. Because sets are propagated from bulbs, any virus present in the parent stock can ride along from year to year. Bulbs can also carry stem and bulb nematodes, fungal rots, and onion pests. Buying certified, disease-free sets from a reputable supplier cuts the risk, and so does rotating shallots to a new bed every year. Seed starts from a clean slate, though seedlings can still pick up trouble from contaminated soil or compost.
Bolting is the other wrinkle. Sets that sit through a cold snap after planting, or sets that are very large, may send up a flower stalk instead of putting energy into the bulb, and a bolted shallot stores poorly. Smaller sets bolt less. Seed-grown plants usually avoid early bolting because they haven’t spent a winter as a bulb, which is one reason some growers swear by seed for spring plantings.
A quick side-by-side:
- Sets: faster, easier, multiplying clusters, higher cost per plant, some disease carryover.
- Seed: slower, cheaper, more varieties, cleaner start, often single larger bulbs.
- Fall planting: sets only, in milder climates.
- Short-season gardens: sets are the safer bet unless you start seed very early.
Planting shallot sets, step by step
Timing depends on where you live. In milder regions (roughly USDA zones 7 through 9, and some zone 6 gardens), sets go in during October and November, so the roots establish before winter and the plants take off early in spring. The details of that approach are in Planting Shallots in Autumn. In colder zones, plant as soon as the soil can be worked in spring, even if nights still dip below freezing. Shallots tolerate cold better than most seedlings.
Preparing the bed
Pick a spot with at least six hours of direct sun and loose, well-drained soil. Shallots have shallow roots and hate wet feet, so a raised bed or a slight mound pays off in heavy clay. Work in an inch or two of finished compost, and skip fresh manure, which can burn roots and invite rot. A soil pH around 6.0 to 7.0 suits them. Pull weeds before planting, because shallots compete poorly with anything taller or hungrier.
Setting the bulbs
Space sets 6 to 8 inches apart in rows about 12 to 18 inches apart, giving the cluster room to swell. Push each one in pointy end up, with the tip at or just barely above the soil surface. Planting too deep is a common error: buried shallots grow longer, necklike bulbs and take longer to mature. Birds and frost heave sometimes lift freshly set bulbs, so check after the first heavy rain or cold snap and push any strays back in. Water once at planting, then only when the soil dries out a couple of inches down.
Feed lightly. A nitrogen boost when green tops are 4 to 6 inches tall helps leaf growth, which drives bulb size, but ease off as the bulbs begin to swell. Overfeeding late gives you thick necks and bulbs that don’t cure well.
Growing shallots from seed, step by step
Start indoors 8 to 10 weeks before the last expected frost. Fill a tray or deep cell pack with a fine seed-starting mix, sow seeds about ¼ inch deep, and keep the mix evenly moist. Germination works best in the 65 to 75°F range and usually takes one to two weeks. Many growers sow several seeds per cell, then plant the whole clump together. This saves time and gives you bunched shallots with little added effort.
Once seedlings emerge, give them strong light, 14 hours a day under grow lights placed just above the tips. Weak light leads to floppy, stretched seedlings. When they reach about 4 inches, trim the tops to 2 or 3 inches with scissors. It sounds harsh, but it encourages sturdy growth, and plenty of onion growers do it routinely.
Harden the seedlings off for a week or so, then transplant them 3 to 4 weeks before the last frost date, or about when the soil is workable. Space single plants 4 to 6 inches apart, or space clumps about 6 to 8 inches apart. Seedlings can handle light frost once hardened. After that, care matches the set-grown crop: consistent moisture, weeding, and modest feeding.
Direct sowing is possible in gardens with long, cool springs, but results vary and the plants often finish late. Starting indoors is the more dependable path for seed-grown shallots, especially north of zone 6.
Harvest, curing, and what comes next
Both methods finish the same way. When the tops yellow and flop over, usually midsummer, it’s time to loosen the soil and lift the bulbs. Seed-grown crops may hold their green tops a bit longer, so watch the plants instead of the calendar. Full guidance on timing and technique is in When to Lift Shallots.
Cure the bulbs in a shaded, airy spot for two to three weeks until the necks are dry and the skins rustle. Properly cured shallots store for several months in a cool, dry place, and some long-storing varieties last well beyond that. Keep the best-looking, medium-sized bulbs aside: those are your planting stock for next year.
That last point carries a useful twist. Even if you started from seed, the bulbs you harvest are clones of the plants that grew them, so replanting them as sets next fall or spring will reproduce that variety reliably, including hybrids that wouldn’t breed true from saved seed. Many gardeners use seed once to get a clean, disease-free start, then switch to saving their own sets for years afterward.