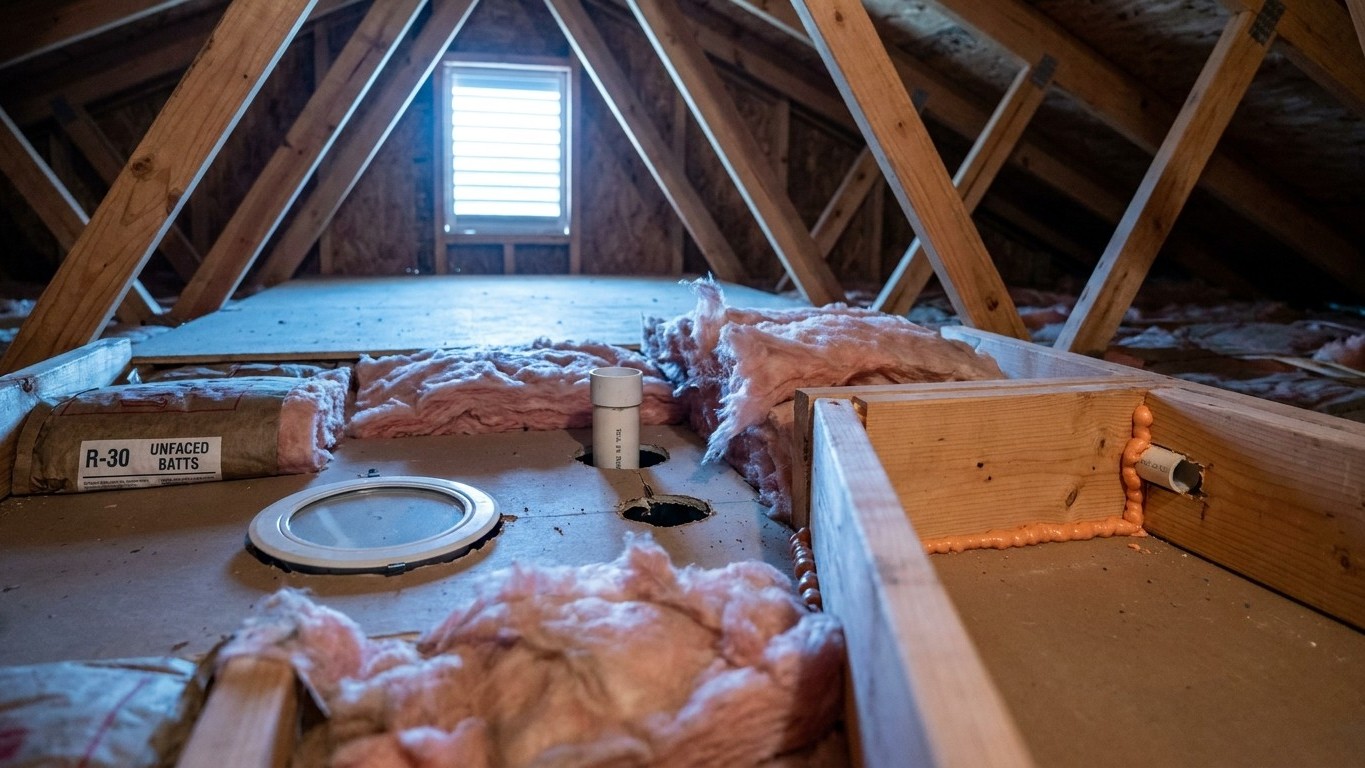

The short answer: air-seal before you insulate, then check ENERGY STAR’s climate-zone table before buying anything. Skipping the sealing step is the most common way homeowners waste new insulation, because heat and moisture move around a fluffy material just as easily as they moved before it was installed. The zone table below tells you the target; a separate ENERGY STAR map tells you which row applies to your address.
What insulation actually does, and does not

Insulation slows heat moving through a material. It does almost nothing to stop air moving around it. That single distinction explains why a house can have a thick, fluffy attic and still feel drafty, and why ENERGY STAR’s own project sequence puts attic air sealing before attic insulation, not after. Gaps around wiring holes, plumbing chases, recessed lights, and the attic hatch let conditioned air leak out and outside air leak in, and no amount of loose-fill or batt material laid on top of those gaps will close them. It just hides them.
This is why the order of operations matters more than the brand or thickness of material you buy. Seal first, insulate second. A homeowner who insulates over an unsealed attic floor is paying for R-value that a convective air current is quietly bypassing.
Moisture goes where the cold surface is
The second idea is less intuitive. Insulation does not create moisture and it does not remove it. Water vapor in household air is already there, from cooking, showers, breathing, and laundry, and it travels toward whatever surface is coldest, where it can condense. Insulation changes where that cold surface sits inside a wall or roof assembly, which is why placement and the position of any vapor-retarding layer matter as much as how many inches you install.
Get the placement wrong and you can trap moisture against a cold surface instead of keeping it away from one. There is no single vapor-barrier rule that applies everywhere in the country, because it depends on the local climate and the direction wall assemblies dry. Getting the facing side wrong can trap water inside a wall cavity, so this is a detail worth confirming against the specific project (a wall retrofit, a crawlspace, a finished attic) rather than guessing from a general rule of thumb.
Put together, those two facts set the whole order for this project: find and close the air leaks, then add material sized to your climate zone, then think about where any vapor retarder needs to face. Getting the sequence backward is the single most common reason an insulation upgrade underperforms.
How much, and the zone this page will not guess
ENERGY STAR publishes recommended insulation levels for retrofitting existing wood-framed homes, organized by climate zone. The guidance below is based on the 2021 International Energy Conservation Code, Table R402.1.3. Note that the table has two attic columns and one floor column per zone, not three attic values.
| Zone | Attic if uninsulated | Attic if you already have 3-4 inches | Floor |
|---|---|---|---|
| Zone 1 | R30 | R25 | R13 |
| Zone 2 | R49 | R38 | R13 |
| Zone 3 | R49 | R38 | R19 |
| Zones 4A and 4B | R60 | R49 | R19 |
| Zones 6, 5 and 4C | R60 | R49 | R30 |
| Zones 7 and 8 | R60 | R49 | R38 |
Read the columns carefully. If your attic currently has no insulation, use the first number. If you can already see 3 to 4 inches of existing material between the joists, use the second, lower number, because you are topping up rather than starting from zero. The third number is a separate target for floors over unheated spaces, not another attic figure.
What this table cannot do is tell you which zone your house sits in. That assignment depends on county-level climate data that ENERGY STAR publishes as a map image, and it is not something to estimate from a state name or a general sense of “cold winters.” Two counties in the same state can fall into different zones. Look up your address on ENERGY STAR’s published climate-zone map before buying material, and treat the zone number as the input that decides everything else on this page.
One more thing worth resisting: converting an R-value into a number of inches. Depth depends entirely on which material you use, fiberglass batt, blown cellulose, mineral wool, or spray foam all reach the same R-value at different thicknesses, and no single conversion applies across all of them. Buy to the R-value, not to a depth someone quoted you from a different material.
Where to start, in order of return
Most homeowners do not start with a blank attic. They start with a symptom, a cold spot, a drafty room, ice building up at the eave. Matching the symptom to the likely cause is the fastest way to figure out which part of this project to tackle first.
| Symptom or location | What it usually means | Where to go next |
|---|---|---|
| Cold floors in winter | Missing or settled floor insulation, often over a crawlspace or unheated basement | Cold floor insulation guide |
| Noticeable drafts near outlets, baseboards, or the attic hatch | Air leakage paths that insulation alone will not fix | Air sealing guide |
| Ice dams at the roof edge | Warm attic air escaping and melting snow that refreezes at the colder eave | Ice dam guide |
| A cold room sitting over a garage | Under-insulated garage ceiling, often missing a proper fire separation as well | Room-over-garage guide |
| A finished attic room that never feels comfortable | Insulation at the roofline or knee walls that is thin, gapped, or missing a vapor detail | Finished attic insulation guide |
| A damp, musty crawlspace | Moisture and insulation problems that need to be solved together, not insulation added over a wet space | Crawlspace guide |
Beyond matching a symptom, there is a general order of work that applies to almost every house, because each step protects the value of the one after it:
- Attic air sealing
- Attic insulation
- Rim joist
- Crawlspace or floor
- Walls
Walls come last for a practical reason: wall insulation guidance really only applies once the siding or interior finish is already coming off for another reason. This is not advice to remove siding just to add insulation. A few safety notes apply across several of these projects and are worth stating once. Attic work means walking on the joists, not the material between them. Never disturb insulation that could contain vermiculite or asbestos; have it assessed first. Clearances around flues and certain recessed light fixtures are set by the fixture itself, not by how much insulation you want to pile on. A garage ceiling is a fire separation, not just a thermal boundary. And any combustion appliance sitting in a space you are about to seal tightly should be evaluated before you close it up.
What the work is worth
ENERGY STAR’s own figure for this project, taken together, is specific and worth quoting exactly: “EPA estimates that homeowners can save an average of 15% on heating and cooling costs (or an average of 11% on total energy costs) by air sealing their homes and adding insulation in attics, floors over crawl spaces, and accessible basement rim joists.”
Both numbers matter, and so do their denominators. Fifteen percent applies to the heating and cooling portion of a bill specifically. Eleven percent applies to the whole energy bill, heating, cooling, water heating, appliances, everything combined. Quoting one figure without saying which slice of the bill it applies to turns an accurate number into a misleading one.
These are averages drawn from energy modeling of a typical existing U.S. home, not a guarantee for any specific address. A poorly sealed 1920s house with no attic insulation at all has more room to improve than a house built to a modern energy code. The estimate is a planning figure, not a promise.
Notice exactly what the sentence covers: attics, floors over crawl spaces, and accessible basement rim joists. It does not mention walls, windows, or doors, and stretching this figure to cover those projects is not something ENERGY STAR’s own methodology supports. Two other percentages circulate around this topic and neither belongs here. ENERGY STAR’s own landing page separately cites “up to a 10% savings on your annual energy bills” for similar work, phrased as a ceiling rather than an average. And a commonly cited 10% figure from the Department of Energy refers to a thermostat setback of 7 to 10 degrees Fahrenheit held for eight hours a day, which has nothing to do with insulation at all. Keep these three numbers separate; blending them is how an accurate statistic turns into a rumor.
Common questions
Do I need to seal every single gap before adding any insulation?
Address the largest and most obvious leaks first, the attic hatch, plumbing and wiring penetrations, chimney chases, and the top plates of interior walls. Perfection is not the bar; closing the paths that let large volumes of air pass through is what protects the insulation you add afterward.
My attic already has some insulation. Do I still use the higher R-value target?
No. ENERGY STAR’s table gives a separate, lower target for attics that already have 3 to 4 inches of existing material, since you are topping up an existing layer rather than starting from an empty joist bay.
Can I figure out my climate zone from my state alone?
Not reliably. Climate zones are assigned by county-level data on ENERGY STAR’s published map, and a single state can span more than one zone. Look up your specific location rather than assuming based on a neighboring county or a general sense of your region’s winters.
Should I insulate my walls before I finish my roof or floors?
Generally no. The typical order of return puts attic sealing and insulation first, then the rim joist, then the crawlspace or floor, with walls last, largely because wall insulation work is most practical when the siding or interior finish is already open for another reason.
Guides by state
- How Much Attic Insulation Do You Need? The Published Table
- Seal the Attic Before You Insulate It, and Why the Order Matters
- Batts, Blown or Foam: What Goes Where
- The Attic Hatch: The Hole in the Middle of Your Insulation
- Insulating a Crawlspace: Under the Floor, or Around the Walls
- The Rim Joist: The Small Job With the Big Return
- Knee Walls and Finished Attic Rooms: Why They Are Always Cold
- The Room Over the Garage, and Why Its Floor Is Always Cold
- Why the Floor Is Cold, and What It Is Telling You
- How to Find the Air Leaks in Your House
- Weatherstripping and Caulk: The Gaps You Can Actually Reach
- Ice Dams Are an Insulation Problem, Not a Gutter Problem
- Insulation and Ventilation Are Not Opposites
- Insulating Existing Walls: Drill and Fill, or Wait for the Siding
- Vapour Barriers: The Most Misunderstood Layer in the Wall
- When Insulation Causes a Damp Problem Instead of Fixing One
- How Much Attic Insulation Do You Need? The Published Table
- Seal the Attic Before You Insulate It, and Why the Order Matters
- Batts, Blown or Foam: What Goes Where
- The Attic Hatch: The Hole in the Middle of Your Insulation
- Insulating a Crawlspace: Under the Floor, or Around the Walls
- The Rim Joist: The Small Job With the Big Return
- Knee Walls and Finished Attic Rooms: Why They Are Always Cold
- The Room Over the Garage, and Why Its Floor Is Always Cold
- Why the Floor Is Cold, and What It Is Telling You
- How to Find the Air Leaks in Your House
- Weatherstripping and Caulk: The Gaps You Can Actually Reach
- Ice Dams Are an Insulation Problem, Not a Gutter Problem
- Insulation and Ventilation Are Not Opposites
- Insulating Existing Walls: Drill and Fill, or Wait for the Siding
- Vapour Barriers: The Most Misunderstood Layer in the Wall
- When Insulation Causes a Damp Problem Instead of Fixing One