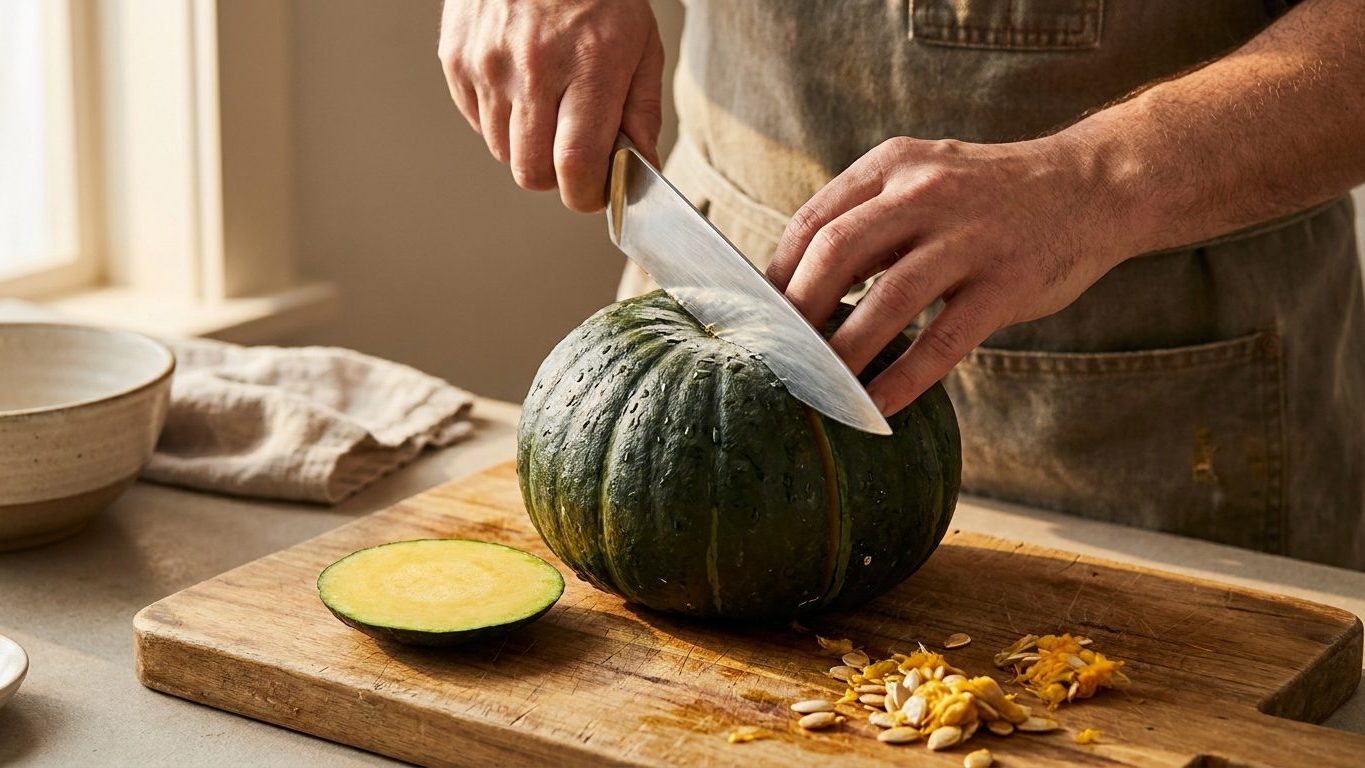

Cutting a hard winter squash safely comes down to one rule: stabilize before you slice. Cut a thin slice off one side first so the squash sits flat instead of rolling, then use a sturdy chef’s knife or cleaver with steady downward pressure. For very hard types, ten minutes in the microwave or a short stint in a hot oven softens the skin enough to cut cleanly without wrestling the blade through solid flesh.
What is actually going on

The thing to understand here is that a round hard squash rolls under a knife, and most kitchen injuries with squash come from cutting into an unstable fruit rather than from the knife itself. A butternut has flat-ish sides and sits reasonably still. A kabocha or a hubbard is closer to a sphere, and a sphere on a cutting board behaves like a ball on a tabletop: it moves the instant you apply lateral force. That’s the mechanism behind nearly every squash-cutting injury reported by home cooks, and it’s why the first cut you make should never be the one that halves the fruit.
The hard rind itself is doing a job. Winter squash, unlike summer squash, is bred and grown to mature a thick, corky skin that seals in moisture and keeps pathogens out during months of storage. That same density is what resists your knife. Soften the rind (heat, a few minutes of steam, or simply letting a squash sit at room temperature after a cool cure) and the cutting resistance drops noticeably, because you’re softening the barrier without cooking the interior flesh.
This is also the point where winter squash and carving pumpkins get confused, and they shouldn’t be. A carving pumpkin is selected and grown for a thin, easily-carved shell and stringy, watery flesh that isn’t meant for eating in quantity. a Winter Squash, whether it’s a dense-fleshed acorn or a sweet, dry-textured type bred for baking, is grown for the flesh itself and for how long that flesh keeps once cured. If a reader is working with a pumpkin meant for a jack-o’-lantern, the cutting and cooking advice here doesn’t fully apply. This site’s pumpkin carving guide covers that shell-focused case separately.
Storage and curing sit right next to food safety, and that’s not a place to guess. A squash with an intact, dry rind and no visible damage can generally be trusted to the eye and nose, but a soft spot, a weeping patch, or a moldy stem end the question immediately. That squash goes in the compost, not the oven, regardless of how the rest of it looks. No storage duration is a promise. A squash cured well and kept in a cool, dry spot may hold for months, and one with a bruise from a rough harvest may fail in weeks, and there’s no visual shortcut that replaces checking it before every use.
In the garden
Stabilizing, softening, and reading the skin after cooking play out differently depending on which type of squash is on the counter. The table below lays out what typically works and, just as important, what goes wrong when a cook skips a step.
| Squash type | Stabilize first | Softening before cutting | Skin after cooking | What goes wrong |
|---|---|---|---|---|
| Acorn-type (ribbed, smaller) | Cut a thin flat base, stand upright | Rarely needed; rind is thinner | Softens fully, often edible | Skipping the flat base still lets it wobble on the ribs |
| Butternut-type (elongated neck) | Usually stable lying on its side | Occasional short microwave for very dense necks | Firm, typically peeled away | Cutting the bulbous seed end first without support snaps the blade sideways |
| Kabocha or hubbard-type (round, very hard) | Essential; these roll the most | Almost always needed; heat 8-10 minutes or steam briefly | Thin but tough; edible in some dishes once cooked | Forcing a cold blade through an unsoftened rind is where most reported cuts happen |
| Spaghetti-type (oblong, moderate hardness) | Stable on its side once halved lengthwise | Light softening speeds the first cut | Firm shell, flesh separates in strands, skin discarded | Trying to scoop seeds before it’s fully cooked tears the strand structure |
Why the order of steps matters
Skipping the stabilizing cut to save thirty seconds is the most common shortcut, and it’s the one that turns a kitchen task into an ER visit. A knife that slides off a curved, rolling surface doesn’t stop at the cutting board. It keeps moving in whatever direction the squash rolled, and a hand braced against the far side is directly in that path. Softening the rind first isn’t about flavor, it’s about reducing the force needed to get the blade through, which reduces how far it travels if it slips.
Once cut, the cooking step reveals how the type was bred. Types meant for mashing or pureeing (dense, high-moisture flesh) break down fast under moist heat like steaming or boiling. Types meant for roasting hold their shape and concentrate sugars better in dry oven heat. Neither method is universally “correct,” and a state or regional extension service that has trialed varieties locally is a better source for which types perform best in a given growing season than any general guide can be.
What it depends on where you are
How hard a squash’s rind gets, and how much curing it needs before it’s easy to cut, has a lot to do with the growing season it came from, and that part of the answer is genuinely local. A long, warm growing season with a proper dry-down period before harvest tends to produce a harder, better-curing rind. A season cut short by early frost, or a wet, humid stretch right before harvest, tends to leave a softer rind that both cuts more easily and stores less reliably. Neither outcome is a defect; it’s a reflection of what that year’s weather did to that particular fruit.
Summer heat and summer rainfall also shape how thick the flesh gets relative to the seed cavity, which changes how a squash cooks even before it changes how it cuts. A squash grown under stress (heat stress, drought stress, or the reverse, too much rain late in the season) can have flesh that’s noticeably wetter or drier than what a recipe assumes, and that’s not something any national guide can predict for a specific backyard.
This is exactly the kind of variation state extension services track, because they run side-by-side trials under their own local conditions rather than generalizing from a national average. If the goal is knowing which type of winter squash cures hardest and keeps longest in a specific climate, that’s a question for the reader’s own state extension service, not a blanket rule. This site’s state-by-state growing guides point toward those local resources rather than repeating a one-size-fits-all answer that wouldn’t hold up from one region to the next.
None of that changes the kitchen mechanics laid out above. A hard rind is a hard rind regardless of what climate produced it, and the stabilize-then-soften approach works the same whether the squash came from a short northern season or a long southern one. What changes is how much softening a given fruit needs, and that’s something a cook has to judge by hand, not by a fixed number of minutes.
The mistake that costs the most
The single costliest mistake is cutting a round, hard squash on an unstable surface without creating a flat base first. It sounds almost too simple to be the main hazard, and that’s exactly why it keeps happening. Cooks reach for the knife, place the whole squash on the board as-is, and start applying downward force on a curved surface that has no intention of staying still. The squash rolls, the knife’s angle changes mid-cut, and the blade either skates off the rind entirely or comes free with much less resistance than expected, right as a hand is braced nearby to hold the squash steady.
The fix costs ten seconds. Cut a thin slice off one end (or one side, for the more oblong types) so the squash has a flat, stable base before any other cut is attempted. That base cut can be made with lighter pressure and a smaller, more controlled motion than the full cut that follows, precisely because it doesn’t need to go through the widest, hardest part of the fruit.
For the roundest, hardest types, pair that stabilizing cut with a short softening step, whether that’s a few minutes of microwave heat or a brief steam, before attempting to halve it. That combination, flat base plus softened rind, removes both the rolling risk and the excess force risk at the same time. Skip either one and the odds shift back toward the same kitchen accident that sends more home cooks to urgent care every fall than any other vegetable-prep mishap. And if a soft spot or moldy patch turns up once it’s finally open, that squash still doesn’t go in the pot, no matter how much effort went into cutting it.