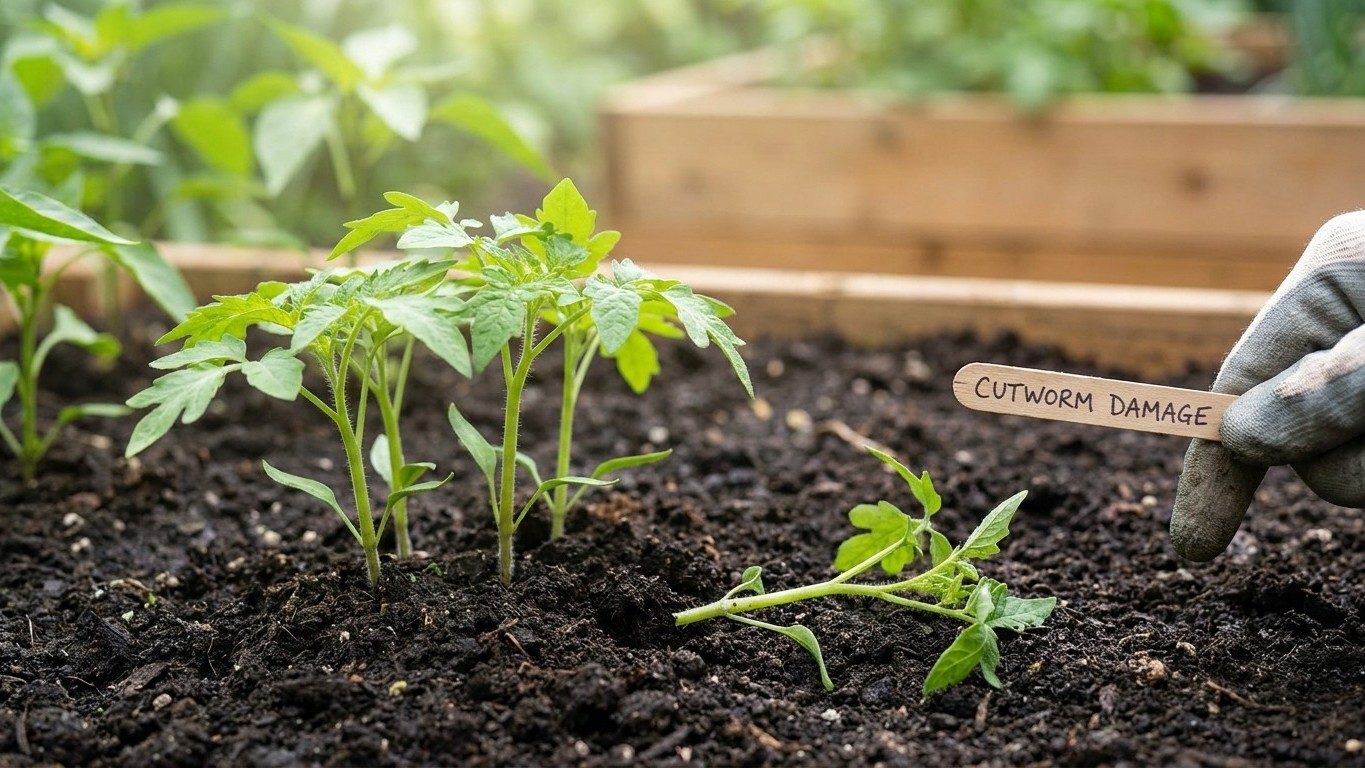

Cutworms show up in Ontario gardens and field crops starting in mid-May, right when soil temperatures climb past 50°F and overwintering larvae or newly hatched moths get moving. The damage appears almost overnight: seedlings that were standing tall the evening before are lying flat on the ground the next morning, severed clean at the soil line. Stopping them means acting before that first week of transplanting, using barriers, tillage timing, and biological controls rather than waiting for the damage to appear.
When Cutworms Are Active in Ontario

Ontario’s cutworm season runs in two waves. The first wave comes from larvae that overwintered right in the soil, curled up a few inches below the surface, waiting for warmth. Once daytime soil temperatures hold above 50°F, usually by the first or second week of May in southern Ontario and a bit later up around Sudbury or Thunder Bay, these larvae resume feeding almost immediately. They’re already partially grown, which means they do damage fast.
The second wave arrives with migratory moths, particularly the black cutworm, which doesn’t reliably overwinter in Ontario’s colder zones but blows in on spring weather systems from the southern United States. These moths lay eggs in low, weedy, or grassy fields, and the resulting larvae hit their destructive peak in late May through June. A third, smaller pulse can show up in late July or August in warmer years, especially in southwestern Ontario counties like Essex and Kent, where longer growing seasons allow a partial second generation.
Cool, wet springs tend to delay the first wave but don’t reduce it. Dry springs push activity earlier. Either way, the practical takeaway for home gardeners is the same: treat the two to three weeks after your last frost date as the highest-risk window for transplants and direct-seeded crops.
Which Cutworm Species Show Up in Ontario
Not all cutworms behave the same way, and knowing which one you’re dealing with changes how you respond. Ontario sees several species regularly, each with slightly different habits.
The black cutworm (Agrotis ipsilon) is the one most gardeners picture: dark, greasy-looking gray-brown, about 1.5 to 2 inches at full size, and responsible for most of the classic “seedling sliced at the base” damage in vegetable beds. It’s a climbing cutworm too, meaning it will sometimes crawl up young plants to feed on leaves and buds rather than just cutting stems.
The red-backed cutworm (Euxoa ochrogaster) is more of a field crop problem, showing up heavily in corn, canola-adjacent areas, and cereal fields across eastern and central Ontario. It overwinters as eggs rather than larvae, which means its emergence timing depends heavily on how fast the soil warms in a given spring.
Then there’s the dingy cutworm (Feltia jaculifera), a duller, less aggressive feeder that tends to nibble leaf edges rather than cut stems outright, and the variegated cutworm (Peridroma saucia), which has a mottled pattern and a wider host range, hitting everything from tomatoes to flowers to strawberries. All of them share the same defensive habit: curl into a tight C-shape when disturbed, which is often the fastest way to confirm you’re looking at a cutworm and not some other larva.
Spotting the Damage Before It Spreads
Cutworm damage has a signature that’s hard to mistake once you’ve seen it. Stems get severed at or just below the soil surface, and the top of the plant is left lying nearby, often untouched, because the larva was after the stem tissue, not the leaves. Compare that to slug damage, which leaves ragged holes in leaves, or wireworm damage, which tunnels through roots and tubers without toppling the whole plant. A row of pepper or tomato transplants that looks fine on Monday and shows three or four toppled stems by Wednesday is a near-certain cutworm signature.
Because cutworms feed at night and burrow into the top inch or two of soil during the day, daytime scouting won’t show you the culprit. A flashlight check an hour or two after dark, right at the base of damaged plants, usually turns one up. In field crops, scouting guides used by Ontario agronomists recommend checking five sets of plants per field, focusing on low or weedy spots where moths preferentially lay eggs, since that’s where larval density concentrates.
One thing that surprises a lot of home gardeners: a single larva can cut down several seedlings in one night, moving from plant to plant, because it eats only a portion of each stem before moving on. That’s why a small overnight loss of four or five seedlings doesn’t necessarily mean four or five separate cutworms, it might mean one hungry larva working down a row.
What Actually Stops Cutworms
Prevention beats treatment here, mostly because cutworm larvae are already below ground and hard to reach once they’ve established themselves in a bed.
Physical Barriers
The cheapest and most reliable fix for home gardens is a simple stem collar. Cut a toilet paper roll, a small section of cardboard, or a plastic cup into a 3-inch-tall cylinder, and push it an inch into the soil around each transplant so it circles the stem. Cutworms can’t climb over it and won’t tunnel deep enough underneath to get around it. This single step, done at transplanting time, prevents the vast majority of seedling losses in a backyard vegetable garden.
For direct-seeded crops where collars aren’t practical, a band of diatomaceous earth around the base of emerging seedlings works as an abrasive barrier, though it needs reapplying after rain since it loses effectiveness once wet.
Soil and Timing Strategies
Fall tillage disrupts overwintering larvae by exposing them to frost and to birds, who make quick work of larvae turned up on the surface. Ontario field crop advisories also recommend controlling weeds in and around fields at least two to three weeks before planting, since egg-laying moths are drawn to grassy, weedy cover, and a clean field in early spring gives them fewer places to settle.
Delaying transplant dates by even a week, when weather allows, can let seedlings develop tougher stems before peak larval activity hits. It’s not a guaranteed fix, but a pencil-thick stem survives a cutworm encounter far better than a thread-thin one.
Biological and Targeted Controls
Beneficial nematodes, applied to moist soil in early spring, target cutworm larvae directly and are commonly recommended by extension programs for gardens dealing with repeat infestations. Bacillus thuringiensis (Bt), specifically strains labeled for cutworms, offers another option, though it works best on younger larvae and loses effectiveness against the bigger, later-stage worms that do the most damage.
Natural predators help too. Ground beetles, birds, and parasitic wasps and flies all prey on cutworm larvae and eggs, which is one more reason heavy broad-spectrum insecticide use can backfire, wiping out the predators that would otherwise keep populations in check the following season.
For field-scale situations, Ontario agronomy programs use economic thresholds, typically recommending treatment only once larval counts and damage percentages hit specific levels in scouted plants, rather than blanket spraying at the first sign of a chewed stem. That threshold approach matters for home gardeners too, in a smaller way: a single damaged seedling doesn’t justify an insecticide application, but a pattern of losses across a row does justify collars, nematodes, or a fall tillage plan for next year.
Cutworm larvae typically pupate in the soil by midsummer and emerge as adult moths later in the season, which means the window of active larval feeding, and therefore the window where collars and barriers matter most, is genuinely limited to spring and early summer for most Ontario growers. Once seedlings toughen up past that early vulnerable stage, cutworm risk drops sharply, even though the moths themselves keep flying into fall.