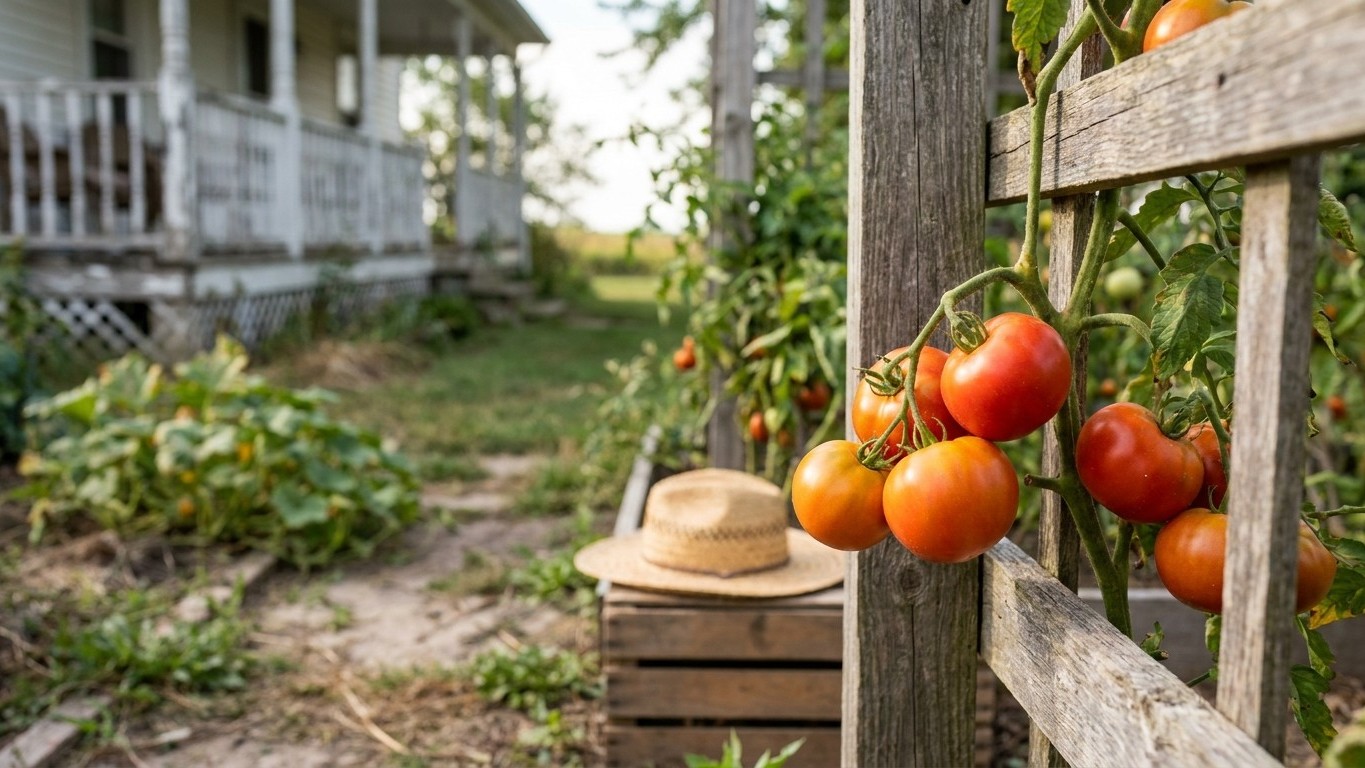

Tomatoes go into the ground in Iowa once the risk of a spring freeze has passed, and for the Des Moines area NOAA’s 1991-2020 climate normals put that last 32°F freeze between April 12 and April 24. Gardeners north of the metro, or at higher elevation, should plan on transplanting later still. The single thing to check before you set plants out: your county’s own frost history through Iowa State Extension, since those records run a few days behind the airport station this figure comes from.
When to plant Tomatoes in Iowa

April 16 to April 28 is the window most Iowa guides point to, but that date is only half the story. Elsewhere, gardeners set tomatoes out the week frost risk clears and call it done. Iowa soil doesn’t cooperate that fast — it stays cold and wet well after the air warms, and roots dropped into it sit still instead of growing. The real timing here has less to do with the calendar than with what the bed itself is doing underfoot.
Starting seeds indoors
Count back six to eight weeks from whichever transplant date you land on. If you’re aiming for the April 16 to April 28 window, that arithmetic puts seed-starting somewhere between mid-February and mid-March, earlier if you’re targeting the front of the window and later if you’re closer to the back. Sow in cell trays under bright grow light, not a windowsill, and keep the medium at a warm, even temperature until germination. Seedlings that stretch toward a window in their first two weeks rarely fill back out once transplanted.
Hardening off
Give young plants seven to ten days outside in dappled shade before they go into open ground, adding an hour or two of direct sun each day as the week goes on. Skip this step, or rush it, and a plant that looked healthy on the porch will scorch and stall within days of transplanting into a bed with no protection from wind or full sun.
Transplanting outside
Don’t transplant by the calendar alone. Cold, wet soil stalls tomato roots even after the air has warmed, so wait until nights are consistently mild and the bed itself feels warm before setting plants out, even if that means waiting past the tail end of the frost window described above. A late-season cold snap after transplanting can still knock plants back hard enough to lose two or three weeks of growth, so keep a row cover or an old sheet on hand through the first week or two just in case.
Soil and site preparation
Tomatoes want at least six to eight hours of direct sun and a spot with real air movement, since stagnant, humid pockets are where foliar disease gets a foothold first. Pick a site that drains well after a hard rain. Standing water for more than an hour or two after a storm is a sign the bed needs raised rows or a different location entirely.
Work compost or well-rotted manure into the bed a few weeks before transplanting, not the day of, so it has time to break down and stop competing with young roots for nitrogen. A soil test taken the previous fall or early that spring is the most reliable way to know whether your ground needs lime, since Iowa’s soils range from the heavy clay loams common across much of the state to sandier ground along the river bottoms. Iowa State Extension runs a soil testing lab that will tell you exactly where your ground stands and what to add before you guess.
Raised beds or hilled rows help in a wet spring, since they warm faster and shed excess water instead of holding it around the stem. Space plants generously: 24 to 36 inches apart for indeterminate varieties that will keep climbing all summer, tighter for compact determinate types, with rows far enough apart that you can walk between them without brushing wet foliage, which is one of the easiest ways to spread disease from plant to plant.
In the two weeks before transplanting:
- Pull back mulch or old plant debris so the soil can warm in direct sun
- Work in finished compost and any amendments the soil test called for
- Set stakes or cages in place before the plant goes in, not after
- Check that the bed drains within an hour or two of a heavy rain
Varieties that suit Iowa
Season length is the trait that matters most here. With transplant dates typically falling in the back half of April and cool nights returning by fall, varieties in the 55 to 68 day range reach harvest with the most margin to spare, while anything past 75 days needs an early, well-hardened transplant and a warm summer to finish reliably. Disease resistance matters almost as much, since Iowa’s humid summers favor the fungal wilts and leaf spots that build up in soil over years of tomatoes in the same bed.
Working out a harvest window
Catalogue days-to-maturity are counted from transplant, not from seed, and they shift by a week or so depending on the season’s actual warmth. Take Sakura, a 55-day cherry tomato: transplanted anywhere in the April 16 to April 28 window described above, it should start ripening from roughly June 10 to June 22. Amish Paste, an heirloom paste tomato at 85 days, wouldn’t start ripening until roughly July 10 to July 22 from that same transplant window, so it needs the earliest possible start and the most consistent warmth of anything on the list.
Here’s how some widely available cultivars compare on the traits that matter most for this climate:
| Variety | Days to maturity | Type | Notable resistance | Best for |
|---|---|---|---|---|
| Sakura | 55 | Indeterminate | Nematodes, Tomato Mosaic Virus, Fusarium Wilt | Earliest cherry harvest |
| Sun Gold | 57 | Indeterminate | Tobacco Mosaic Virus, Fusarium Wilt | Sweet snacking cherries |
| Jasper | 60 | Indeterminate | Late Blight, Early Blight | Blight-prone gardens |
| Juliet | 60 | Indeterminate | Late Blight, Early Blight | Grape tomatoes for sauce or snacking |
| Supersweet 100 | 60 | Indeterminate | Verticillium Wilt, Fusarium Wilt | Heavy cherry yields |
| Amalfi | 68 | Determinate | Nematodes, Late Blight, Early Blight | Compact plants, canning sauce |
| Cherokee Purple | 72 | Indeterminate | None listed | Heirloom slicing flavor |
| Big Beef Plus | 72 | Indeterminate | Nematodes, Gray Leaf Spot, Tomato Mosaic Virus | All-purpose slicer with disease cover |
| Tiren | 75 | Indeterminate | Verticillium Wilt, Tomato Mosaic Virus, Fusarium Wilt | Slicing tomato for disease-prone beds |
| Granadero | 75 | Indeterminate | Nematodes, Verticillium Wilt, Tomato Mosaic Virus | Paste tomato for disease pressure |
| Celebrity Plus | 78 | Determinate | Nematodes, Gray Leaf Spot, Tomato Mosaic Virus | Reliable determinate main crop |
| San Marzano II | 78 | Indeterminate | None listed | Classic sauce tomato |
| Brandywine | 78 | Indeterminate | None listed | Heirloom flavor, needs a long warm run |
| Amish Paste | 85 | Indeterminate | None listed | Latest-maturing paste tomato |
Growers further south, including in Georgia’s much longer season, lean on many of these same nematode-resistant cultivars (see our guide to growing tomatoes in Georgia), but there days-to-maturity barely matters since the frost-free stretch runs so much longer. In Iowa, it’s the first number to check on the packet.
What to plant alongside
Basil is the classic companion, mostly for the kitchen pairing rather than any proven pest effect. Studies looking for a repellent effect on hornworms or aphids haven’t found much to back up the folklore, though basil takes up little space and doesn’t compete meaningfully with tomato roots, so there’s no real cost to planting it close by.
Marigolds have better evidence behind them. French marigolds release root compounds that suppress certain root-knot nematode populations in the soil around them, a genuine benefit in a bed that’s grown tomatoes for several years running. Borage and other flowering annuals draw in pollinators and predatory insects, which helps fruit set and gives aphid predators like lacewings and ladybugs a reason to stick around.
Carrots, onions and lettuce make reasonable neighbors since they root at different depths and don’t compete heavily for the same nutrients. Keep tomatoes well away from potatoes, eggplant and peppers, since all four share susceptibility to the same soil-borne wilts and blights, and rotating them through the same ground year after year builds up disease pressure that eventually shows up in poor yields regardless of variety.
Corn is worth avoiding too, since the same corn earworm moth lays eggs that become tomato fruitworm, giving the pest a bridge between the two crops. And skip the ground near black walnut trees entirely. Black walnuts release a compound called juglone from their roots that is toxic to tomatoes, causing wilting and eventual death within the walnut’s root zone, and since black walnut is a common tree across Iowa’s fencerows and woodlots, it’s worth checking what’s growing nearby before you dig a bed.
Watering, feeding and support
Water deeply and infrequently rather than a little every day. An inch or so of water a week, delivered in one or two soakings that reach six inches down, trains roots to grow deep instead of clustering near a surface that dries out fast in July heat. A soaker hose or drip line at the base keeps water off the foliage, which matters more than almost anything else for keeping fungal disease down, since wet leaves overnight are exactly what early blight and Septoria need to get started.
Mulch heavily once the soil has warmed, with straw, shredded leaves or grass clippings laid two to three inches deep. Mulch holds soil moisture steady between waterings, keeps weeds down, and stops rain from splashing soil-borne fungal spores up onto the lower leaves, one of the most common ways early blight gets into a plant in the first place.
Feeding through the season
Work a balanced fertilizer or finished compost into the bed at transplanting, then hold off on heavy nitrogen after that. Too much nitrogen mid-season buys you a huge, leafy plant and very little fruit, since the plant puts its energy into foliage instead of setting blossoms. A side-dressing of a fertilizer higher in phosphorus and potassium once the first fruit sets is more useful than repeated doses of an all-purpose feed.
Staking, caging and pruning
Indeterminate varieties, which is most of the list above, keep growing and setting fruit until frost and need a tall stake, a cattle-panel trellis, or a sturdy cage to keep the fruit off the ground. Determinate varieties like Celebrity Plus and Amalfi stop growing once they set their main flush of fruit and need less support, usually a shorter cage.
- Remove suckers, the shoots growing in the leaf joints, on indeterminate varieties to keep the plant to one or two main stems
- Tie the main stem loosely to its support every twelve inches or so as it grows
- Strip off the lowest leaves once they yellow or once fruit is set above them
- Leave more foliage on determinate varieties, since heavy pruning cuts into their one main harvest
Common problems

Most tomato failures trace back to water, not pests. Learn to read the symptom before reaching for a spray.
Blossom end rot

A sunken, leathery, dark brown to black patch develops at the blossom end of the fruit, opposite the stem. It’s caused by uneven calcium delivery to the fruit, almost always driven by inconsistent watering rather than a true calcium shortage in the soil. Even, deep watering fixes it far more reliably than adding calcium products, since the calcium is usually already there and just isn’t reaching the fruit through a plant under water stress.
Cracking and catfacing

Fruit that splits in concentric rings around the top, or develops puckered, scarred tissue near the blossom end, is reacting to a sudden heavy rain or deep watering after a dry stretch. The skin can’t keep up with the fruit’s quick growth spurt and splits. Keeping soil moisture even with mulch and a regular watering rhythm is the main fix, since there’s no cure once the damage is done.
Wilts (Fusarium and Verticillium)

A plant that wilts steadily from the bottom up, even in moist soil, and eventually yellows and dies on one side first, is likely carrying one of the soil-borne wilts that build up over years in the same bed. There’s no treatment once a plant is infected. Pull and discard the plant rather than composting it, and switch to a resistant variety the next season. Several cultivars on the table above, including Tiren, Granadero and Supersweet 100, carry high resistance to Fusarium or Verticillium and are worth planting in a bed with a known history of either disease.
Leaf spot diseases (early blight and Septoria)

Small dark brown to black spots, often with a yellow halo, start on the lowest, oldest leaves first and work upward as the season goes on. Early blight spots often show faint concentric rings like a target. Both diseases spread fastest in wet, humid conditions and via soil splashed onto lower leaves during rain, which is why mulch and drip watering matter so much. Remove affected leaves as soon as you spot them and improve airflow between plants rather than waiting until the whole lower third of the plant has gone yellow.
Hornworms and aphids

Tomato hornworms are large, pale green caterpillars with white diagonal stripes and a single curved horn near the tail end, and they can strip a plant of leaves in a couple of days if missed. Check the plant in the early morning or evening when they’re easiest to spot, and hand-pick them off. Aphids cluster in small, soft-bodied groups, usually green or black, on new growth and the undersides of leaves, and a strong jet of water or an insecticidal soap knocks most infestations back before they get out of hand.
Pests that actually show up in Iowa
Iowa State University Extension’s Yard and Garden Encyclopedia lists nine pests for state vegetable and ornamental gardens, but only three of them actually bother tomato plants. Squash bug, squash vine borer, striped cucumber beetle and spotted cucumber beetle all target squash, cucumbers and melons, not tomatoes, so a gardener who only grows tomatoes can ignore that group entirely. Iris borer and lily leaf beetle are ornamental pests that feed on iris rhizomes and lily foliage and never touch a tomato plant. If you grow those flowers alongside your vegetables, watch for iris borer damage in May and June and rhizome collapse from July into early August, but keep the two gardens mentally separate.
Japanese beetle is the one to watch. ISU Extension calls it the most destructive insect pest in the Iowa landscape and garden, and it has been present in the state since it was first found here in 1994. You will see the damage before you see the beetle: leaves skeletonized down to a lace of veins, usually starting on upper foliage exposed to full sun. Adults are active from mid-June through July and peak by mid-July. Handpicking into a jar of soapy water in the cool of early morning, when the beetles are sluggish, is the most reliable control for a home planting. Skip pheromone traps near your tomatoes. They pull in more beetles than they catch.
Common stalk borer shows up as a single wilted branch or a whole plant that collapses while the rest of the row looks fine. The larva tunnels inside the stem, and you can often find a small entry hole with frass around it if you look closely at the wilted stem’s base. Larvae move into thicker stems from mid to late June. There is no fixing a stem that is already hollowed out, so mow grassy weeds and field edges near the garden through spring, since that is where the eggs are laid before the larvae wander into the tomato rows.
Grasshoppers chew ragged, irregular holes through leaves and can scar fruit surfaces in a bad year. Numbers build through summer and peak in the hot, dry stretches of July and August. Floating row cover over young plants keeps the worst of them off until the plants are tall enough to shrug off some leaf loss.
Harvest and end of season
Pick tomatoes once they’ve reached full color for the variety, whether that’s the deep red of Big Beef Plus, the dusky near-black pink of Cherokee Purple, or the orange-gold of Sun Gold. Fruit continues to ripen after picking, so there’s no harm in taking tomatoes slightly early if a raccoon, a hailstorm, or an early frost is bearing down.
Once picked, keep tomatoes at room temperature out of direct sun rather than in the refrigerator. Cold storage dulls both flavor and texture, breaking down the compounds that give a vine-ripened tomato its taste, and it doesn’t slow spoilage enough to be worth the trade-off for fruit you’ll eat within a week or two.
As fall frost approaches
NOAA’s figures above cover the spring side of the season, measured at the Des Moines airport station. For the first fall freeze, Iowa State Extension’s county-level data run about 10 days earlier than that airport station, so don’t assume the growing season stretches as long into fall as the spring numbers might suggest. Check your county’s exact freeze dates before deciding how long to let fruit hang on the vine. Once night temperatures start dropping toward that danger range, pull any tomatoes that have started to show color and let them finish indoors on a windowsill or paper-lined tray out of direct sun.
Fully green fruit with no color break at all rarely ripens well off the vine and is better used for fried green tomatoes or relish than left to gamble on a windowsill. Pull entire plants and hang them upside down in a garage or basement if a hard freeze is forecast with several weeks of the season nominally left. Fruit will often keep sizing up and ripen slowly over the following weeks even off the root.
Local help
Frost dates and soil conditions shift enough across Iowa that county-level numbers beat any statewide average. Iowa State University Extension and Outreach publishes county-specific planting dates and runs a soil testing lab that will tell you exactly what your particular bed needs before you amend it. Find your county office through the Iowa State Extension website. For help adapting other crops to the state’s short season, our other Iowa guides use the same frost-window arithmetic laid out here.
Where to Go Next
Everything above comes down to one number: the date of the last spring freeze. If you want to see how that single number turns into an actual planting schedule, the planting calendar walks through counting back from your frost window, and why the “safe” date is really a probability that climbs from 30 to 70 percent over about two weeks rather than a hard line on the calendar.
The same frost window also decides which varieties are worth growing here. Before you commit to a seed packet, it’s worth checking the tomato varieties that ripen in time in Iowa, since days-to-maturity numbers only mean something once you’ve measured them against that local frost date.
And once the plants are in the ground and growing, the pests show up on their own schedule. The tomato pests roundup covers the same six insects Iowa gardens see almost every year, arriving in a predictable order tied to that same stretch of spring weather.
Common questions
Is it too late to plant tomatoes in Iowa if I missed the April window?
No. Tomatoes transplanted through late May still have a full summer ahead of them in most of the state, since the plants don’t care what the calendar says as long as the soil is warm and there’s no more frost coming. A later start mostly costs you the earliest cherry tomatoes off Sakura or Sun Gold, not the main harvest from mid- and full-season varieties.
Do I need to rotate where I plant tomatoes each year?
Yes, and it matters more in Iowa’s humid summers than in drier climates, since the fungal wilts and leaf spot diseases covered above persist in soil for years. Moving tomatoes, potatoes, peppers and eggplant to a different part of the garden on a three to four year cycle keeps pathogen levels from building up to the point where even a resistant variety struggles.
Why do my tomato leaves curl?
Leaf curl usually comes from heat and moisture stress rather than disease, especially when the upper leaves roll upward and inward during a hot, dry stretch. It looks alarming but rarely affects yield. Curling paired with yellowing, mottled color or stunted new growth points toward a virus instead, and there’s no cure beyond removing the plant and choosing a resistant variety like Sakura or Tiren next season.
Can I grow tomatoes in containers if I don’t have garden beds?
Yes, and determinate varieties like Celebrity Plus or Amalfi handle container life better than sprawling indeterminate types, since they stay more compact. Use the largest pot practical, at least five gallons and ideally closer to fifteen, since container plants dry out much faster than ground beds and need checking daily once summer heat sets in.
My plants have plenty of flowers but no fruit is forming. What’s wrong?
Poor fruit set is almost always a temperature problem rather than a pollination problem. Tomato blossoms drop without setting fruit when nights run too cool in late spring or when daytime heat climbs too high in midsummer, since pollen itself becomes less viable outside a fairly narrow range. There’s little to do beyond waiting out the temperature swing, though a gentle shake of the flower clusters at midday can help pollen release during marginal conditions.