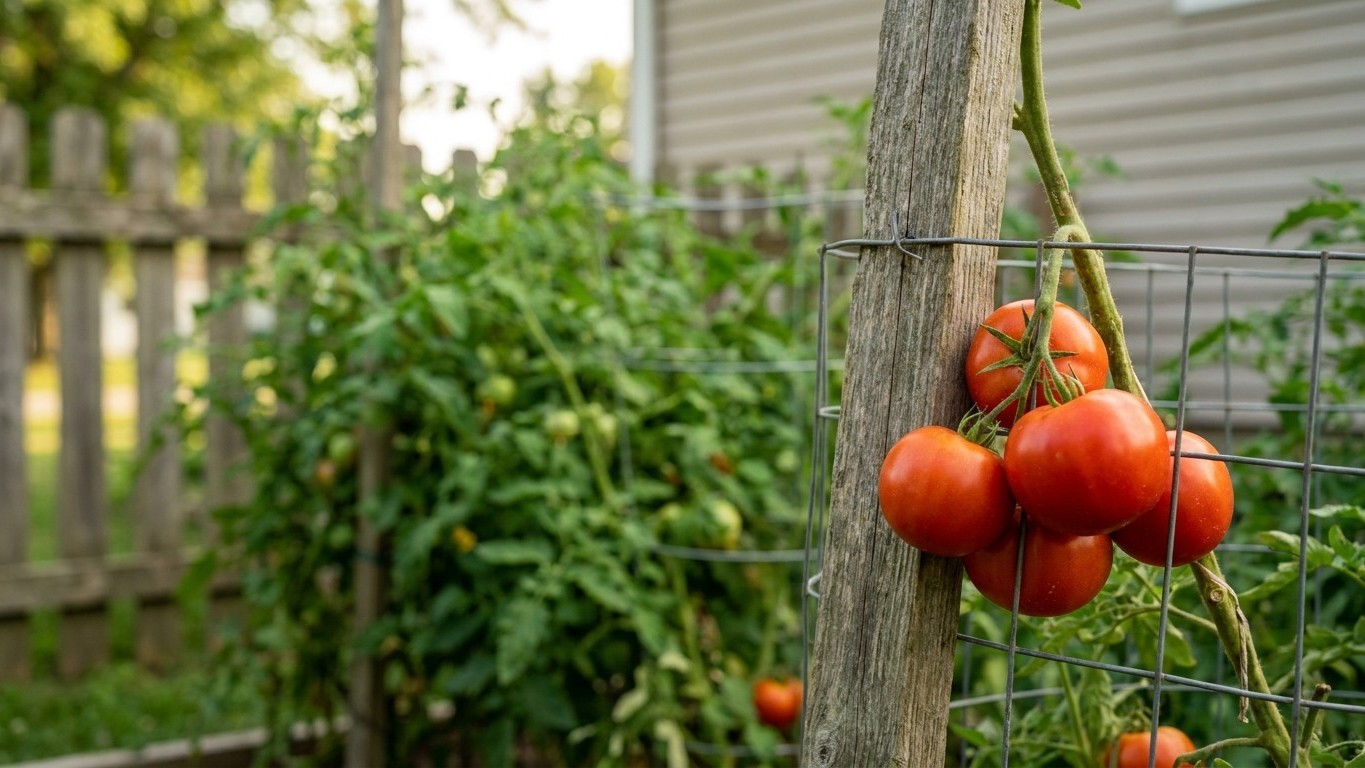

Indianapolis frost dates get treated like a statewide rule, but that April 9 to April 21 window belongs to the middle of the state and nowhere else. Push south toward the Ohio River and your ground usually clears earlier; head north or up in elevation and you’re often waiting two extra weeks past it. Working from Indianapolis when you actually garden in Evansville or South Bend just sets your tomatoes up wrong before they’ve even gone in the ground.
When to plant Tomatoes in Indiana

Indianapolis sits close to the center of the state, and NOAA’s NCEI 1991-2020 climate normals put its last spring freeze in the April 9 to April 21 window, the band where a 32°F event lands 30 to 70 percent of the time. That’s the figure to work from if you garden anywhere near the middle of Indiana. Southern counties along the Ohio River generally clear their last frost earlier than this range, while the northern tier and any higher elevations can run two weeks or more behind it. Growers just across the border in Iowa deal with a similar north-south spread, so the habit of checking your own closest weather station rather than a statewide average applies there too.
Counting back from transplant to seed start
Tomato seed packets typically call for starting indoors six to eight weeks before plants go into the ground. Count back from the Indianapolis frost window and seed-starting falls somewhere between mid-February and mid-March, depending on which end of the frost range you’re aiming for and whether you count six weeks back or eight. Someone targeting the early edge, April 9, and starting a full eight weeks ahead lands in mid-February. Someone targeting April 21 and counting only six weeks back lands in the second week of March. Neither is a fixed date. Both are reasonable starting points, and the arithmetic matters more here than any single day a seed-starting app hands you.
Hardening off and getting plants in the ground
Seedlings raised indoors under lights or on a windowsill need a transition before they meet full sun, wind and cooler night air. Move them outside for a couple of hours a day in a sheltered, partly shaded spot, and stretch that time over a week to ten days, adding sun exposure gradually. Skip this step and the leaves bleach and blister within a day of going into open ground.
Don’t rush the transplant date just because the calendar shows the frost window has opened. Tomatoes are a warm-season crop, and soil that’s still cold and wet from spring rain stalls root growth even when the air temperature looks fine. Wait for a stretch of settled weather, set the plants a little deeper than they sat in their pots since buried stem grows extra roots, and water them in well the same day you transplant.
Soil and site preparation
Tomatoes want full sun, six to eight hours of direct light a day at minimum, and a spot with enough air movement that leaves dry off after dew or rain rather than staying damp all morning. Pick that location weeks before planting, not the same morning you bring seedlings home.
Working the bed ahead of time
Drainage matters more than most gardeners expect. Tomatoes sitting in waterlogged soil grow shallow, stressed roots and are far more prone to rot and wilt disease later in the season. If your ground stays soggy for more than a day after rain, raised beds or mounded rows solve the problem better than any amount of amending in place.
Work compost or well-rotted manure into the bed several weeks before transplanting so it has time to break down rather than sitting as a raw layer around new roots. A soil test done ahead of the season, through your county extension office, tells you far more about what the ground needs than a guess made at the garden center. Tomatoes are heavy feeders and do best in soil close to neutral pH. If your results come back well off that mark, follow the lime or sulfur rate on the report rather than a generic rule of thumb.
Spacing and bed layout
Space determinate varieties roughly two feet apart in the row and indeterminate types closer to three, with rows far enough apart to walk through once the plants fill in. Crowded plants trap humidity in the canopy, and that humidity is exactly what fungal disease needs to get established. Set cages or stakes in at planting time rather than after the plant has sprawled, since driving a stake through an established root ball does real damage. Crowding is the single most common spacing mistake in home tomato patches, usually because six small seedlings looked like plenty of room back in April.
Varieties that suit Indiana
Indiana’s season is long enough for full-season slicers but humid enough that disease resistance and days-to-maturity both deserve real weight when picking varieties. Catalogue days-to-maturity figures are counted from the transplant date, not from seed, and they shift by a week or two either direction depending on the summer’s weather.
Matching maturity to the season
Cross the catalogue number against the Indianapolis-based transplant window and you get a rough sense of when fruit starts coming in. A 60-day variety set out anywhere in the April 9 to April 21 range should begin ripening from early to mid June onward. An 85-day variety pushes first harvest into July. Given the real chance of a late frost early on and the general unpredictability of a Midwest summer, a shorter-season variety carries less risk, and pairing one early producer with a full-season type spreads the harvest across more weeks instead of dumping it all at once.
For an early cherry tomato, Sun Gold (57 days from transplant, indeterminate) resists Tobacco Mosaic Virus and Fusarium wilt race 1, and Sakura (55 days, indeterminate) resists nematodes, Tomato Mosaic Virus and Fusarium wilt races 1 and 2. Jasper (60 days, indeterminate) carries high resistance to late blight and intermediate resistance to early blight, two diseases that show up often after a stretch of humid, rainy weather.
For a main-season slicer, Celebrity Plus (78 days, determinate) resists nematodes, gray leaf spot and Tomato Mosaic Virus, and its compact, determinate habit makes it easier to manage in a smaller bed. Big Beef Plus (72 days, indeterminate) carries the same three resistances on a larger, longer-producing vine. For sauce and paste tomatoes, Amalfi (68 days, determinate) resists nematodes and shows intermediate resistance to both late and early blight, while San Marzano II (78 days, indeterminate) and Amish Paste (85 days, indeterminate) run longer without listed disease resistance, so they reward a clean, well-spaced bed rather than a shortcut. Heirloom growers reaching for flavor over resistance have Brandywine (78 days, indeterminate) and Cherokee Purple (72 days, indeterminate), both open-pollinated and both worth staking heavily, since neither carries built-in disease protection to fall back on if the season turns wet.
| Variety | Days to maturity | Type | Disease resistance | Best for |
|---|---|---|---|---|
| Sun Gold | 57 | Indeterminate | TMV, Fusarium race 1 | Early cherry tomatoes |
| Sakura | 55 | Indeterminate | Nematodes, ToMV, Fusarium races 1, 2 | Earliest harvest of all |
| Jasper | 60 | Indeterminate | Late blight, early blight | Cherry tomatoes in humid seasons |
| Celebrity Plus | 78 | Determinate | Nematodes, gray leaf spot, ToMV | Compact main-season slicer |
| Big Beef Plus | 72 | Indeterminate | Nematodes, gray leaf spot, ToMV | Large main-season slicer |
| Amalfi | 68 | Determinate | Nematodes, late/early blight | Sauce and paste |
| Brandywine | 78 | Indeterminate | None listed | Heirloom flavor |
What to plant alongside
Some companion planting claims hold up and some don’t, and it’s worth sorting one from the other before building a bed around folklore. Basil is the most reliable pairing: it doesn’t compete much for root space, tolerates the same watering and heat, and its flowers draw pollinators and predatory insects that help hold aphids down. Borage does similar work pulling in bees, though the claim that it deters hornworms is thinner than the pollinator benefit. Marigolds earn their spot for pollinator traffic alone. The often-repeated claim that marigolds suppress root-knot nematodes has real research behind it, but that research comes from marigolds grown as a dense cover crop for a full season ahead of planting, not from a few plants tucked between tomato stems, so treat the interplanting version as a modest bonus rather than a fix.
What to keep away
- Corn: shares the tomato fruitworm, which is the same insect as the corn earworm, so growing them side by side concentrates the pest rather than confusing it.
- Potatoes: both are nightshades that share early blight, late blight and the Colorado potato beetle, so keeping tomatoes and potatoes in separate beds is worth the extra planning.
- Brassicas like cabbage, broccoli and kale: heavy feeders that compete hard for the same nitrogen tomatoes need mid-season.
- Fennel: widely reported to stunt nearby tomato growth, and not worth testing in a bed you’re counting on.
Nasturtiums work well as a trap crop, since aphids often prefer them to tomato foliage and pull pest pressure away from the plants you actually want to protect. None of these pairings replace basic spacing and airflow. A well-spaced bed with no companions at all will outperform a crowded one dressed up with marigolds at every corner.
Watering, feeding and support
Consistency matters more than volume with tomatoes. Deep, infrequent watering that soaks the root zone builds a stronger root system than a light daily sprinkle, and it’s the swing between bone-dry and soaked that causes cracked fruit and blossom end rot, not the total amount of water on its own. Water at the base rather than overhead where you can manage it, since foliage left wet overnight is a standing invitation to fungal disease.
Mulch and feeding
Lay down two to three inches of straw, shredded leaves or grass clippings once the soil has warmed and plants are established. Mulch holds moisture evenly, keeps soil from splashing onto lower leaves during rain, which is one of the main ways fungal spores travel from ground to plant, and cuts down on weeding through the summer. Feed with a balanced fertilizer at transplanting, then switch to something lower in nitrogen and higher in potassium once fruit sets. Too much nitrogen through the season buys a lush, dark green plant with plenty of foliage and disappointingly little fruit to show for it.
Staking, caging and pruning
Indeterminate varieties, the vining types that keep growing and setting fruit until frost, need real support: a sturdy cage, a stake with regular tying, or a Florida weave strung between posts along a row. Determinate varieties stay more compact and often get by with a lighter cage. Pruning suckers, the shoots that emerge in the leaf axils, is mostly a matter of preference on indeterminate types. Removing some improves airflow and channels energy into fewer, larger fruit, while leaving them all gives a bushier plant with more, smaller tomatoes. Determinate varieties shouldn’t be pruned hard, since much of their total yield comes from those same side shoots.
Common problems

Most tomato trouble falls into a handful of repeatable patterns, and reading the symptom correctly saves a season of guesswork.
Physiological problems
Blossom end rot shows up as a flat, sunken, leathery brown-black patch on the bottom of the fruit while the rest still looks fine. It’s caused by a local calcium shortage inside the fruit, usually triggered by inconsistent watering rather than a lack of calcium in the soil itself, so even watering fixes it more often than a calcium spray does. Fruit cracking, radial or concentric splits around the top of the tomato, comes from the same root cause: a dry spell followed by heavy rain or a big watering catch-up, swelling the fruit faster than the skin can stretch. Mulch and steady watering prevent both problems more reliably than any product aimed at treating them after the fact.
Poor fruit set, where plants flower but don’t hold fruit, usually traces back to weather stress, either an unusually hot stretch or a cool, wet one disrupting pollen viability during the narrow window each flower is receptive. It typically resolves once conditions moderate. In a long, hot state like Florida, this same problem runs almost the opposite way, with heat driving blossom drop through much of the summer rather than a short, frost-limited season causing the trouble, as covered in our Florida tomato guide.
Disease
Early blight and Septoria leaf spot both start as small dark spots on the lower, older leaves that expand and cause yellowing and leaf drop working up the plant. Both are fungal, both spread fastest in humid weather with wet foliage sitting overnight, and both are why mulching and base watering matter as much as any fungicide. Fusarium and Verticillium wilt cause one-sided yellowing and wilting that often shows up on just one branch or one side of the plant first, and they persist in soil for years once established, which is exactly why the resistance codes printed on seed packets are worth checking before buying, not after losing a plant to them.
Pests
- Tomato hornworm: a large green caterpillar that blends into the foliage, best hand-picked in early morning when it’s easiest to spot.
- Colorado potato beetle: attacks tomato foliage as readily as potato, especially where the two have been grown near each other.
- Aphids: cluster on new growth and the undersides of leaves, usually manageable with a strong water spray before reaching for anything stronger.
- Tomato fruitworm, also called corn earworm: bores directly into developing fruit near the stem end, one more reason to keep tomatoes away from corn.
Pests that actually show up in Indiana
Purdue Extension Entomology’s E-21 guide to managing insects in the home vegetable garden lists ten pests recorded across the state, but most of them, striped and spotted cucumber beetle, squash bug, squash vine borer, asparagus beetle, and Mexican bean beetle, feed on squash, beans, and asparagus rather than tomatoes. If you grow those crops alongside your tomatoes, watch for them separately. For tomatoes themselves, three pests on the list matter.
Colorado potato beetle will move onto tomato foliage as soon as it emerges in spring, since tomatoes share the same nightshade family as its usual host. You’ll see ragged holes eaten through leaves, sometimes stripped to bare stems on young plants, with the striped adult beetles and reddish larvae clustered on the undersides. Purdue notes Indiana’s Colorado potato beetle populations have built up resistance to most insecticides sold for home use, which leaves hand-picking beetles and eggs off the foliage as the most reliable control through both of the season’s generations.
Brown marmorated stink bug shows up later, feeding directly on the fruit through summer into September. The damage looks like cloudy, slightly sunken discolored patches under the skin where the bug pierced through to feed, often not obvious until you slice the tomato open. Row cover over young plants keeps early populations off, but once fruit is forming and ripening, the best defense is picking ripe tomatoes promptly so less fruit sits exposed and vulnerable at any one time.
Seedcorn maggot targets tomatoes at the other end of the season, tunneling into seeds and the base of young transplants set out in cool, wet soil in late April and early May. A transplant that suddenly wilts and pulls up with a hollowed, rotting stem below the soil line is the tell. Waiting to set plants out until soil has warmed and dried some, rather than rushing them in during a cold snap, does more to prevent this than any product applied after the damage shows.
Harvest and end of season
Pick tomatoes once they’ve reached full color for the variety, whether that’s the deep red of Big Beef Plus, the dusky near-black red of Cherokee Purple, or the gold of Sun Gold. Fruit keeps ripening off the vine as long as it’s past the breaker stage and shows at least a blush of color, so there’s no need to leave a cracked or pest-damaged tomato on the plant hoping for perfect color.
Storing and ripening indoors
Keep ripe tomatoes on the counter, not in the refrigerator. Cold storage wrecks the texture and mutes the flavor, turning the flesh mealy in a way that doesn’t reverse once the tomato warms back up. Green, mature fruit ripens well spread out on a windowsill or wrapped individually in newspaper in a box, checked every few days and pulled as each one turns.
Closing out the season
As nights turn consistently cool and the first fall frost gets close, the safer move is to strip the plants rather than gamble on a late stretch of warm weather. Pick anything showing a blush of color and bring the fully green fruit indoors to ripen. A hard freeze turns green tomatoes to mush in a way no amount of counter-ripening fixes afterward. Fall frost timing varies significantly across Indiana, so check NOAA’s climate data or Purdue Extension’s county-level guidance rather than assuming the same week works from the Ohio River to the Michigan line.
Local help
The Indianapolis figures used here are a starting point, not a substitute for what’s happening in your own county. Purdue Extension publishes county-level planting dates, offers soil testing through local offices, and can confirm which diseases and pests are actually active in your area in a given year. For more on gardening elsewhere in the state, our Indiana guides cover other crops and the regional differences worth knowing before you plan a full season.
Where to Go From Here
Everything above is the overview — the three pages behind it go deeper on the specifics. If you want to nail down when to actually get plants in the ground, the tomato planting calendar counts back from Indianapolis’s typical last spring freeze (April 9 to April 21) and first fall freeze (October 21 to October 30) to lay out that six-and-a-half-month window and what it means for your schedule. Once timing is settled, the question is what to plant in that window: tomato varieties that ripen in time walks through cultivars that actually finish before frost, using NOAA’s 1991-2020 climate normals as the baseline rather than guesswork. And once plants are in the ground, the last piece is knowing what’s likely to come after them — the pests that actually show up in Indiana covers the short, real list: cutworms and flea beetles right at transplant, Colorado potato beetles and aphids as early summer moves in, and spider mites later on. Together these three fill in the timing, the plant choice, and the pest side of growing tomatoes here.
Common questions
Can I plant early if I cover the plants with a wall of water or a cloche?
Season-extending covers let you push a week or two earlier than the open-air transplant window, since they buffer the plant from the coldest overnight air. They don’t make the plant frost-proof, and a hard freeze can still get through cheap plastic, so keep watching the forecast even with covers in place.
Why are my tomato leaves curling upward?
Leaf curl on its own, without discoloration, is usually a physiological response to heat, wind or uneven watering and isn’t a disease. If the curling comes with yellowing, mottling or stunted new growth, that points toward a virus or herbicide drift instead, and it’s worth pulling the plant if you suspect virus so it doesn’t spread to neighbors.
Do I need to rotate where I plant tomatoes each year?
Yes, rotating tomatoes and other nightshades like potatoes and peppers to a different bed each year, ideally on a three-year cycle, cuts down on the soil-borne wilts and blights that build up when the same family grows in the same ground repeatedly. A small backyard plot makes a strict rotation hard, but even moving a few feet helps.
Can I grow tomatoes in containers instead of the ground?
Yes, and determinate varieties like Celebrity Plus or Amalfi generally do better in containers than sprawling indeterminate types, since their more compact habit doesn’t outgrow a pot as fast. Containers dry out faster than garden soil, so expect to water more often, sometimes daily in hot stretches.
What’s the real difference between determinate and indeterminate if I only have room for one plant?
Determinate varieties grow to a set size, set most of their fruit in a shorter window, and then taper off, which suits a gardener who wants one big harvest for canning. Indeterminate varieties keep growing and producing until frost, giving a steadier trickle of fruit all season but needing taller support and more pruning attention.