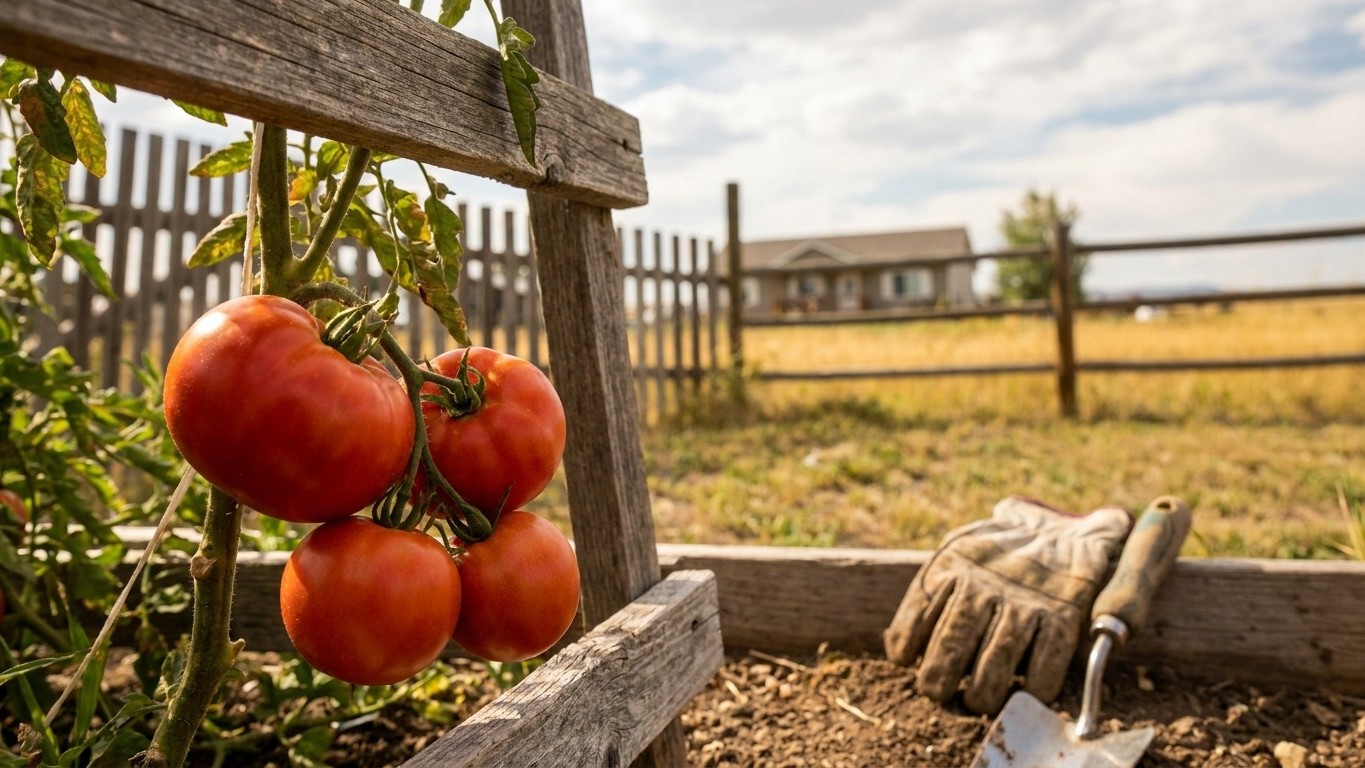

Wyoming’s growing season is short and the timing is unforgiving. NOAA’s NCEI 1991-2020 climate normals for the Cheyenne station put the last spring freeze between May 7 and May 18, and that window is what everything else in this guide works around. Don’t set transplants outside until that window has passed where you live, and if you haven’t started seed indoors yet, do that this week.
When to plant Tomatoes in Wyoming

May 7 to May 18: that’s not a rough guess, it’s the real spread of Cheyenne’s frost window in a given year, and it’s why the standard “count eight weeks back from your last frost” rule leaves so many Wyoming gardeners with either leggy, overgrown seedlings or plants that miss the transplant date entirely. Here, the six-to-eight-week rule has to bend around a ten-day window, not a single circled date, and around wind strong enough to undo a plant that hasn’t been properly hardened off.
Counting Back From the frost date
Tomato seedlings need roughly six to eight weeks indoors before they’re ready to go in the ground. Counting back from the earliest end of the Cheyenne window, May 7, at eight weeks lands you in mid-March. Counting back from the latest end, May 18, at six weeks lands you in early April. So for southeastern Wyoming, starting seeds indoors somewhere between mid-March and early April puts a stocky, well-rooted transplant in your hands right around the frost window, whichever end of it your particular spring turns out to be.
Start seeds in a sterile mix under grow lights rather than a sunny windowsill. Wyoming’s spring light is bright but day length in March is still short, and windowsill seedlings almost always stretch and go leggy. Keep the mix consistently moist and the lights four to six inches above the leaves as they grow.
Hardening off and transplanting
Seven to ten days before you plan to set plants outside, start hardening them off: a couple hours of sheltered outdoor time the first day, building to a full day and night by the end of the week. This step matters more here than in milder states, because Wyoming wind is relentless and a plant that hasn’t toughened up will show it in bent stems and torn leaves within a day of transplanting.
Once you’re past the Cheyenne frost window, or your own county’s equivalent, transplant into warmed soil on a calm, overcast day if you can find one. Keep row cover or a frost blanket on hand through the end of May even after transplanting, since a late frost outside the 30-70% band is still possible, the probability band just tells you the odds, not a guarantee. For a broader look at what else is happening in the garden calendar this time of year, the Wyoming guides page covers other crops working around the same frost dates.
Soil and site preparation
Tomatoes want full sun, at least eight hours a day, and a spot that isn’t fighting wind on top of everything else. Wyoming wind will snap unstaked stems and dry leaves out faster than roots can keep up, so if you have a choice of sites, pick the one with a fence, shed wall, or windbreak planting on the prevailing side.
Soil texture varies a lot across the state, from heavy clay to fast-draining sandy ground, and there’s no single fix that applies everywhere. What holds true regardless is that tomatoes need soil that drains within a few hours of a heavy watering and holds enough organic matter to keep from crusting between waterings. Work two to three inches of finished compost into the top eight inches of soil a few weeks before you plant, not the same day, so it has time to integrate rather than sitting in a raw layer around the roots.
Raised beds and warming the soil early
Given how short the frost-free stretch is here, anything that warms the soil ahead of transplanting pays off. Raised beds warm faster than ground-level rows because they drain and shed cold air more readily, and a sheet of black plastic laid over the bed for a week or two before transplanting raises the soil temperature further. Don’t skip this step if your last frost date runs toward the later end of the window, since it effectively buys back some of the days spring took from you.
Space determinate varieties two to three feet apart in rows three feet apart, and give indeterminate varieties three to four feet in each direction since they keep growing and branching all season if conditions allow. Crowded plants hold humidity around the leaves longer after rain or watering, which is exactly the condition that lets fungal disease get a foothold, so err on the wider side of any spacing printed on the seed packet.
Varieties that suit Wyoming
The biggest factor in choosing a tomato variety here is days to maturity weighed against how much frost-free season you actually have. With the Cheyenne frost window bounded by NOAA’s May 7-18 last-frost normals and roughly 130 frost-free days total at 6,000 feet, an 85-day tomato is working with very little margin for a cold spring or an early fall chill. That doesn’t rule out the long-season varieties, it just means they need the earliest possible indoor start and, ideally, a wall-of-water or similar season-extension device at transplant time.
Days-to-maturity figures on seed packets are counted from transplant, not from seed, and they’re catalogue figures that shift a week or two either way depending on how warm and sunny the season turns out to be. Use them to compare varieties against each other, not as a promised harvest date.
Short-season and disease-resistant picks
Cherry and paste types tend to run shortest. Sakura (55 days) and Sun Gold (57 days) are both indeterminate and both carry resistance packages worth having in a state where soil-borne disease can build up in a bed over years: Sakura resists nematodes, tomato mosaic virus and two races of fusarium wilt, while Sun Gold resists tobacco mosaic virus and fusarium race 1. Jasper (60 days) and Juliet (60 days) both carry resistance to late and early blight, useful in a wet year, and Supersweet 100 (60 days) resists verticillium and fusarium wilt. For a full-size slicer without pushing the season too hard, Amalfi (68 days, determinate) resists nematodes and both blights at an intermediate level.
Slicers and pastes that need the earliest start
Cherokee Purple (72 days) and Brandywine (78 days) are old heirloom indeterminates with no listed disease resistance, so they carry more risk in a compressed season and reward a gardener who starts seed on the early side of the mid-March to early April window. Big Beef Plus (72 days) and Celebrity Plus (78 days, determinate) both resist nematodes, gray leaf spot and tomato mosaic virus, a steadier bet in a bed that’s grown tomatoes before. San Marzano II (78 days), Granadero (75 days), Tiren (75 days) and Amish Paste (85 days) are the paste tomatoes worth the extra effort for canning, with Granadero and Tiren both carrying verticillium and mosaic virus resistance that Amish Paste and San Marzano II don’t. Growers working with the much longer hot stretch covered in Growing Tomatoes in Arkansas can lean on 80-plus day heirlooms without much thought. In Wyoming, treat anything past 75 days as a variety that needs your earliest transplant date and a sheltered, warm site.
| Variety | Days to maturity | Type | Notable resistance |
|---|---|---|---|
| Sakura | 55 | Indeterminate | Nematodes, TMV, Fusarium 1&2 |
| Sun Gold | 57 | Indeterminate | TMV, Fusarium 1 |
| Jasper | 60 | Indeterminate | Late blight, early blight |
| Juliet | 60 | Indeterminate | Late blight, early blight |
| Supersweet 100 | 60 | Indeterminate | Verticillium, Fusarium 1 |
| Amalfi | 68 | Determinate | Nematodes, late & early blight |
| Cherokee Purple | 72 | Indeterminate | None listed |
| Big Beef Plus | 72 | Indeterminate | Nematodes, gray leaf spot, TMV |
| Granadero | 75 | Indeterminate | Nematodes, verticillium, TMV |
| Tiren | 75 | Indeterminate | Verticillium, TMV, Fusarium 1 |
| Celebrity Plus | 78 | Determinate | Nematodes, gray leaf spot, TMV |
| San Marzano II | 78 | Indeterminate | None listed |
| Brandywine | 78 | Indeterminate | None listed |
| Amish Paste | 85 | Indeterminate | None listed |
What to plant alongside
Basil is the classic tomato companion, and while the often-repeated claim that it improves tomato flavor doesn’t hold up under any controlled test, it grows well in the same conditions and its flowers draw pollinators and predatory insects that keep aphid numbers down. Borage does something similar, and gardeners who grow it near tomatoes report fewer hornworm problems, though that particular claim is anecdotal rather than proven.
Nasturtiums earn their keep as a genuine trap crop: aphids prefer them to tomato foliage, so a border of nasturtiums pulls pest pressure away from the plants you actually want to protect. Onions and chives at the bed edge don’t compete for the same root zone as tomatoes, and there’s some evidence their scent confuses egg-laying pests hunting for a host plant. Carrots make a safe, low-competition neighbor since they root at a different depth.
Marigolds deserve a more careful claim than they usually get. The nematode-suppression effect is real in research trials, but it comes from tilling marigold roots into the soil over a full season before planting, not from tucking a few marigold starts next to your tomato transplants in the same bed. Grown as a simple companion, marigolds mostly just draw pollinators.
- Keep away: potatoes, peppers and eggplant, nightshades that share early blight, late blight and verticillium wilt with tomatoes
- Keep away: corn, which hosts the same fruitworm that attacks tomato fruit
- Keep away: fennel, which releases compounds that stunt tomato growth nearby
- Keep away: brassicas like cabbage and broccoli, heavy feeders that compete hard for nitrogen
If you rotate beds year to year, and that matters more in a state where a short season means every bed works hard, keep track of where nightshades grew the previous year and move tomatoes to different ground rather than replanting the same spot.
Watering, feeding and support
Water deeply and infrequently rather than a little every day. A deep soak encourages roots to grow down looking for moisture, which makes the whole plant more resilient during a windy, dry stretch, something Wyoming supplies more of than most states. A quick daily sprinkle keeps roots shallow near the surface, where they dry out and stress the plant every time the wind picks up.
Mulch matters twice over here. Early in the season, black plastic or a dark mulch holds the soil warmth you worked to build before transplanting. Once summer settles in, switch to or add straw or another light-colored organic mulch on top, which keeps soil moisture from swinging between soaked and bone dry and cuts down on the splash that carries soil-borne fungal spores onto lower leaves.
Feeding through the season
Work a starter fertilizer higher in phosphorus into the planting hole to support root development, then hold off on more nitrogen until the first fruit sets. Tomatoes fed heavily on nitrogen too early put their energy into leafy growth instead of flowers and fruit, and in a season as short as Wyoming’s, every week spent growing leaves instead of tomatoes is a week you don’t get back. Once fruit is setting, switch to a balanced feed every few weeks through midsummer, then stop feeding once the plant carries as much fruit as it’s likely to ripen before the season ends.
Staking, caging and pruning
Determinate varieties like Celebrity Plus and Amalfi stay compact and do fine in a sturdy cage without much pruning. Indeterminate varieties, most of the list here, keep growing and setting fruit until frost stops them, and they need a stake or a tall cage plus regular attention to suckers, the small shoots that emerge in the joint between the main stem and a branch. Pinch suckers out while they’re small and the plant puts more energy into fruit already set rather than an ever-larger tangle of foliage. Stake before the plant needs it, not after, since driving a stake through an established root system does real damage.
As fruit begins to ripen, ease off on watering slightly and keep it as consistent as you can manage. A sudden heavy watering after a dry stretch is the single most common cause of split, cracked fruit right when it’s closest to ready, so a steady rhythm through harvest matters as much as it did at transplant.
Common problems

Most tomato trouble in Wyoming traces back to the same few root causes: wind stress, uneven watering, and a season that doesn’t leave much room for a plant to recover from a slow start. Here’s what the common symptoms actually mean.
Blossom end rot
A flat, sunken, leathery patch on the bottom of the fruit, starting green-brown and darkening over time, is blossom end rot. It looks like a calcium deficiency and gardeners often reach for a calcium spray, but most garden soils have plenty of calcium already. The real cause is inconsistent watering, which interrupts the plant’s ability to move calcium up into the fruit. A steadier watering schedule and mulch fix it, not a supplement.
Cracking
Concentric rings or splits radiating from the stem end happen when a dry spell is followed by heavy watering or a hard rain, and the fruit’s flesh grows faster than its skin can stretch. Keeping soil moisture even, especially in the days right before harvest, is the main prevention.
Leaf curl and poor fruit set
Upward-curling leaves without discoloration are usually a stress response to heat, wind or drought rather than a disease, and the plant typically recovers once conditions ease. Blossoms that form but drop without setting fruit are often a temperature problem at either end: nights that stay too cool early in the season, or a hot, dry stretch later on, can both interrupt pollen viability. There’s not much to do about either beyond making sure plants aren’t also short on water, which makes both problems worse.
Wilts and soil-borne disease
A plant that wilts in the heat of the day and recovers by evening is normal. A plant that wilts and stays wilted, especially starting on one side or one branch, points toward fusarium or verticillium wilt living in the soil. There’s no cure once a plant is infected. This is the practical case for the resistance codes covered under varieties: a bed with a known wilt history does better planted with something like Tiren or Granadero, both bred with verticillium resistance, than with an heirloom that carries none.
Pests to watch for
- Hornworms: large green caterpillars that strip foliage fast, easiest to spot by the black droppings under a chewed branch
- Aphids: small soft-bodied insects clustered on new growth and leaf undersides, sticky honeydew residue is often the first sign
- Flea beetles: tiny dark beetles that leave small round shot-holes in leaves, most damaging to young transplants
- Cutworms: sever young seedlings at the soil line overnight, a cardboard collar around each stem at transplant stops them
None of these pests are unique to Wyoming. Growers in wetter, more humid states like those covered in Growing Tomatoes in Illinois deal with heavier fungal pressure because of the moisture, while Wyoming’s dry air cuts down on foliar disease. What the state trades that for is wind damage and a season too short to shrug off a slow start, so responding quickly matters more here than in a longer season.
Pests that actually show up in Wyoming
The University of Wyoming Extension catalogs thirteen pests across its home vegetable garden list in MP-24, Pests of the Home Vegetable Garden, but most of them target other crops. Cabbage worms and flea beetles favor brassicas, the Mexican bean beetle sticks to beans, root maggots go after root crops, and the sugarbeet root aphid is a table beet problem. Grasshoppers, cutworms, aphids, hornworms and the potato psyllid are the ones that actually show up on tomato plants.
Cutworms are a transplant problem, not a mature-plant problem. A seedling that was fine yesterday and is now snipped off at the soil line overnight is the classic sign, and it happens in the first few weeks after you set plants out. A cardboard collar pushed an inch into the soil around each stem stops them cold, and it costs nothing but a cereal box.
Aphids cluster on new growth and the undersides of leaves, curling and yellowing the foliage they feed on, and you’ll usually spot the sticky honeydew residue before you spot the insects themselves. A strong jet of water from the hose knocks most colonies down enough for ladybugs and lacewings to finish the job.
Hornworms do the most visible damage of any tomato pest in the garden: entire branches stripped of leaves almost overnight, with dark green droppings on the leaves below giving away where to look. They’re easiest to find at dusk or with a blacklight after dark, and handpicking is still the most reliable control once you spot the pattern.
The potato psyllid is the one gardeners miss because the insect itself is tiny and easy to overlook. It causes psyllid yellows, a yellowing and upward curling of the foliage that can look a lot like ordinary heat stress, and University of Wyoming Extension notes it typically turns up on wild host plants by mid-May before moving into gardens. Watching for the pattern early, and pulling and discarding badly affected plants before it spreads, is the only practical response home gardeners have.
Grasshoppers are more of a nuisance than a crisis for tomatoes specifically, chewing ragged holes in leaves during dry, hot stretches, but they rarely do the kind of damage that costs you the plant.
Harvest and end of season
Pick tomatoes when they’ve reached full color for the variety and give slightly under gentle pressure. Fruit left on the vine past that point doesn’t gain much flavor and just sits there vulnerable to cracking or a bird deciding it looks good. For paste varieties destined for canning, like San Marzano II or Amish Paste, picking a touch before dead ripe and finishing on a counter for a day or two makes them easier to handle without losing quality.
When the season is running out
Working from NOAA’s Cheyenne data, the last spring frost falls between May 7 and May 18, and the station’s roughly 130 frost-free days at 6,000 feet put the first fall frost, by simple arithmetic, somewhere between mid and late September for that same location. Add or subtract from that depending on your own elevation, since higher ground cuts the season further and can bring frost close to either edge of it. Watch the forecast rather than the calendar once you’re inside the last two or three weeks of the season, and keep frost cloth ready to throw over plants for a one-off cold night rather than ending the harvest early.
When a hard freeze is genuinely on the way, pick everything showing any color at all, plus full-size green fruit that’s stopped growing. Small, immature green tomatoes won’t ripen well off the vine and are better used fried or pickled than saved. Wrap the mature green ones individually in newspaper and store them in a single layer in a cool, dark spot, checking every few days for ones that have turned. Never refrigerate a tomato you want to eat fresh, since cold temperatures stop the ripening enzymes and flatten the flavor permanently, even if the fruit looks fine afterward.
Local help
Frost dates, soil types and elevation shift enough across Wyoming that a Cheyenne-based figure is only ever a starting point. The University of Wyoming Extension office for your county can give you a planting window calculated for your actual location, along with soil testing that tells you what your bed needs rather than what a general guide assumes. That’s worth doing before you sink a season’s work into a bed you’ve never tested.
Where to Go Next
Everything above comes down to timing, and Wyoming’s timing starts with the frost window. If you haven’t nailed down your dates yet, the planting calendar that counts back from your frost window walks through how to use NOAA’s Cheyenne normals of May 7 to May 18 for the last spring frost to figure out when a given variety needs to go in the ground.
Once you know your window, the next question is which tomatoes can actually finish inside it. The page on tomato varieties that ripen in time lays out options that can mature between that last spring freeze and the first fall freeze in late September or early October, so you’re not left with a plant full of green fruit when the cold comes back.
And once the plants are in and growing, you’ll want to know what’s likely to come after them. The rundown of tomato pests that actually show up in Wyoming covers the short list worth watching for over the course of the season — cutworms, flea beetles, aphids, spider mites, hornworms and blister beetles — rather than every pest that could theoretically bother a tomato plant somewhere in the country.
Common questions
Do I need a greenhouse to grow tomatoes in Wyoming?
No, but some form of season extension helps a lot. A cold frame, wall-of-water, or row cover kept on hand for cool nights can add meaningful weeks to a growing season that NOAA’s Cheyenne data already shows running on a fairly tight frost window.
Why are my tomato leaves purple on the undersides?
That’s usually a sign of phosphorus deficiency, or more often here, cold soil that prevents roots from taking up phosphorus even when it’s present. It shows up most in young transplants set into soil that hasn’t warmed enough yet, one more reason to warm beds with plastic before transplanting.
Can I grow tomatoes the same way in Jackson or Laramie as in Cheyenne?
Not exactly. The Cheyenne frost dates in this guide come from one NOAA station, and higher, more northern parts of the state run a shorter, later season with frost possible in any month at real elevation. Treat Cheyenne’s numbers as a reference point and check with your county extension office for a window calculated closer to home.
Is it too late to plant tomatoes if it’s already June?
It depends what you’re planting. A short-season variety like Sakura or Sun Gold, at 55 to 57 days to maturity, can still finish if you get a transplant in the ground early in the month, while an 80-plus day heirloom started that late is a gamble against the first fall frost.
Should I start from seed or just buy transplants?
Buying transplants is the easier route and works fine, especially for a first season, but it limits you to whatever varieties the garden center stocks. Starting from seed indoors six to eight weeks before your transplant date opens up the full range of disease-resistant and short-season varieties covered above, which matters more in a climate this tight on time.