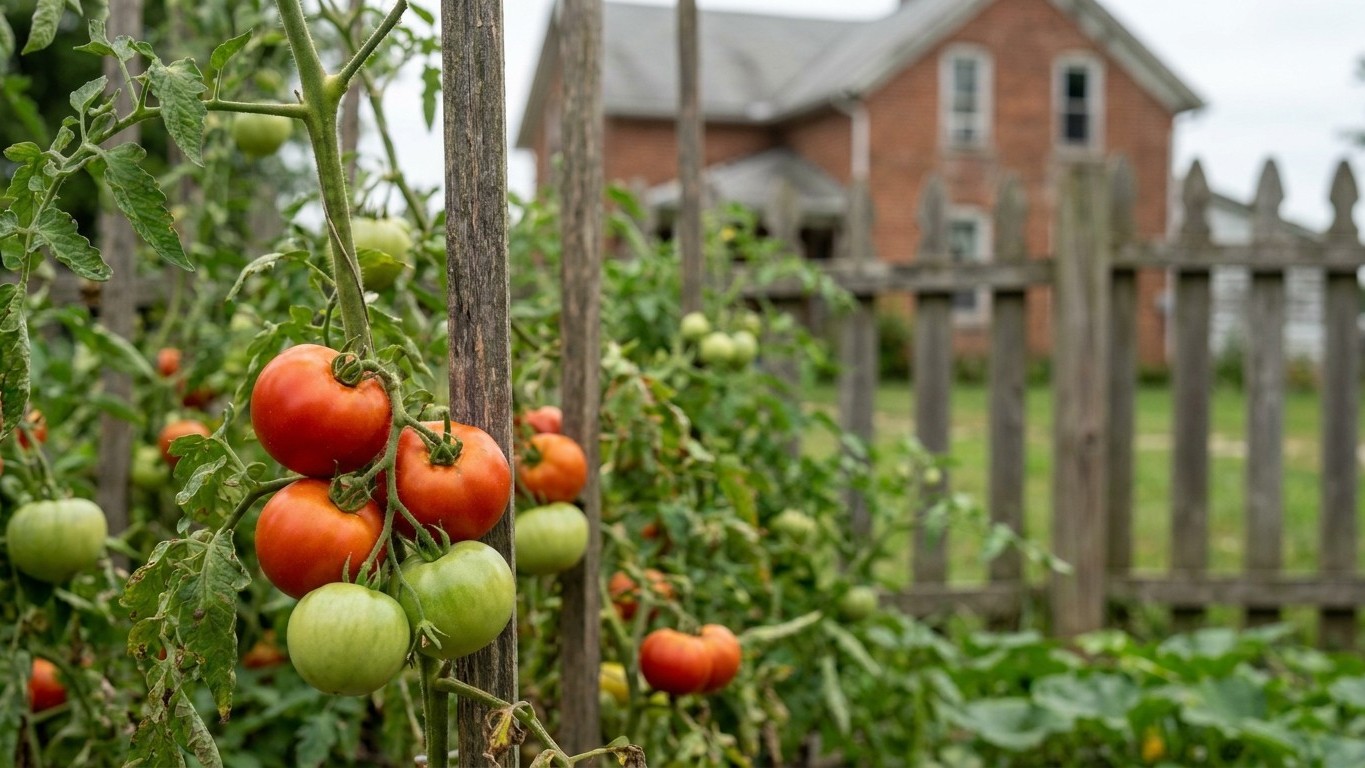

May 5 to May 15 — that’s the transplant window Columbus-area gardeners work with, and it’s the number most of central Ohio plants by. Push toward Lake Erie or up into the southeastern hills and you’re often waiting another week or two for the soil to catch up; drop down into the Ohio River valley and you may beat that date by several days. Six to eight weeks before your own safe date, seed goes in trays indoors — which for most of us means early March, trowel still nowhere in sight.
When to plant Tomatoes in Ohio

OSU Extension’s Ohio Gardening Calendar lists the last spring frost for the Columbus area, zone 6a, as falling somewhere between May 5 and May 15. That range is your transplant window for tomatoes anywhere in central Ohio. Gardeners in the Snowbelt counties along Lake Erie, in the hill country of southeastern Ohio, or anywhere at higher elevation should expect their own safe date to land later than Columbus’s, sometimes by a couple of weeks, because cold air settles differently in those landscapes. Cincinnati and the Ohio River valley, sitting lower and warmer, often see an earlier safe date than Columbus does. Treat the May 5 to May 15 window as a starting reference, not a fixed date for the whole state, and confirm your own county’s figure with OSU Extension before you commit trays of seedlings to the ground.
Starting seed indoors
Tomato seed needs six to eight weeks indoors before it is ready to go outside as a transplant. Counting back from the Columbus window, that puts indoor sowing somewhere in early March if you’re aiming for the earlier end of the transplant range, stretching toward late March or the first days of April if you’re working toward the later end. Sow seed about a quarter inch deep in a seed-starting mix, keep it warm until it germinates, then move seedlings under strong light right away so they don’t stretch and go leggy. Leggy, pale seedlings started too early are a bigger risk than starting a week late, because a stretched stem never fully recovers even after you bury part of it at transplant.
Hardening off and transplanting
About a week to ten days before your chosen transplant date, start hardening seedlings off. Set them outside in a sheltered, shaded spot for an hour or two the first day, then add outdoor time and a bit more direct sun each following day. By the end of that stretch they should sit outside all day without wilting or scorching. Transplant into the garden once you’ve reached your date inside the May 5 to May 15 window and the forecast isn’t showing anything close to freezing. Bury the stem up to the first set of true leaves. Tomatoes root readily along a buried stem, and the deeper root system that results makes for a sturdier plant later in the season.
If you want a head start without pushing your transplant date earlier than the frost window allows, warm the soil first with black plastic or a cold frame for a week or two before you plant, and keep a frost blanket on hand in case a late cold snap slips in after plants are already out. That’s worth doing in any year the forecast looks unsettled going into your transplant date, and it costs nothing to have the blanket ready even if you never use it.
Soil and site preparation
Tomatoes want a full sun spot, six to eight hours of direct light a day at minimum, and they want soil that drains well. Heavy clay that stays wet after rain is one of the most common soil problems Ohio gardeners run into with this crop, because saturated roots invite the fungal and bacterial diseases that show up later as wilts and rots. If a bed puddles for more than a few hours after a heavy rain, raise it. A mounded row or a raised bed four to six inches above grade solves most drainage problems without any other intervention.
Building the bed before you plant
Work compost or well-rotted manure into the bed in the weeks ahead of transplanting, not on the day itself. Two to three inches worked into the top eight inches of soil gives soil biology time to start breaking it down before roots arrive. If you’re working from a fall soil test, correct pH and any major nutrient gaps then too, since lime and some amendments take months to fully react with the soil. A pH close to neutral, on the slightly acidic side, is what tomatoes prefer, and a basic soil test through OSU Extension will tell you where your ground actually stands rather than leave you guessing.
Space plants generously. Indeterminate varieties, which keep growing and setting fruit until frost, need two to three feet between plants in the row with three to four feet between rows once you account for staking or caging. Determinate varieties, which grow to a set size and ripen their fruit in a shorter window, can go a little tighter. Crowding tomatoes is the single fastest way to invite foliar disease, because tight spacing keeps leaves wet longer after rain or dew and slows airflow through the planting. If you’re short on space, favor fewer plants set properly apart over more plants jammed close together, since a crowded planting yields less clean fruit than a well-spaced one with half as many plants.
Varieties that suit Ohio
The trait that matters most for an Ohio garden is days to maturity measured against that May transplant window, because it tells you how much of the summer a variety needs before it starts ripening. A 55-day cherry tomato and an 85-day paste tomato both work in central Ohio, but they ripen at very different points in the season, and disease resistance matters more as summer wears on and the air stays humid, which is when foliar diseases build up on the plant.
Short-season and reliable producers
For the earliest fruit, look at the short cherry types. Sakura (55 days from transplant) is one of the fastest to ripen and carries intermediate resistance to nematodes plus high resistance to Tomato Mosaic Virus and both races 1 and 2 of Fusarium Wilt. Sun Gold (57 days) ripens nearly as fast and resists Tobacco Mosaic Virus and Fusarium race 1, both at a high level. Supersweet 100 (60 days) and Juliet (60 days) round out the early group, the first a cherry with high resistance to Verticillium Wilt and Fusarium race 1, the second a grape-type paste tomato with intermediate resistance to both late blight and early blight, the two fungal diseases that do the most damage in a wet Ohio summer.
Main-season slicers and paste tomatoes
Jasper (60 days) carries high resistance to late blight and intermediate resistance to early blight. Celebrity Plus (78 days) and Big Beef Plus (72 days) are disease-resistant slicers, each carrying intermediate nematode resistance plus high resistance to Gray Leaf Spot and Tomato Mosaic Virus. For sauce and paste, Amalfi (68 days) brings intermediate resistance to late blight, early blight and nematodes together in one plant, while Granadero (75 days) and Tiren (75 days) both carry high resistance to Verticillium Wilt and Tomato Mosaic Virus. San Marzano II (78 days) and Amish Paste (85 days) carry no listed disease resistance, so give them your best-drained, best-spaced ground. Heirlooms like Cherokee Purple (72 days) and Brandywine (78 days) also carry no listed resistance and reward extra mulch and airflow. Counting from a May 5 to May 15 transplant date, a 60-day variety starts ripening roughly the first two weeks of July, while an 85-day variety like Amish Paste is closer to late July or early August, so mixing short and long varieties spreads the harvest out instead of dumping it all at once.
Gardeners working with a shorter frost-free season altogether, further north and west, deal with a tighter version of this same math. Our guide to growing tomatoes in South Dakota walks through picking varieties when the whole season runs several weeks shorter than it does around Columbus.
| Variety | Days to maturity | Type | Notable resistance |
|---|---|---|---|
| Sakura | 55 | Cherry, indeterminate | Nematodes (Int.), ToMV (High), Fusarium 1&2 (High) |
| Sun Gold | 57 | Cherry, indeterminate | TMV (High), Fusarium 1 (High) |
| Jasper | 60 | Cherry, indeterminate | Late blight (High), Early blight (Int.) |
| Celebrity Plus | 78 | Slicer, determinate | Nematodes (Int.), Gray Leaf Spot (High), ToMV (High) |
| Amalfi | 68 | Paste, determinate | Nematodes, Late blight, Early blight (all Int.) |
| Amish Paste | 85 | Paste, indeterminate | None listed |
What to plant alongside
Basil is the classic tomato companion, and while the old claim that it improves flavor has no real evidence behind it, it does the practical job of filling the ground between plants with something low and useful rather than bare soil or weeds. Borage draws in pollinators and predatory insects that help with early aphid pressure, and it self-seeds readily once established in a bed. Marigolds, the French type specifically, have real research behind them for suppressing root-knot nematodes in the soil right around their roots, worth using if you’ve had nematode trouble in a bed before, though the effect stays local to the root zone and won’t protect a whole planting from a stray infested transplant.
What to keep away from tomatoes
Skip planting tomatoes near potatoes, peppers and eggplant, the other common nightshades. They all share susceptibility to the same soil-borne wilts and to late blight, so planting them close together just gives disease two ways to spread through the same patch instead of one. Corn and tomatoes are also a bad pairing, not because they compete for nutrients so much as because the tomato fruitworm and the corn earworm are the same insect, and a corn patch next door gives it somewhere to build up numbers before it moves over to your tomatoes. Fennel is worth avoiding outright. It releases compounds into the soil that measurably stunt the growth of a lot of garden vegetables, tomatoes included, and it’s one of the few companion-planting warnings with solid research behind it rather than just tradition.
Cabbage family crops aren’t harmful to tomatoes directly, but they compete hard for the same nitrogen in the weeks right after transplant, and both prefer cooler conditions than an Ohio July delivers, so they’re better used elsewhere in the rotation. Treat most companion planting advice as a minor assist, not a substitute for spacing, airflow and a disease-resistant variety, which do far more to determine how the season goes than what’s planted in the next row over.
Watering, feeding and support
Water deeply and less often rather than a little every day. Push a finger two inches into the soil near the root zone: if it’s dry at that depth, water; if it’s still damp, wait. Shallow, frequent watering trains roots to stay near the surface, where they dry out faster and take up calcium less reliably, one of the paths to blossom end rot later on. A soaker hose or drip line at the base of the plant keeps water off the foliage, which matters more in Ohio’s humid summers than it would in a drier climate, since wet leaves are what let fungal disease get started and spread through a planting.
Mulch and feeding
Mulch as soon as the soil has warmed after transplanting, with straw, shredded leaves or grass clippings laid two to three inches deep. Mulch holds soil moisture steady between waterings, keeps weeds down, and stops soil from splashing onto the lower leaves in a hard rain, which is one of the main ways early blight spores reach the plant in the first place. Feed with a balanced fertilizer at transplant, then switch to something lower in nitrogen and higher in phosphorus and potassium once the first flowers open. Too much nitrogen after fruit set gives you a huge, dark green plant with hardly any fruit, because the plant keeps investing in leaves instead of setting and ripening tomatoes.
Staking, caging and pruning
Indeterminate varieties, Sun Gold and Cherokee Purple among them, keep growing all season and need real support: a sturdy stake driven at planting time, a cattle-panel trellis, or a heavy-gauge cage, not the flimsy wire cones sold for the purpose. Determinate varieties like Celebrity Plus and Amalfi grow to a fixed size and usually get by with a standard cage. Suckering, pinching out the small shoots that grow in the joint between the main stem and a branch, is worth doing on indeterminate varieties if you’re staking to a single or double stem, since it keeps the plant open enough for air to move through and light to reach the fruit. Skip suckering on caged plants. A caged plant relies on that extra foliage to shade fruit from sunscald, and pruning it hard just exposes tomatoes to more heat and less protection than they need.
Common problems

Blossom end rot shows up as a flat, sunken, leathery brown or black patch on the bottom of the fruit, usually while it’s still green or just turning. It’s caused by a calcium shortage inside the fruit itself, which is almost always a watering problem rather than a soil problem: calcium moves through the plant with water, and inconsistent watering, a dry week followed by a soaking, interrupts that movement even when there’s plenty of calcium in the soil. Even watering is the fix, not a calcium spray or crushed eggshells worked into the planting hole, which do little to change the actual cause.
Cracking, curling and poor fruit set
Cracking, radial or concentric splits running out from the stem end, comes from the same inconsistent watering pattern, usually a heavy rain after a dry stretch that swells fruit faster than the skin can stretch. Mulch and steady watering reduce it. Leaf curl on its own, with leaves rolling upward but staying otherwise healthy and green, is usually just heat stress and doesn’t need treatment. Leaf curl paired with yellowing, mottling or stunted new growth is worth a closer look, since that combination points toward a virus rather than simple heat stress. Poor fruit set, flowers dropping without forming fruit, is most often a temperature problem: tomato pollen doesn’t set well once night temperatures run consistently warm, or during a cold snap early in the season, and it usually resolves on its own once conditions moderate.
Wilts and pests
Fusarium and Verticillium wilt both cause yellowing and wilting that often starts on one side of the plant or one branch at a time, working its way up. Both live in the soil for years, which is why a variety with resistance bred in, like Sakura or Tiren against Fusarium, or Supersweet 100 and Granadero against Verticillium, is worth choosing if you’ve had either problem in that bed before. There’s no cure once a plant is infected. Pull it and don’t compost it.
- Tomato hornworms: thick green caterpillars several inches long, stripping leaves fast. Hand-pick them off in the evening.
- Aphids: small, soft-bodied insects clustered on new growth and the undersides of leaves. A strong water spray or insecticidal soap usually handles a light infestation.
- Flea beetles: tiny, dark, jumping beetles that leave small round holes in leaves, mostly a problem on young transplants.
- Stink bugs: shield-shaped insects that cause pale, cloudy spots on ripening fruit.
Fungal disease pressure builds fastest during a warm, humid stretch with wet foliage, which is why states with longer, more humid growing seasons see it even worse than Ohio does. Our guide to growing tomatoes in Tennessee covers a climate where that pressure runs even higher across a longer season.
Pests that actually show up in Ohio
Ohio State University Extension keeps a running list of vegetable garden pests across the state (Ohioline fact sheets ENT-65, ENT-0106 and ENT-0108), and not everything on it bothers a tomato plant. Squash vine borer and the striped and spotted cucumber beetles are squash, melon and cucumber pests, not tomato ones, so if you spot them in a mixed garden, look to your vine crops rather than your tomato bed.
The pests that do show up on tomatoes start with cutworms, which cut a young transplant clean through at the soil line, usually within the first couple of weeks after planting. A cardboard or foil collar pushed an inch into the soil around each stem stops them cold. Japanese beetles arrive later, chewing leaves down to a lace of veins between late June and early fall according to Ohioline’s seasonal window for the species. Handpicking into soapy water works on a small planting, since the beetles are slow and easy to knock off in early morning.
Aphids cluster on new growth and the undersides of leaves, leaving them curled and sticky with honeydew. A strong jet of water knocks most of a colony off, and that’s usually enough before reaching for anything stronger. Twospotted spider mite is a hot-weather problem, worst during summer heat, and shows up first as fine yellow stippling on leaves rather than any visible insect. Mites thrive in dry, dusty conditions, so keeping plants watered and hosing down foliage during a heat stretch keeps populations from building.
Fourlined plant bug and tarnished plant bug both feed on foliage in late spring and early summer, leaving small sunken or discolored spots where they’ve punctured leaf tissue. Damage looks worse than it is on an established plant and rarely needs more than removing the worst leaves. Slugs and snails become a problem in wet springs and falls, rasping holes in leaves and going after fruit that sits against damp soil, so mulch that keeps fruit off the ground and a beer trap or iron phosphate bait handle them. European earwigs feed at night on seedlings and soft ripening fruit, and are worth checking for with a flashlight after dark if you find ragged holes with no insect in sight come morning.
Harvest and end of season
Pick tomatoes once they’ve reached full color for the variety, whether that’s the deep red of Big Beef Plus, the dusky near-black red of Cherokee Purple, or the orange-gold of Sun Gold, and they give slightly under gentle pressure. Fruit picked at the breaker stage, when just a blush of color has started, will finish ripening at room temperature on a counter with nearly the same flavor as fruit left on the vine, so there’s little reason to leave fruit hanging once it’s started to turn if a hard rain or a pest is a bigger risk than a day or two of extra ripening time.
As frost approaches
Ohio’s fall frost date isn’t a single figure for the whole state any more than the spring one is, and OSU Extension’s county-level pages are the place to check when it typically arrives where you garden. Once nights start dropping and a frost warning shows up in the forecast, pick everything on the vine showing any color at all, since fruit that never started turning won’t ripen off the vine with much real flavor. Fruit that’s fully green with no blush is best used for fried green tomatoes or relish rather than held for ripening, because it lacks the ethylene the plant would otherwise have supplied to finish the job.
Whole plants pulled ahead of a hard frost can be hung upside down in a garage or basement, and fruit still attached will often continue ripening slowly over several weeks. Store ripe fruit at room temperature out of direct sun, not in the refrigerator, since cold temperatures break down the compounds responsible for tomato flavor and turn the texture mealy. Green tomatoes held for later ripening keep best wrapped individually in newspaper in a single layer, checked every few days for any starting to turn or rot.
Local help
For county-level frost dates, soil testing and diagnosing anything that shows up on your particular plants, contact OSU Extension through extension.osu.edu, which runs an office in every Ohio county. A local soil test is worth the small fee before you amend a new bed, since it tells you exactly what your ground needs instead of guessing from a bag’s label. For other crops that share Ohio’s frost windows and soil quirks, browse our Ohio guides.
Where to Go Next
Everything above is the overview, but each piece of it gets its own deeper page. If you want to know exactly when to get plants in the ground, start with the tomato planting calendar, which counts backward from Columbus’s frost window instead of just naming a date and hoping it holds. That same frost window matters again when you’re choosing what to plant, since not every variety has time to ripen before fall — the guide to varieties that ripen in time walks through which ones actually finish in a Zone 6a season like Ohio’s. And once plants are in and growing, the question turns to what’s eating them: the rundown of tomato pests in Ohio covers the seven insects responsible for nearly all the damage reported around the state, matched against that same OSU Extension frost window. Read them in whatever order fits where you are right now — deciding when to plant, deciding what to plant, or already out in the garden trying to figure out what’s chewing on your leaves.
Common questions
Can I plant tomatoes before the last frost date if I cover them?
A frost blanket or cloche buys you a few degrees of protection, not immunity from a hard freeze. It can help you push a few days earlier than the safe window OSU Extension lists for your area, but it’s not a substitute for waiting out a real cold snap, and a plant knocked back by frost damage rarely catches up to one planted on schedule.
Is it too late to plant tomatoes in June?
Not necessarily, especially with a short-season variety. Sakura at 55 days or Sun Gold at 57 days can still ripen fruit from a June transplant in most of Ohio, though you’ll want to keep an eye on your county’s fall frost timing through OSU Extension to make sure there’s enough season left.
Why do my tomato leaves curl in the heat even though the plant looks otherwise fine?
That’s usually just physiological leaf roll, the plant’s response to heat and bright sun, and it isn’t a disease. It only becomes a concern if the curling shows up alongside yellowing, mottled color or stunted new growth, which points toward a virus instead.
Do I need to rotate where I plant tomatoes each year?
Yes, and rotating with peppers or eggplant doesn’t count, since all three share the same soil-borne wilts. Move tomatoes to ground that hasn’t grown any nightshade crop for at least a couple of years if you have the space to do it, longer if you’ve had a wilt problem before.
Can I grow tomatoes in a container on a patio in Ohio?
Yes, and the same May 5 to May 15 transplant guidance from OSU Extension still applies, since container plants are just as vulnerable to a late frost as ones in the ground. Pick a determinate or compact variety for a container, use at least a five-gallon pot for anything beyond a small cherry type, and expect to water more often than you would with an in-ground planting, since containers dry out faster.