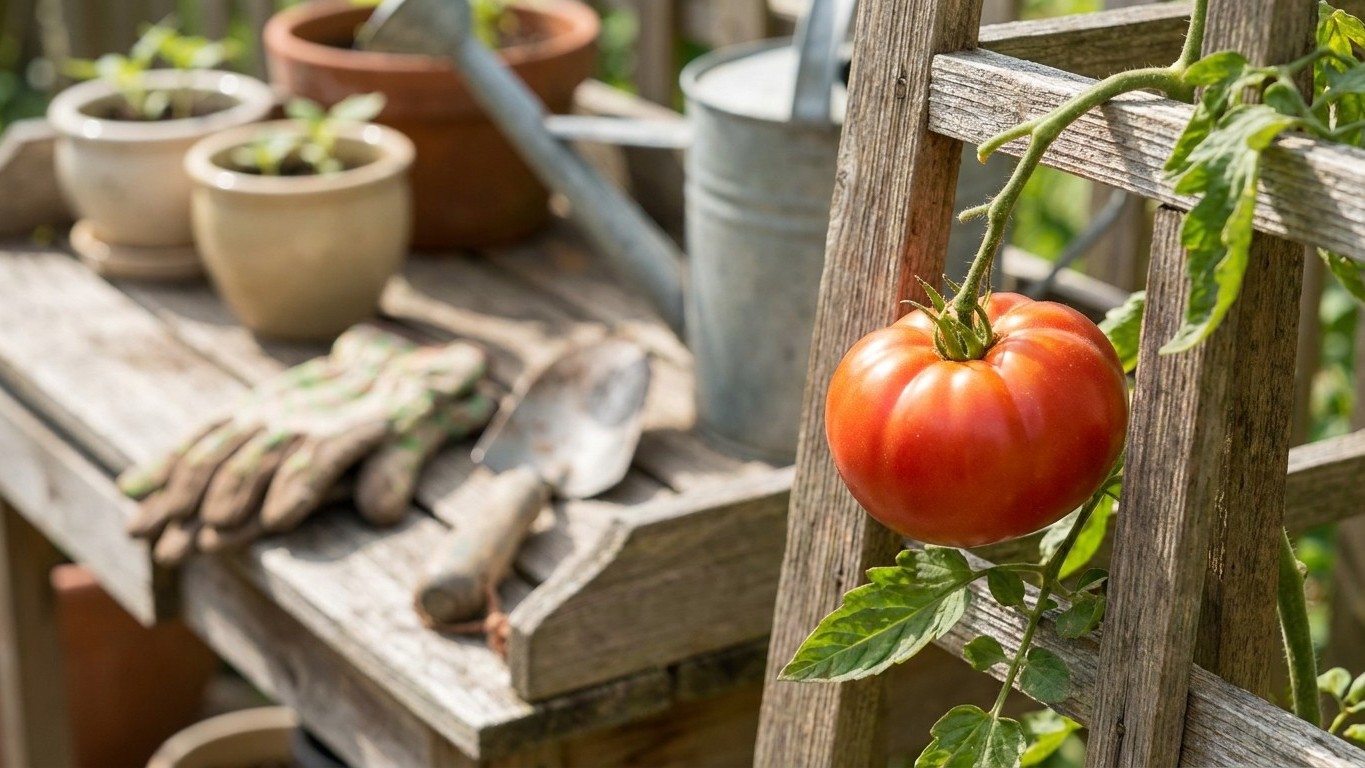

Tomatoes go into the ground once the danger of frost has passed, nighttime temperatures hold consistently above the mid-50s Fahrenheit, and the soil itself has warmed, not just the air above it. Cold soil stalls root growth even in a plant that looks perfectly healthy on top. Check your state extension service’s average last spring frost date for your area, then work backward from it to fix your own seed-starting and transplanting window.
When tomatoes go in the ground
Tomatoes are a warm-season crop from a warm-climate ancestor, and every part of how you time them traces back to that fact. A late frost will kill a transplant outright, but even a frost-free night that’s merely cool does damage you won’t see for days: chilled roots stop taking up water and nutrients, growth stalls, and the plant sits sulking in the ground for a week or two after you were sure it was safe to plant. The real threshold isn’t the frost date, it’s sustained warmth, in the soil as much as the air.
Soil temperature lags behind air temperature by days or weeks depending on how exposed the bed is and whether it’s covered in mulch or black plastic. A gardener who plants the moment the frost risk passes, going by a calendar date alone, is often planting into soil that’s still too cold for a tomato root to do much of anything. Waiting for consistently mild nights, not just a frost-free forecast, is the more reliable signal.
Working backward from your last frost date
Once you know your area’s average last spring frost date, from your state extension service or from NOAA’s climate normals, you can set a seed-starting window by counting back from it. Most tomato varieties need something in the range of six to eight weeks indoors before they’re ready to go outside, so a grower who knows their frost date can count backward on a calendar and land on a starting window without needing anyone else to tell them the day.
That frost date is a local figure, and it varies enormously even within a single state, let alone across the country. A last-frost date calculated for one city can be off by weeks for a location a few hundred miles away, at a different elevation, or near a large body of water. Don’t borrow a date from a gardening forum or a national seed packet chart, use the figure your own state extension service publishes for your specific region, and treat it as an average rather than a guarantee: a late frost after the average date is common enough that most experienced gardeners keep some row cover on hand just in case.
Choosing what to grow
The first decision that actually matters is determinate versus indeterminate, because it changes how you stake the plant, how you prune it, and when you’ll be picking. Determinate varieties grow to a fixed, compact size, set most of their fruit in a short window, and then taper off. Indeterminate varieties keep growing, flowering, and fruiting until frost or disease stops them, often reaching several feet taller than a determinate plant and needing sturdier, taller support.
Days to maturity is the number that decides whether a variety will actually finish in your season, and it’s counted from the transplant date, not from seed. A packet reading “75 days” means roughly 75 days from the day you set that seedling in the ground, and catalog figures shift by a week or two depending on how warm and sunny the season runs. Compare that number against your area’s frost-free growing season length, which your state extension service publishes, to see whether a given variety has enough time to ripen a real crop before fall frost ends things.
Disease-resistance codes on a plant tag or seed packet, letters like V, F, N, T, and A, tell you which named diseases that specific cultivar has been bred to resist: Verticillium wilt, Fusarium wilt, nematodes, Tobacco Mosaic Virus, and Alternaria, respectively. A tag reading “VFN” resists all three of the first ones. These codes are the same everywhere; they’re a property of the cultivar, not the location, so they’re worth reading closely when a garden has a known disease history.
Cherry, paste, and slicing types
Cherry tomatoes, such as ‘Sun Gold’ (about 57 days, indeterminate), are bred for sugar and yield rather than size, and they tend to keep producing heavily even under stress that would stop a larger-fruited variety. Paste tomatoes, such as ‘San Marzano‘ (around 80 days, indeterminate) or ‘Amish Paste‘ (80 to 85 days, indeterminate), carry less water and more flesh, which is what makes them the right choice for sauce and canning rather than fresh eating. Slicing tomatoes, the kind meant for a sandwich, include determinate types like ‘Celebrity‘ (about 70 days, resistant to Verticillium, Fusarium, nematodes, Tobacco Mosaic Virus, and Alternaria) and indeterminate heirlooms like ‘Cherokee Purple‘ (80 to 90 days). A dedicated guide to tomato varieties goes further into matching specific cultivars to a short or long growing season.
Starting from seed
Most home gardeners start tomatoes indoors rather than sowing them directly outside, because the seedling stage needs weeks of warmth and stable conditions that an outdoor bed can’t reliably offer that early in the year. Starting indoors also lets you begin the plant’s clock before your soil and air outside are actually warm enough for it to survive.
Germination wants warmth, and a seedling heat mat set under the trays speeds it along and evens it out. Once the seed has actually sprouted, though, the plant’s real need flips: light matters far more than heat from that point on. A windowsill rarely provides enough of it, which is why seedlings grown on one so often end up pale, thin, and leaning hard toward the glass. A grow light run close to the top of the seedlings for most of the day produces a shorter, stockier, darker-green plant.
Potting on and hardening off
As roots fill the starting cell, seedlings need moving into a larger pot at least once before they go outside, giving the root system room to keep developing rather than circling and stunting itself. Skipping this step is a common reason seedlings look stalled in the weeks before transplant even when the light and water are right.
Hardening off is the last stage: over a week or more, seedlings go outside for a little longer each day, starting in a sheltered, shaded spot and working up to full sun and wind, so the plant builds the thicker cuticle and stronger stem it needs to survive outdoors. A seedling moved straight from an indoor windowsill to open garden sun can scorch or snap in a single afternoon.
The two failure modes worth naming outright are leggy growth, a tall, thin, weak-stemmed seedling caused by too little light, and starting too early, which leaves you babying an oversized, rootbound plant indoors for weeks longer than it should ever have to wait. A dedicated guide to starting tomatoes from seed, and another on growing seedlings indoors, cover the light setup, timing, and airflow in more detail.
Preparing the ground
Tomatoes are more forgiving about soil texture than about drainage. A tomato root sitting in waterlogged soil suffocates and rots regardless of how fertile that soil is, so a bed that puddles and stays wet after rain needs correcting, with raised beds or added organic matter, before anything else about the soil matters.
Beyond drainage, tomatoes want a slightly acidic soil pH and a generous helping of organic matter worked in ahead of planting. Compost improves structure in both directions: it opens up heavy clay and helps sandy soil hold water and nutrients longer. A soil test is the only way to know your actual pH and nutrient levels rather than guessing, and most state extension services offer inexpensive testing that comes back with specific amendment recommendations for your soil.
Rotation and what to add before planting
Tomatoes belong to the nightshade family, along with peppers, eggplant, and potatoes, and all of them are vulnerable to some of the same soilborne diseases. Planting tomatoes in the same spot, or where any of those relatives grew the previous year, lets those pathogens build up in the soil year over year. Rotating tomatoes to a different bed each season, ideally on a multi-year cycle, is one of the simplest disease-prevention steps available and costs nothing but planning.
Amendments belong in the soil before planting, not scattered on top afterward. Compost, aged manure, and any pH-correcting material like lime or sulfur need time worked into the root zone to actually change conditions where roots will grow, and digging them in after the plant is established disturbs roots without giving the amendment anywhere useful to go. A dedicated guide to soil preparation for tomatoes covers pH targets and amendment rates in more depth.
Planting out

Tomatoes are one of the few vegetables that root along a buried stem, which is why planting deep, or in a trench, works specifically for this crop in a way it wouldn’t for most others. Small hair-like structures on the stem, called adventitious root primordia, turn into real roots once buried, so a seedling planted with two-thirds of its stem underground develops a much larger root system than one planted at the same depth it grew in its pot.
Where the soil is too shallow or rocky for a straight-down deep hole, a trench works just as well: lay the seedling on its side in a shallow trench with the top few sets of leaves bent gently upward out of the soil, and the buried stem still roots exactly the same way once covered.
Spacing and the first two weeks
Crowding tomatoes costs more than it seems to at first. Plants set too close together compete for light and shade each other’s lower leaves, which slows airflow and keeps foliage wet for longer after rain or dew, the exact conditions fungal disease needs. Indeterminate varieties, which grow larger and need more room to be staked and pruned, generally need more space between plants than compact determinate types.
Water thoroughly right after planting to settle soil around the roots and remove air pockets, then keep the bed evenly moist, not soaked, for the first two weeks while the root system establishes. This is the period when transplant shock shows itself as wilting or yellowing lower leaves, and consistent moisture, rather than any feeding, is what gets a new transplant through it. A dedicated guide to planting tomatoes covers exact depth and spacing figures by variety.
Support

Every tomato plant benefits from some form of support, but which kind depends on how the plant grows. Determinate varieties, which stay compact and produce most of their fruit in one window, generally do fine in a sturdy cage. Indeterminate varieties, which keep growing taller all season, need a stake tall enough or a cage strong enough to handle several feet of vine and a heavy fruit load without toppling.
Stakes

A single stake driven in beside the plant and tied at intervals as the plant grows is the simplest option, and it works well for a plant that’s being pruned to one or two main stems. It takes up little space, which matters in a tight garden, but it also means more regular tying and more pruning to keep the plant to a manageable single stem.
Cages

A cage lets a plant branch more freely, since the foliage is simply held up and in rather than tied to one point. Cages suit determinate varieties especially well because those plants stop growing at a predictable, manageable size. For a large indeterminate plant, an undersized wire cage from a garden center often isn’t strong enough and topples once the plant fills out and fruits.
The Florida weave

The Florida weave, common in rows of plants grown for market, uses stakes driven at intervals along the row with twine woven horizontally between them at increasing heights as the plants grow. It’s fast to set up and manages a whole row without individually tying every plant, and it works for both determinate and indeterminate types grown in rows rather than as single specimens.
Whichever method you choose, the decisive point is installing it at planting time, not weeks later once the plant has sprawled and rooted where it fell. Driving a stake or dropping a cage over an already-large plant risks damaging the roots and stems you’re trying to support. A dedicated guide to staking and caging tomatoes walks through installation for each method.
Pruning and training
A sucker is the small shoot that grows in the crook between the main stem and a leaf branch, and left alone it grows into a full new stem with its own leaves and fruit. Removing suckers on an indeterminate variety trained to one or two main stems concentrates the plant’s energy into fewer, often larger fruit, and it keeps the plant narrower and easier to support on a stake. On a determinate variety, though, removing suckers costs yield rather than improving it, since determinate plants set most of their crop on the growth those suckers would have produced.
Removing the lowest leaves, the ones closest to the soil, improves airflow around the base of the plant and gets foliage away from soil splash, which is one of the main ways fungal spores move from the ground onto leaves in the first place. This is worth doing on any tomato plant regardless of type, usually once the plant is established and has outgrown its lowest few leaves.
Topping and what not to cut
Topping, cutting off the growing tip of an indeterminate plant, makes sense late in the season when there’s no longer enough time left before frost for new flowers to mature into ripe fruit. Removing the tip redirects the plant’s energy into ripening what’s already set rather than continuing to produce flowers that will never finish.
What not to cut matters just as much as what to remove: flower clusters, any stem currently setting fruit, and healthy upper foliage should be left alone. Over-pruning a tomato plant strips away the leaves that are actually feeding the fruit through photosynthesis, and a plant pruned too hard often produces less, not more, along with fruit more prone to sunscald from sudden overexposure. A dedicated guide to pruning tomato plants covers sucker removal and timing variety by variety.
Water and mulch
Tomatoes do better on deep, infrequent watering than on frequent light sprinkling, and the reason comes down to roots. Shallow, frequent watering trains roots to stay near the surface, where they dry out fast and the plant becomes more dependent on the next watering. A deep soak, less often, encourages roots to grow downward into moisture reserves that stay available longer between waterings, giving the plant more resilience during a hot stretch.
Consistency is the single biggest lever on fruit quality that a home gardener actually controls. Tomatoes that go from very dry to suddenly soaked, after a heavy rain or an overdue watering, take up water fast and the fruit swells faster than the skin can stretch, which is the direct mechanical cause of cracking and splitting. Even moisture levels through the season prevent that swing far more reliably than any product or spray applied after the fact.
Why mulch and timing matter
Mulch is what actually makes that consistency achievable without constant attention. A layer of straw, shredded leaves, or landscape fabric over the root zone slows evaporation, keeps soil temperature more even, and suppresses the weeds that would otherwise compete for the same water. Mulch also blocks the soil splash that carries fungal spores onto lower leaves during rain, which makes it a disease-prevention step as much as a watering one.
Watering at the base of the plant, rather than overhead, keeps foliage dry, since wet leaves left standing overnight are exactly what fungal diseases need to take hold. Morning watering is preferable to evening for the same reason: it gives any incidental splash on the foliage a full day to dry before nightfall, rather than sitting damp through the cool, humid overnight hours. A dedicated guide to watering tomatoes and another on mulching cover material choices and depth in more detail.
Feeding
A tomato plant’s nutrient needs change as it moves from vegetative growth into flowering and fruiting, and feeding the same way all season is one of the most common mistakes home growers make. Early on, while the plant is building leaves and stems, nitrogen supports that growth. Once flowering starts, though, the plant’s priorities shift toward phosphorus and potassium, the nutrients that support flower formation, fruit set, and fruit development, rather than more leafy growth.
The classic mistake is continuing a high-nitrogen feeding program right through flowering and fruiting. A tomato plant given too much nitrogen too late produces exactly what you fed it: lush, dark green, vigorous foliage, often at the direct expense of flowers and fruit. Growers who describe a plant that “looks amazing but won’t set tomatoes” have very often been feeding it a lawn fertilizer or an all-purpose blend well past the point where it should have switched to something lower in nitrogen and higher in phosphorus and potassium.
Calcium and the rest
Calcium deserves separate mention because a shortfall shows up as a fruit problem, blossom end rot, rather than a leaf problem, and it’s covered in more detail further down this guide. In most garden soils, calcium is present in adequate amounts already, and the more common cause of a calcium-related symptom is inconsistent watering interfering with how the plant moves calcium to the fruit, not an actual shortage in the ground. A soil test settles the question of whether your soil is actually calcium-deficient rather than guessing. A dedicated guide to feeding tomatoes breaks down a full-season fertilizing schedule.
What to plant alongside
Some companion planting claims for tomatoes have a real mechanism behind them, and some are garden folklore repeated without evidence. It’s worth knowing which is which before building a planting plan around a pairing that doesn’t actually do anything.
Basil and other low, bushy herbs planted at the base of a tomato plant provide some ground shading that helps retain soil moisture, and they draw in pollinators when flowering, which benefits a plant that depends on insect activity for good fruit set. Borage is another pollinator draw worth naming for the same reason. Marigolds have a genuine, researched mechanism against certain root-knot nematodes when grown as a rotation crop or interplanted over a season, though the effect is a soil-biology one, not the plant “repelling” pests by scent as often claimed.
What to avoid, and what’s unproven
Corn, potatoes, and other nightshades compete with tomatoes for the same soil nutrients and, in the case of potatoes, share several of the same fungal and bacterial diseases, which makes planting them side by side a way to spread problems rather than prevent them. Fennel is worth avoiding near tomatoes as well, since it’s known to inhibit the growth of many neighboring plants through compounds it releases into the soil.
The claim that basil improves tomato flavor by growing next to it has no real evidence behind it beyond garden tradition, pleasant as the idea is. The same goes for most “trap cropping” claims made for tomatoes specifically, planting a sacrificial crop to lure pests away, which work better in some vegetable systems than others and haven’t been well demonstrated for the pests that trouble tomatoes most. A dedicated guide to tomato companion planting sorts the researched pairings from the folklore in more detail.
Growing without a garden
Tomatoes grow well in containers, but the pot itself becomes the limiting factor in a way garden soil never is. Pot volume determines how much root the plant can grow, how much water the soil can hold between waterings, and ultimately how much fruit the plant can support. A container that’s too small for the variety planted in it produces a stunted, stressed plant no matter how well it’s watered and fed.
Garden soil doesn’t belong in a container. It compacts hard once confined, drains poorly, and often carries weed seeds and soilborne disease into what should be a clean growing space. A bagged potting mix, formulated to stay light and well-drained under those confined conditions, is the right growing medium for any container planting.
Watering rhythm and variety choice
Container-grown tomatoes dry out far faster than the same plant would in open ground, since the limited soil volume holds much less reserve water and the container walls expose that soil to more heat and airflow. A container that needs watering every few days in a garden bed may need it daily, sometimes more than once a day during a hot stretch, once it’s confined to a pot.
Compact determinate and dwarf varieties suit containers far better than a sprawling indeterminate type. Cultivars bred specifically for pots, such as ‘Patio Choice Yellow’ (about 50 days, determinate cherry), ‘Better Bush’ (around 68 days, compact determinate), and ‘Tiny Tim’ (45 to 55 days, dwarf), stay small enough for a container’s limited root run while still producing a real harvest. A dedicated guide to growing tomatoes in containers covers pot sizing and potting mix choices by variety.
Pests and diseases

The first and most useful diagnostic step is figuring out which of three categories a problem falls into: an insect doing visible damage, a fungal or bacterial disease spreading through tissue, or a physiological disorder caused by watering, temperature, or nutrition rather than any living pest or pathogen. That distinction decides everything that follows, since a fungicide does nothing for an insect problem, an insecticide does nothing for a fungal one, and neither does anything for a disorder caused by uneven watering.
Telling them apart
Insect damage usually shows as chewed leaf edges, holes, visible insects or eggs on the underside of leaves, or a sticky residue left by sap-feeding pests. Fungal and bacterial disease more often shows as spots, lesions, or discoloration that spreads across a leaf or stem over days, sometimes with a fuzzy or powdery texture at the site. A physiological disorder tends to show up as a fruit-specific problem, a sunken patch, a crack, a color that never develops, without any insect or spreading lesion in sight.
The pests most home gardeners meet are the tomato hornworm, a large green caterpillar that strips foliage fast enough to notice overnight, aphids, small soft-bodied insects that cluster on new growth and stems, whiteflies, tiny white insects that scatter in a cloud when a leaf is disturbed, and stink bugs, shield-shaped insects that damage fruit directly. On the disease side, early blight, late blight, and several wilts and leaf spots are the ones that show up most often and do the most damage once established.
- Tomato hornworm: large green caterpillar, visible chewing damage, hand-picking is often enough
- Aphids: small clusters on new growth, often controlled by natural predators or a strong water spray
- Whiteflies: tiny white insects on leaf undersides, scatter when disturbed
- Stink bugs: shield-shaped, damage shows as pale or discolored spots on the fruit itself
- Early and late blight: leaf spots and lesions that spread with wet, humid conditions
Prevention does more work than any spray applied after symptoms appear. Good airflow between plants, mulch that blocks soil splash, rotating tomatoes away from last year’s nightshade bed, and watering at the base rather than overhead all reduce the conditions fungal and bacterial disease need to establish in the first place. A dedicated guide to tomato pests and another to tomato diseases go through identification and treatment for each one individually.
When something looks wrong
Most of the symptoms a tomato plant shows aren’t disease at all. They’re the plant’s direct response to water, heat, or nutrient swings, and most of them are preventable once you know which condition is actually causing them.
Blossom end rot

A dark, sunken, leathery patch on the bottom of the fruit is caused by a localized calcium shortage at the fruit itself, and in most gardens the real cause is inconsistent watering, not a lack of calcium in the soil. Uneven moisture interrupts the plant’s ability to move calcium to developing fruit even when the soil has plenty of it. A dedicated guide to blossom end rot covers the watering fix in detail.
Cracked tomatoes

Splits in the skin, either circling the stem end or running radially down the fruit, happen when the fruit takes up water faster than the skin can stretch to accommodate it, typically after a heavy rain following a dry stretch. Even soil moisture through the season is the fix. A dedicated guide to cracked tomatoes covers irrigation timing that prevents it.
Fruit that won’t ripen
Tomato ripening slows dramatically or stalls entirely above a certain heat threshold, since the plant’s ripening pigments don’t form well in extreme heat regardless of how mature the fruit is. Toward the end of the season, picking mature green fruit and ripening it indoors is often the more reliable route than waiting on the vine. A dedicated guide to tomatoes not ripening covers the heat threshold and end-of-season options.
Curling leaves
Leaves that roll upward while staying a normal green color are usually a physiological response to heat and water stress, and it resolves once conditions moderate. Leaves that come in narrow, twisted, and distorted from the start point toward herbicide drift instead, a different problem with a different cause. A dedicated guide to curling tomato leaves separates the two.
Flowers dropping without setting fruit
Tomato pollen becomes unreliable outside a fairly narrow temperature range, and flowers that open during a stretch of extreme heat or unusually cool nights often drop without ever forming fruit. Excess nitrogen, which pushes leafy growth at the expense of flowering, is the other common cause. A dedicated guide to tomato plants not setting fruit covers both causes.
Yellowing leaves
Which leaves yellow, and in what order, is the diagnostic clue. Lower, older leaves yellowing first while new growth stays green usually points to a nitrogen shortfall or simply age, since a plant naturally sheds its oldest leaves as it grows. Yellowing that starts higher up or appears in a blotchy, uneven pattern points toward disease instead. A dedicated guide to yellow leaves on tomatoes walks through reading the pattern.
Harvest and what comes after

The right moment to pick is when a tomato has reached full color for its variety and gives slightly to gentle pressure, not rock hard. Fruit picked a little early, once it has started to turn color, ripens off the vine nearly as well as fruit left to finish there, which is a useful option toward the end of the season when frost or heat threatens the last of the crop.
Ripening indoors works best at room temperature out of direct sun, not on a sunny windowsill, which can overheat and soften fruit unevenly. A paper bag with a banana or apple inside speeds the process along, since those fruits release ethylene gas, the same compound tomatoes use to trigger their own ripening.
Storage and what to do with a big harvest
The refrigerator is the worst place to store a ripe tomato, since cold temperatures break down the compounds responsible for its flavor and give the flesh a mealy texture that doesn’t reverse once the tomato warms back up. A ripe tomato keeps better and tastes better left on the counter, out of direct sun, and eaten within a few days.
A tomato glut has several real preservation routes beyond eating fresh: freezing whole or chopped fruit for later use in cooked dishes, drying slices for a concentrated, chewy product, and canning as sauce, whole tomatoes, or salsa for shelf-stable storage. Each route suits a different end use, and each has specific safety steps worth following exactly, particularly for canning. A dedicated guide to storing tomatoes covers all three methods with the steps in full.
Saving seed for next year only works reliably with open-pollinated and heirloom varieties, since hybrid varieties, often labeled F1 on the packet, don’t come true from saved seed and can produce plants quite different from the parent. Saving seed from an open-pollinated tomato involves fermenting the seed and pulp briefly to remove the germination-inhibiting gel coating, then drying the cleaned seed fully before storage. A dedicated guide to saving tomato seeds covers the fermentation process step by step.
Adapting this to where you live
Everything above, deep planting, staking at transplant, deep and infrequent watering, the shift from nitrogen to phosphorus and potassium at flowering, holds true for a tomato grown in any part of the country. The technique doesn’t change by zip code. What changes by location is timing, which varieties actually finish before frost, and which pests and diseases show up in your particular region.
A planting date that works for one part of the country would be flatly wrong for most of the rest of it. Frost-free season length varies by months between a short-season northern region and a long, mild southern one, which is exactly why this guide has given you a method, counting backward from your own last-frost date, rather than a date that would only be accurate for one place and misleading everywhere else.
Your state extension service is the right source for the three things that actually are local: the average last and first frost dates for your specific area, a list of varieties bred or trialed to perform well in your regional conditions, and current alerts on pest and disease pressure specific to your growing season. NOAA’s climate normals are the other reliable source for frost-date and temperature data by weather station, useful for checking your extension service’s figures against the station nearest you. A dedicated guide to extending the tomato season covers row covers, cloches, and greenhouse options for gardeners working with a shorter frost-free window than they’d like.
Common questions
Can I plant tomatoes and peppers next to each other?
Yes, tomatoes and peppers can grow side by side without direct competition problems, since they don’t share the same aggressive nutrient demands. They do share some of the same diseases as fellow nightshades, though, so keep an eye on rotation history for both crops in that bed, not just for tomatoes.
Why did my tomato seedlings die right after I moved them outside?
The most common cause is skipping or rushing the hardening-off period, moving a seedling straight from indoor conditions into full outdoor sun and wind before it’s built up tolerance to either. A close second cause is transplanting before the soil has actually warmed, which stresses roots even if the air temperature feels fine.
Do I need to remove suckers on every tomato plant?
No. Sucker removal helps indeterminate varieties trained to one or two stems, but pruning suckers off a determinate variety removes the growth that plant would have used to set its main crop, cutting your yield rather than improving it.
How many tomato plants do I actually need for a family?
It depends heavily on what you’re growing them for and which varieties you choose, since a handful of indeterminate slicing plants can outproduce a dozen small determinate ones. For fresh eating through the season, most home gardeners find a modest number of indeterminate plants goes a long way, while anyone canning or freezing in bulk plans for considerably more.
Is it too late to start tomatoes from seed if I missed the window?
Not necessarily. Nurseries and garden centers sell already-started transplants well into the planting season specifically for gardeners who missed their own indoor-sowing window, and buying a young plant skips the seed-starting stage entirely without costing you the growing season.