
You grow garlic by planting individual cloves in autumn, not seed in spring, and lifting whole bulbs the following summer after the crop has spent months underground gathering the cold it needs to divide into cloves at all, with Curing Garlic garlic the essential step that follows harvest before the bulbs are ready to store—though gardeners who missed the fall window still have options, since Planting Garlic in Spring garlic can work as a fallback, even if the resulting bulbs tend to be smaller. The figure that governs the whole process comes from University of Georgia Extension publication C854: garlic needs roughly six to eight weeks of soil temperatures below 40°F to vernalize properly, meaning that single clove splits into a full head instead of staying a solid round. The one thing to do before Choosing Seed Garlic garlic and buying a single bulb is check your area’s average first and last frost dates through NOAA’s climate normals or your state extension service, because that window, not a date on a calendar, is what tells you when to plant—an easy alternative once you’ve grown a crop is simply Replanting Your Own garlic from your best bulbs rather than sourcing seed stock each season.
Why garlic is planted in autumn

Almost everything else in a vegetable garden goes in once the soil warms. Garlic goes in as that soil is cooling, right around the time you’re pulling tomato vines and clearing frosted beans. That timing isn’t a quirk of tradition. Why Garlic Needs Cold garlic comes down to triggering the division into cloves, and the only way to give it that period reliably is Planting Garlic garlic in fall and letting winter do the work.
The trade-off is real: garlic holds a bed for close to nine months, from planting in fall through harvest the following summer, while a bed of lettuce or beans might cycle through two or three plantings in that same span. You give up flexibility in that one patch of ground for almost the entire gardening year, though growing Garlic in Containers garlic is one way to sidestep that trade-off if in-ground space is tight, and staying alert to Garlic Pests garlic over that long stretch matters just as much as managing the space itself—as does harvesting Garlic Scapes partway through the season, a step that not only yields an early edible crop but also redirects the plant’s energy back into bulb development.
In exchange, you get a crop that asks almost nothing of you between planting and spring. There’s no seed starting, no transplanting, no hardening off—just getting the Soil for Garlic garlic ready before the cloves go in, followed by Mulching Garlic garlic to protect them before winter sets in, along with the occasional check on Watering Garlic garlic needs during dry spells, attention to Feeding Garlic garlic as growth resumes in spring, some thought given to Garlic Companion Planting garlic choices when you’re laying out the bed, and watching for Garlic Diseases garlic that can crop up once the weather turns wet. The clove sits in the ground doing root work through the coldest months, when you have no other planting to do anyway, and it’s usually the first thing you harvest heavy from in early summer—some gardeners even pull a few young stalks early as Green Garlic garlic—well ahead of anything you started from seed that same year. A gardener who plants in October and does the work right is pulling full bulbs before most of the tomato patch has set fruit, making Harvesting Garlic garlic one of the earliest big payoffs of the gardening year, with the bonus of Braiding Garlic garlic from the surplus once the harvest is in, and attention to Storing Garlic garlic properly to enjoy the crop for months afterward.
Hardneck or softneck: the choice your winter makes
Deciding between Hardneck or Softneck garlic is the decision everything else in this guide assumes you’ve already made, because it isn’t really a preference. It’s a question your climate answers for you. Hardneck garlic, botanically Allium sativum var. ophioscorodon, needs a real winter to perform. It produces a stiff central flower stalk called a scape, wraps its cloves around that stalk in a single ring, and rewards a cold climate with fewer, larger cloves that peel easily because each one has a loose, single-layer wrapper.
Softneck garlic, Allium sativum var. sativum, tolerates mild winters that would leave hardneck types stunted or undivided. It produces no scape, packs more, smaller cloves into each bulb in overlapping layers, and its pliable stem is exactly what lets you braid it. It also stores considerably longer than hardneck, often outlasting it in a pantry by several months.
Named types under each
Hardneck breaks down into a few recognizable groups, each with cultivars sold by name in seed catalogs: Porcelain types like ‘Music’ and ‘German White’, Purple Stripe types like ‘Chesnok Red’ and ‘Persian Star’, and Rocambole types like ‘German Red’ and ‘Spanish Roja’. Softneck splits mainly into Artichoke types, including ‘Inchelium Red’ and ‘California Early’, and Silverskin types like ‘Nootka Rose’ and ‘Silver White’. Seed catalogs commonly list garlic at somewhere around 240 days from planting to harvest, a figure counted from the fall clove-in date, and it shifts by a week or two depending on how the winter runs, so treat it as a rough frame rather than a countdown.
| Trait | Hardneck | Softneck |
|---|---|---|
| Winter needed | Cold winter, strong vernalization | Tolerates mild winters |
| Clove count/size | Fewer, larger cloves | More, smaller cloves |
| Peeling | Easy, single wrapper | Fussier, overlapping layers |
| Scape | Yes, cut before harvest | No |
| Storage life | Shorter, months | Longer, up to a year |
| Braiding | Not possible, stiff stem | Yes, pliable stem |
The full comparison, with more on which cultivars fit which climates, is worth reading before you order anything. See hardneck or softneck for the longer breakdown.
The cold requirement, and how to know if you have it
The number that matters most in this entire crop comes from University of Georgia Extension publication C854: garlic needs roughly six to eight weeks of soil temperatures below 40°F after planting to vernalize. Vernalization is the cold exposure that tells the clove to split into a multi-clove bulb instead of staying a single round, undivided bulb, which is exactly what you get from garlic planted too late or grown somewhere with too mild a winter.
Skip that cold period, or shortchange it, and the plant doesn’t fail outright. It just doesn’t do the one thing you’re growing it for. You’ll get a plant that looks perfectly healthy above ground and lift a bulb the size of a shallot, undivided, at the end of the season. That mistake is invisible until harvest day. There’s no leaf symptom, no color change, nothing to catch mid-season and fix.
Finding out what your area offers
Your own soil’s winter behavior depends on your USDA Plant Hardiness Zone and your local frost pattern, both of which vary enormously across the country, from Gulf Coast counties that barely see a hard freeze to northern states where the ground freezes solid for months. Check the USDA hardiness zone map for your specific zone, and check NOAA’s climate normals for how long your area typically sits below that 40°F threshold. If your winters run mild, you’re looking at softneck varieties, or hardneck grown with extra help, rather than fighting a cold requirement your climate can’t deliver. The full explanation of how vernalization works, and how to judge whether your winter is long enough, is at the cold garlic needs.
Choosing seed garlic
Grocery store garlic disappoints for two reasons. Most of it is treated with a sprout inhibitor to keep it shelf-stable, which also keeps it from rooting well when you plant it. And it’s rarely labeled by variety, so you have no idea whether you’re planting something suited to a cold winter or a warm one, or whether it even carries the vernalization response your climate needs to trigger.
A seed garlic supplier sells bulbs specifically grown for planting stock: named cultivars, screened for disease, sized for good clove development, and shipped at the right time for fall planting in your region. That traceability is the entire reason to buy from one rather than raiding the produce aisle.
The one rule that matters most
Once you’ve got seed stock in hand, break the bulb apart and plant only the largest cloves. Clove size at planting correlates directly with bulb size at harvest, more reliably than almost anything else you’ll do all season. Small cloves grow small bulbs. It’s tempting to plant every clove you get rather than eat the smaller ones, but a bed planted entirely from top-size cloves will out-yield a bed planted from mixed sizes by a wide margin, and the small cloves are better used in the kitchen than in the ground. The full buying guide, including what to look for in a supplier and how far ahead to order, is at choosing seed garlic.
Preparing the bed
Garlic sits in the same patch of soil through the wettest months of the year in most climates, fall through winter into early spring, and that’s the single fact that should drive every decision about the bed. Drainage comes before everything else. A clove sitting in waterlogged soil for weeks will rot long before any fungus or pest gets near it. If your planned bed holds a puddle for more than an hour or two after heavy rain, raise it, or move the garlic somewhere else.
Building the bed itself
Work in a generous amount of finished compost or well-rotted manure before planting. Garlic is a long-season crop feeding itself out of the same soil for most of a year, and it draws down organic matter and nutrients steadily the whole time it’s growing, not in one quick flush like a fast crop does. A raised bed or a mounded row helps in any soil that holds water, and loosening the soil a good spade’s depth below where the clove sits gives the roots room to run before the ground freezes.
Hold back on fresh, unfinished manure. It’s high in nitrogen relative to the other nutrients garlic needs at this stage, and fresh manure applied right before planting can encourage soft, lush growth going into winter, exactly the kind of growth that’s most vulnerable to cold damage. Finished compost, not fresh manure, is what goes in at planting. A soil test is worth doing before you plant if you’ve never grown garlic in that bed, since it tells you whether you need to adjust pH or add phosphorus and potassium before the crop goes dormant for winter. The full walkthrough on building the bed, including cover crops and timing the compost application, is at preparing the bed.
Planting the cloves
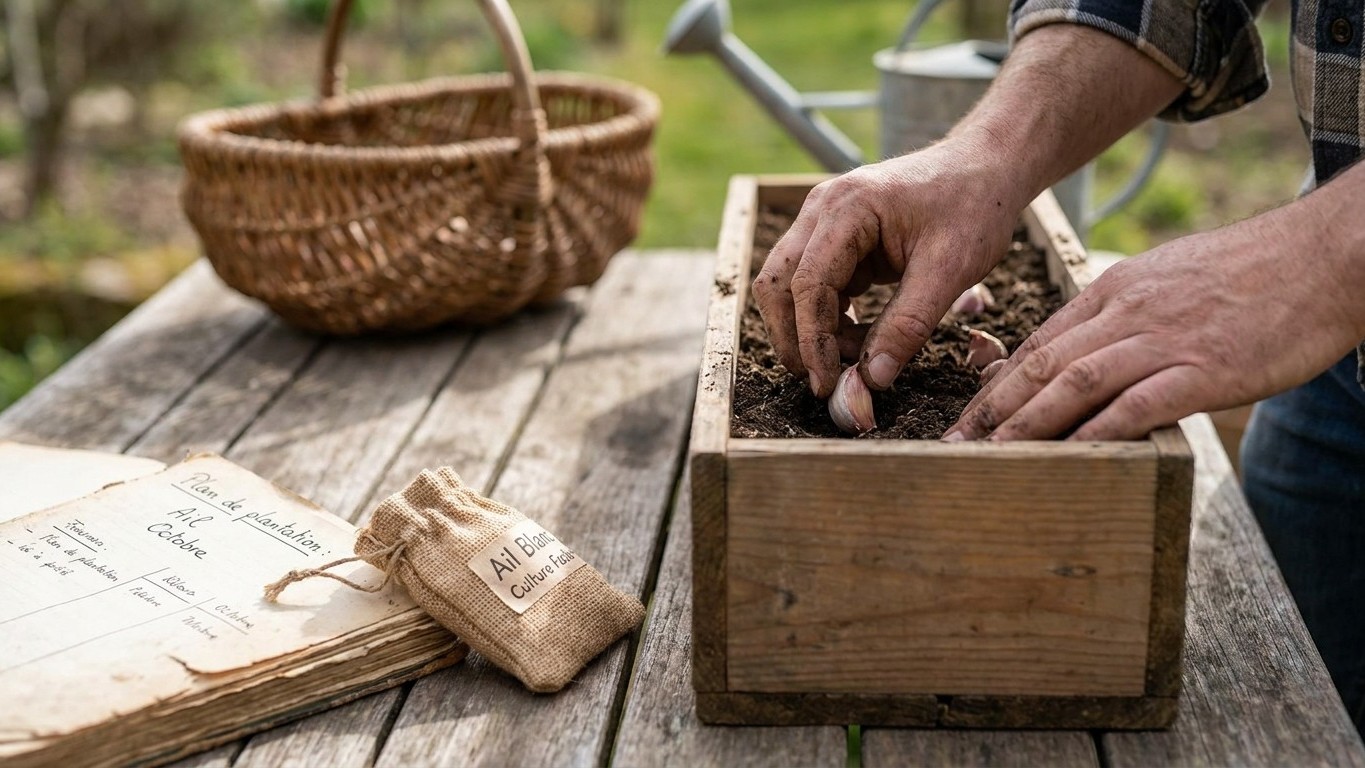
Break the bulb into individual cloves the same day you plant, not weeks ahead. A clove left exposed to air loses moisture and vigor fast, and a bulb broken apart too early dries out well before it goes in the ground. Keep the papery wrapper on each individual clove. That skin is protecting it from soil pathogens and moisture loss during the weeks it spends rooting before any top growth appears.
Depth, spacing, and orientation
Plant each clove with the pointed end facing up and the flat, root-scarred end facing down, roughly two inches deep, measured from the top of the clove to the soil surface. Garlic planted upside down will still often find its way to the surface, but it wastes energy doing it, and that energy shows up as a slightly smaller bulb by harvest. Space cloves around four to six inches apart in rows spaced roughly a foot apart, close enough to use the ground efficiently but wide enough that each bulb has room to size up without competing hard for water and nutrients.
Timing it off the frost, not the calendar
Rather than picking a fixed date, plant once your area has had its first light frost of the season, the kind that knocks back tender annuals but doesn’t freeze the ground. That timing gives the clove several weeks to put down roots in cooling soil before winter dormancy sets in fully, without pushing enough top growth to be vulnerable to a hard freeze. Check your area’s average first frost date from NOAA’s climate normals to place this window for your own location, since it varies by weeks depending on where you garden. The step-by-step on depth, spacing, and exact timing windows by climate is at planting the cloves.
Mulch and the first winter
Once cloves are in, a thick layer of mulch, usually straw or shredded leaves, goes down to insulate the soil and moderate the freeze-thaw swings that do more damage to a shallow-planted clove than steady cold ever does. Frost heaving, the repeated freezing and thawing that literally pushes a clove up out of the soil, is the main threat mulch protects against, and a clove that’s heaved partway out of the ground over winter is exposed to cold and drying air it was never meant to face.
Timing the mulch, and what to do with it in spring
Lay mulch after planting, generally once the soil has cooled but before a hard freeze sets in, so the ground isn’t insulated while it’s still warm enough to encourage unwanted top growth before winter. Left in place, that mulch layer also suppresses weeds that would otherwise get a head start in late winter and early spring, before you’re paying close attention to the bed.
In spring, most growers pull mulch back partially, not entirely, once new green shoots are visible pushing up through it. Leaving a thinner layer in place still suppresses weeds and holds soil moisture through the growing season, while giving the emerging shoots room to grow without pushing through several inches of matted straw. Pulling every scrap of mulch off in spring exposes the bed to weed pressure and moisture swings you’ll be fighting the rest of the season. The details on mulch material, timing, and how to judge when to pull it back are at mulching for winter.
Spring: feeding and watering
Garlic restarts fast once the ground warms, and the growth it puts on in spring, mostly leaf growth, is what eventually feeds bulb development. A nitrogen feeding early in spring, once green shoots are up and growing, supports that leaf growth directly. Leaves are what the bulb is built from, so a plant that’s stunted or yellow in spring rarely catches up to full size by harvest, no matter what you do later in the season.
The instruction most growers miss
Watering matters through spring while the bulb is bulking up, but there’s a point where you need to stop entirely, and this is the single most commonly missed instruction in the whole crop. Continuing to water right up until harvest keeps the soil wet during the exact weeks the bulb should be finishing and the outer wrappers should be drying down and toughening up. Wet soil at that stage encourages the wrappers to stay soft, invites rot, and makes for a bulb that won’t cure or store well no matter how carefully you handle it afterward.
The cue to stop watering is the plant itself: once the lower third of the leaves has started yellowing, cut off irrigation and let the bed dry down, rain aside, for the final weeks before you expect to lift. That timing shifts by a few weeks depending on your local climate and how the season has run, which is exactly why it’s tied to the plant’s own signal rather than a date on the calendar. The complete breakdown of feeding schedules and the watering cutoff is at feeding in spring and when to stop watering.
Scapes: cutting them and using them
A scape is the stiff, curling flower stalk that hardneck garlic sends up from the center of the plant in early summer, often looping into a full loop or two before straightening. Softneck garlic doesn’t produce one at all, which is one of the easiest ways to tell the two types apart in the field once they’re growing. The scape is not part of pollination and doesn’t need to be left in place for the plant to set fruit. Garlic is lifted as a bulb, and the scape’s only job at that point is drawing energy away from it.
What cutting it does, and what to do with the cutting
Removing the scape while it’s still young and tender, before it straightens fully, redirects the plant’s energy back into bulb development rather than the flower structure at the top. Growers who compare cut and uncut plants in the same bed generally see a noticeable difference in final bulb size, which is reason enough to cut every scape you see on a hardneck plant.
Cut just above the topmost leaf with a clean snip, and don’t pull, since pulling can damage the leaves still feeding the bulb below. What you cut isn’t waste. Scapes are edible, with a mild, fresh garlic flavor, and they’re good chopped into a stir-fry, blended into a pesto in place of basil, or pickled whole in a jar of vinegar brine for something to pull out through winter.
Knowing when to lift
The calendar tells you roughly when to expect harvest, but the plant tells you exactly when. Watch the leaves, not the date. Garlic is ready to lift when roughly the bottom third to half of the leaves have browned and died back while the upper leaves are still green. Since each leaf corresponds to a wrapper layer around the bulb, that ratio is your best read on how many intact wrapper layers you still have protecting the cloves.
The two mistakes, and what each one looks like
Lift too early, while most of the leaves are still green, and you sacrifice size. The cloves haven’t finished bulking up, and you’ll notice it the moment you cut into one, undersized and sometimes underdeveloped compared to what the variety should produce. There’s no fixing an early lift after the fact, since the bulb stops growing the moment it’s out of the ground.
- Lifted too early: mostly green leaves, small or shallow cloves, wrappers intact but bulb underweight for the variety.
- Lifted too late: almost all leaves brown and collapsed, wrappers split or shed, cloves separating from the stem, bulbs sometimes already sprouting new roots.
Lift too late, once nearly all the leaves have died back, and you lose the wrappers instead. Those protective outer layers split, shed, or rot away in the soil, leaving a bulb that looks fine at harvest but won’t cure properly and won’t keep more than a few weeks. A bulb lifted too late also risks the cloves separating from each other underground, which shows up as a loose, ragged bulb the moment you dig it. Both mistakes are avoidable by checking the bed every few days once the lower leaves start turning, rather than relying on a date you picked back in fall.
Curing, and why it decides everything after
Curing is the step most new growers rush, and it’s the one that decides whether the harvest keeps until next spring or turns to mush in a matter of weeks. Freshly lifted garlic is still full of moisture in the neck and outer layers. Three to four weeks of proper curing dries that moisture out slowly, hardening the neck and outer wrappers into the papery, protective layer that makes long storage possible at all.
How to do it right
Don’t wash the bulbs. Brush off loose soil by hand and leave the roots and leaves attached. Lay or hang the bulbs somewhere with good airflow and out of direct sun, a shed, a covered porch, or a garage with a fan running works well. Shade matters as much as airflow, since direct sun during curing can scorch the outer wrappers and even cook the outer cloves in bulbs left out on a hot day.
Spread bulbs in a single layer, or hang them in loose bunches, with air moving freely around every bulb rather than stacking them in a pile where the center ones stay damp. Damp spots in a crowded pile are where rot starts, and it can spread to bulbs touching it before you ever notice.
You’ll know curing is finished when the neck, the stem right above the bulb, feels tight, dry, and papery rather than soft or fleshy when you squeeze it, and the outer wrappers rustle rather than feel damp. At that point, trim the roots close and cut the stem down to an inch or two above the bulb, or leave it long if you’re planning to braid softneck varieties. A bulb moved into storage before the neck has fully dried is a bulb that rots from the inside within weeks, no matter how good the storage conditions afterward.
Storing it, and what ruins it
Once cured, garlic keeps best somewhere cool, dry, and dark, with decent airflow around the bulbs. A pantry shelf, a mesh bag hung in a cool closet, or a ventilated box in a cool basement all work. What ruins it fastest is the refrigerator. Cold, humid refrigerator air is close enough to the conditions garlic needs to break dormancy that bulbs stored there routinely sprout green shoots within weeks, which draws down the flavor and substance of the clove even before it looks obviously spoiled.
How long each type actually keeps
Hardneck varieties generally store for a few months under good conditions before quality drops off noticeably, since their looser, single-layer wrappers offer less protection over time. Softneck varieties, with their tighter, overlapping wrappers, commonly keep considerably longer, often the better part of a year, which is a large part of why softneck dominates commercial and long-term storage garlic. Either type declines faster in a warm kitchen than in a cool pantry, and faster still if the bulbs weren’t fully cured before storage started.
Check stored bulbs periodically and pull any that are softening, sprouting, or showing mold at the neck before they affect their neighbors. A single soft bulb in a mesh bag can spread rot to bulbs touching it if it’s left in place too long.
Pests and diseases worth knowing
Garlic is a relatively trouble-free crop compared to most vegetables, but a handful of problems are worth knowing before they show up in your bed. Onion maggot and thrips are the most common insect pests, feeding on roots and leaves respectively, and both are manageable with crop rotation and reasonable sanitation in the bed. Bulb mites and nematodes can travel in on infected seed stock, which is one more reason buying from a reputable seed garlic supplier matters more than it might seem.
Why white rot deserves its own warning
Among the diseases, white rot is the one to take seriously before it ever appears, not after. It’s caused by a soil fungus that produces tiny black survival structures called sclerotia, and those sclerotia can remain viable in soil for over twenty years, waiting for a host crop in the allium family to trigger germination. There is no treatment that clears it from soil once it’s established. An infection in one bed is effectively a permanent loss of that ground for garlic, onions, and every other allium you might want to grow there.
- Yellowing, dying leaves on plants that otherwise look healthy below ground
- A soft, watery rot at the base of the bulb, often with visible white fungal growth
- Small black specks, the sclerotia, embedded in that white growth or in the surrounding soil
Because it spreads through soil, tools, and even boots carrying contaminated dirt, the single best defense is never introducing it, which means buying seed garlic only from suppliers who inspect and guarantee their stock, and avoiding moving soil or tools between infected and clean ground. If you see symptoms that match, your state extension service’s plant diagnostic lab is the right place to confirm it before you plant that ground again with anything in the onion family.
Saving your own to replant
Saving your biggest, healthiest bulbs from this year’s harvest to replant in fall works, and most home growers do exactly that for a run of several years without trouble. Select from bulbs that were well-formed, disease-free, and among the largest in the bed, since you’re propagating those traits forward the same way you selected clove size at planting.
Why it stops working eventually
The decline, when it comes, is usually viral rather than sudden. Garlic accumulates viruses over repeated vegetative propagation, since every clove is a genetic clone of the parent, and there’s no seed-grown reset the way there is with most vegetables. Those viruses build up gradually across generations of replanting, and the visible effect is a slow decline in vigor and bulb size, often not obvious in any single year but clear if you compare a stock five years in against fresh seed side by side.
Most growers get somewhere in the range of three to five good years out of a saved stock before the decline becomes noticeable enough to matter, though that range depends heavily on growing conditions, how carefully you’ve selected for size each year, and how much disease pressure your soil carries. When bulb size starts trending down year over year despite good growing conditions, or you notice more streaking or mottling on leaves than in past seasons, that’s the signal to buy certified, virus-tested seed stock again rather than continuing to replant your own. The full guide to selecting, storing, and knowing when to replace saved seed is at choosing seed garlic.
Adapting all this to where you live
Everything in this guide assumes something close to an average winter, enough cold to vernalize a hardneck variety properly, a frost pattern that gives you a clear planting window in fall, and a growing season long enough to size up bulbs before the leaves start dying back. Real gardens vary a lot from that baseline, and the two references worth checking before you commit to a planting date are the USDA Plant Hardiness Zone map for your general cold tolerance profile, and NOAA’s climate normals for your area’s specific first and last frost dates.
Where the guide needs adjusting locally
In a mild-winter region, that means leaning toward softneck varieties or artichoke types that don’t demand a hard freeze, and possibly supplementing vernalization by refrigerating seed cloves before planting if your winters run too warm to deliver the cold naturally. In a severe-winter region, it means planting earlier relative to the ground freeze, mulching more heavily, and choosing hardneck types bred for exactly that kind of winter, like the Porcelain and Rocambole groups.
Your state extension service is the best source for planting dates and variety recommendations specific to your county, since those numbers shift by weeks or more across a single state, let alone across the country. A grower in a coastal, mild-winter county and a grower three hundred miles inland at higher elevation in the same state can be working from entirely different planting windows, even though every other part of this process, bed prep, clove selection, curing, and storage, stays the same.
When Something Looks Off
Even a well-planned garlic bed can throw up surprises, and most gardeners eventually find themselves staring at a leaf or a bulb wondering what it’s trying to tell them. Garlic doesn’t come with a warning label. Instead it speaks through what goes wrong with garlic, where yellow tips, mushy roots, orange dust on the leaves, or a bulb that falls apart at harvest each point toward a different cause. Learning to read those signs before you reach for a spray or start pulling plants can save a whole season’s crop, and it’s worth spending time with this guide the first time you spot anything that doesn’t look right. Keep it bookmarked alongside the rest of your growing notes, because the signs often show up weeks before you’d otherwise notice a problem, and catching them early is usually the difference between losing a few plants and losing the bed.
Common questions
Can I plant garlic in spring instead of fall?
You can, but expect smaller bulbs, since spring-planted garlic misses most or all of the cold period it needs to vernalize and divide fully. Some growers plant pre-chilled cloves in early spring as a fallback in mild climates, but a proper fall planting almost always outperforms it.
My garlic came up with only one big round clove, not a bulb. What happened?
That’s a vernalization failure, almost always caused by planting too late, a winter too mild to deliver enough cold, or seed stock that wasn’t properly chilled before planting. The round is edible but it means the clove never got the cold exposure needed to split into a multi-clove bulb.
Do I need to remove scapes from softneck garlic too?
No, softneck varieties don’t produce scapes at all, so there’s nothing to cut. If you see a stiff, curling stalk coming up from the center of a plant, that plant is a hardneck type, not softneck.
Can I plant cloves from a bulb I bought at the grocery store?
You can try, but it often disappoints, since grocery store garlic is frequently treated with a sprout inhibitor and rarely labeled by variety, so you have no idea whether it’s suited to your climate or your winter’s cold requirement.
Why did my garlic bulbs come apart into loose cloves after harvest?
That usually means the crop was left in the ground too long past the right lifting window. The wrappers holding the bulb together degrade once most of the leaves have died back, and the cloves separate underground before you ever pull them.
Is it normal for garlic to sprout a little green shoot in storage?
A little sprouting toward the end of a bulb’s storage life is normal and doesn’t mean it’s spoiled, though the flavor and texture decline once it starts. Sprouting much earlier than expected usually points to storage that’s too warm or too humid, or bulbs that went into storage before curing was fully finished.